zep toilet unclog: A Practical DIY Guide
Learn proven, safe techniques to unclog a ZeP toilet using a plunger and toilet auger. Practical DIY tips and maintenance to prevent future clogs.

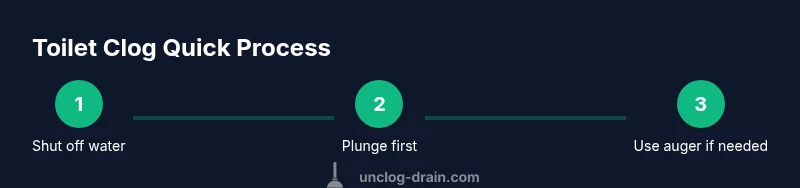
You can unclog a toilet safely by starting with a plunger, then using a toilet auger if needed. Begin by turning off the water, removing any standing water, and applying steady, full-body pressure with a flange-capable plunger. If the plunger fails to dislodge the blockage, use a toilet auger to break up or retrieve the obstruction. Avoid chemical cleaners and proceed with mechanical methods for best results.
What Causes a Toilet Clog
Toilet clogs commonly occur when too much toilet paper is flushed, combined with solid waste or foreign objects that restrict flow through the toilet trap and drain line. In many homes, slow drainage builds up over time, turning a minor obstruction into a stubborn clog. According to Unclog Drain, residential clogs most often stem from everyday use rather than dramatic overflows, and the right mechanical approach can typically clear the issue without resorting to chemical cleaners. Understanding that most clogs originate in the bowl and trap area helps you target your efforts effectively and safely.
Beyond the bowl, clogs can form in the drain line or vent system when wastewater cannot move freely. If multiple fixtures are slow or gurgle after flushing, the problem may lie further down the line or in the main sewer. In these cases, a DIY fix may provide only a partial solution, and calling a plumber could be necessary. Keeping a light understanding of how your plumbing works helps you decide whether to proceed with a plunger, an auger, or professional help.
Safety and Prep Before You Start
Before touching tools, set up a safe workspace. Put on rubber gloves and lay down old towels or a drop cloth to catch splashes. Move any nearby items away from the bathroom to avoid contamination, and ensure children and pets are kept out of the area. Gather your tools: plunger with a flange, a toilet auger, a bucket, a sponge or towels, dish soap, and a kettle of hot water (not boiling). Never mix chemical drain cleaners with other cleaners or use them in a toilet; they can damage porcelain and septic systems, and may create hazardous fumes. A well-lit, dry workspace reduces slips and makes the procedure more predictable.
If your toilet is near a septic system, consider adding a little extra caution and avoid overloading the system with chemicals or large amounts of water at once. Unclog Drain recommends sticking to mechanical methods first, then reassessing after each step.
The Plunger Method: Classic First Step
The plunger is your first line of defense. Use a flange-style toilet plunger and ensure a good seal around the drain. If the bowl is full, remove excess water with a sponge or towel to improve suction. Place the plunger so the flange sits inside the drain opening and push down firmly, then pull back with a steady, controlled motion. Repeat this 15–20 times, keeping the seal intact and avoiding fast, jerky strokes. If water begins to rise alarmingly, pause, check the seal, and adjust. A successful plunge often requires patience and controlled pressure rather than brute force.
If you feel resistance and a slight give during plunging, you may be on the edge of the clog. In that case, stop and switch to the auger rather than applying more force with the plunger. A poor seal wastes effort and can cause splashes. With the plunger, consistency beats raw power.
Tip: Keep your body weight aligned over your feet rather than just using arm force to keep the motion smooth. A strong, stable stance helps you deliver consistent pressure.
When a Plunger Isn’t Enough: Using a Toilet Auger
If plunging fails to clear the blockage, a toilet auger is a reliable next step. A toilet auger is a flexible, snake-like tool designed to reach into the trap and break up or retrieve clogs. Insert the. auger’s cable slowly into the toilet bowl, rotating the handle clockwise as you feed the cable. When you encounter resistance, gently twist and push forward, then reel back slightly to pull the obstruction away from the drain walls. Retract gradually and remove the cable, inspecting for debris. Flush briefly to test the drain, repeating as needed.
Always keep the auger tip pointed away from your face to avoid contact with splashes. If the obstruction doesn’t budge after several attempts, stop and reassess—some clogs require more time or professional intervention. Cleaning the auger after use prevents cross-contamination.
Alternative DIY Approaches That Can Help
Hot water paired with dish soap can loosen organic blockages. Pour hot (not boiling) water into the bowl gradually, add a squirt of dish soap, and let the mixture soak for 5–10 minutes before attempting another plunge or flush. The heat and soap can soften tissue and paper, allowing easier movement through the trap. Enzymatic cleaners or enzyme-based drain treatments are another option for ongoing maintenance, but they are not typically effective for immediate clogs and should be used as a preventative tool rather than a primary fix.
If you have a trapped situation where the water backs up into the tub or another fixture, stop and contact a licensed plumber. A clogged main sewer line or vent problem can require specialized equipment and expertise. In the meantime, avoid flushing again until you’re confident the blockage has cleared.
When to Call a Pro: Signs of a Bigger Issue
If your attempts do not restore normal flow after multiple methods, it’s time to call a plumber. A persistent clog may indicate a deeper blockage in the main line, a broken sewer line, or venting issues that require professional diagnosis. If water continues to back up into other fixtures, or if you hear unusual noises from the plumbing, seek professional help promptly. The Unclog Drain team recommends not waiting too long in cases of recurrent clogs or repeated backups, as delays can lead to more significant damage and higher repair costs.
Preventing Future Clogs: Maintenance and Good Habits
Prevention is easier than clearing a stubborn clog. Consider these habits:
- Flush only what the toilet is designed to handle and avoid flushing wipes, paper towels, or sanitary products.
- Use a reasonable amount of toilet paper per flush; excessive paper can contribute to blockages.
- Consider a weekly or monthly maintenance rinse using hot water and a small amount of dish soap, especially if you have hard water or mineral buildup.
- Maintain your septic system by scheduling regular inspections and avoiding introducing toxic cleaners that disrupt beneficial bacteria.
- Keep a basic unclog kit ready in the bathroom (plunger, auger, gloves, towels) so you can act quickly when a clog begins.
Final Note: A Practical, Safe Approach
With patience and the right tools, most residential toilet clogs can be resolved without professional help. Mechanical methods—plunger and auger—are typically sufficient when used methodically and with attention to safety. Always prioritize safety and avoid rushing through steps. If in doubt, don’t hesitate to contact a licensed plumber for a reliable solution.
Tools & Materials
- Plunger (cup-style with flange)(Ensure a good seal around the drain opening; this is your first line of defense.)
- Toilet auger / plumber's snake(1/4 to 3/8 inch coil; about 3 feet length is standard for a toilet.)
- Rubber gloves(Protect hands; prefer latex-free if sensitive.)
- Bucket or container(For catching splashes and holding water as you work.)
- Dish soap(A small amount helps lubricate waste and loosen buildup.)
- Hot water(Not boiling; safe to pour from a height if careful.)
- Towels or rags(To blot spills and protect the floor.)
- Flashlight(Helpful for visibility inside the toilet bowl and drain.)
Steps
Estimated time: 45-60 minutes
- 1
Shut off the water supply
Turn the supply valve behind the toilet clockwise until it stops. If water keeps flowing, shut off the main house valve. This prevents overflow while you work.
Tip: Know your shutoff location before a clog strikes. - 2
Remove standing water
Scoop out excess water with a cup or sponge and place it into a bucket. This reduces splash and improves plunger efficiency.
Tip: Work calmly; avoid splashing by angling the sponge properly. - 3
Position the plunger
Set the flange of the plunger inside the drain opening and ensure the cup is fully submerged. Create a tight seal against the bowl rim.
Tip: Practice a few gentle pushes to feel the seal before full pressure. - 4
Plunge with control
Push down slowly, then pull up with equal force. Use 15–20 steady strokes; pause to check progress by attempting a flush.
Tip: Keep your arms straight and use body weight for momentum. - 5
Try the toilet auger
If plunging fails, insert the auger into the drain and rotate clockwise as you push. Stop when you feel resistance, then pull back and clear debris.
Tip: Never force the auger; a gentle, steady motion works best. - 6
Hot water and soap soak
Pour hot water and a squirt of dish soap into the bowl; let it sit for 5–10 minutes. Then attempt another plunge or flush.
Tip: Avoid boiling water to prevent porcelain damage. - 7
Test the flush and clean up
Flush to confirm the clog is cleared. If not, repeat steps 3–6 or call a professional. Wipe down surfaces and wash hands.
Tip: If water backs up again, stop immediately and reassess your approach.
Common Questions
What is the safest first step to unclog a toilet at home?
Shut off the water supply, remove standing water, then try mechanical methods like a plunger.
First shut off water, remove standing water, then use a plunger.
Can chemical drain cleaners be used to unclog toilets?
Chemicals are not recommended for toilets as they can damage porcelain and septic systems. Mechanical methods are preferred.
Avoid chemical cleaners in toilets; mechanical methods work best.
Why does a toilet sometimes drain slowly after a clog?
A partial blockage, venting issue, or buildup in the trap or drain line can cause slow drainage.
Partial blockages or vent problems can slow drainage.
What tools are essential for DIY unclogging?
A plunger, a toilet auger, gloves, a bucket, and towels are essential.
You need a plunger, an auger, gloves, and towels.
Is boiling water safe for unclogging toilets?
Boiling water can crack porcelain. Use hot water, not boiling.
Use hot water, not boiling, to avoid cracks.
When should I call a plumber for a toilet clog?
If multiple attempts fail, or you notice backups in other fixtures, a professional assessment is wise.
If the clog won’t budge after several tries, call a plumber.
Watch Video
Key Points
- Shut off water before starting
- Use mechanical methods first
- Avoid chemical cleaners in toilets
- Call a pro if persists
- Prevent future clogs with regular maintenance