Unclog Stopped Up Toilet: A Practical DIY Guide
Learn safe, effective steps to unclog a stopped up toilet using plunger and auger. This DIY guide from Unclog Drain covers prep, tools, step-by-step actions, safety tips, and prevention.

Unclogging a stopped up toilet typically starts with a firm, well-sealed plunger, followed by a toilet auger if needed. Begin by prepping the area, ensuring water is not overflowing, then plunge with steady pressure. If the clog persists, switch to an auger and avoid chemical drain cleaners. This quick method often resolves most toilet clogs without a call to a plumber.
Common causes of toilet clogs
Toilet clogs happen for several practical reasons. According to Unclog Drain, many residential clogs start with regular toilet paper accumulating faster than the system can push it through. The most frequent culprits are excessive toilet paper, non-flushable wipes, and items accidentally flushed. If the water in the bowl is high and rising, you may be dealing with a deeper blockage; a low, stagnant level suggests a partial clog. The more you understand the cause, the safer and more effective your clearing method will be, reducing the risk of damage to the porcelain or sewer line. Common culprits include paper products, wipes, and minor mineral buildup in older plumbing.
Safety and prep before you attempt to unclog
Before you grab any tool, prepare the workspace. Put on rubber gloves and consider protective eyewear. Clear children and pets from the area, lay down towels to catch splashes, and ensure the bathroom is well-lit. If the toilet is overflowing, do not flush again; instead turn off the water supply at the shut-off valve behind the toilet and gently lift the fill valve to reduce flow. This prep minimizes mess and keeps you and your family safe while you work.
Tools you’ll want on hand
A well-chosen toolkit makes the job smoother. Start with a flange plunger designed for toilets, which creates a better seal than a standard sink plunger. Have a toilet auger (closet auger) ready for deeper clogs. Keep a bucket for collecting water, towels to protect the floor, and gloves for sanitary handling. Optional items like a flashlight help you see into dark corners, while a small amount of dish soap can help reduce friction during manipulation. Avoid chemical cleaners in toilets; they can damage seals and pipes and complicate future fixes.
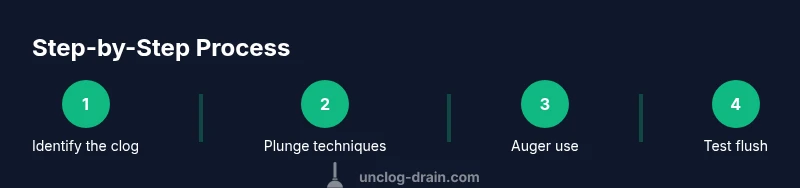
Step-by-step overview to clear a toilet clog
This section provides a practical narrative that aligns with the step-by-step instructions below. Start by assessing the water level, gather your tools, and protect the surrounding area. If plunging fails, switch to a toilet auger and carefully twist to dislodge the obstruction. After each method, test the flush to confirm clearance. If water continues to rise or you detect odors of sewer gas, stop and seek professional help. The sequence below mirrors best practices and minimizes risk of a messy overflow.
Aftercare and prevention
Once the toilet is clear, thoroughly rinse any tools, disinfect the plunger and auger, and launder towels separately. Inspect the toilet for any cracks or leaks and ensure the fill valve returns to its normal position. To reduce future clogs, avoid flushing non-flushable items, consider limiting toilet paper usage, and periodically flush with hot water and a small amount of safe cleanser (never mixing cleaners). Regular maintenance reduces the likelihood of repeated blockages.
When to call a professional
If you cannot clear the blockage after multiple attempts, or if water rises despite your best efforts, it’s wise to contact a licensed plumber. Persistent clogs may indicate deeper issues in the drain line or sewer lateral that require specialist equipment. The Unclog Drain team recommends not forcing tools or applying aggressive leverage, which can crack porcelain or push the clog further into the system.
Tools & Materials
- Flange toilet plunger(Ensure it forms a good seal around the drain opening.)
- Toilet auger (closet auger)(Aim for a 4 ft length typical for household toilets.)
- Rubber gloves(Choose non-slip material; consider latex-free if needed.)
- Old towels or rags(Place around the base to catch splashes.)
- Bucket(For collecting water and cleaning up.)
- Flashlight(Helpful for dark bathrooms or under the toilet.)
- Dish soap(Optional lubricant to reduce friction during probing.)
Steps
Estimated time: 25-45 minutes
- 1
Prepare area and safety gear
Clear the bathroom, lay towels, and put on gloves. If possible, wear eye protection. Remove items from the floor that could get wet and place a bucket nearby for any overflow. This initial setup reduces mess and protects you during the process.
Tip: Keep a dry hand on the plunger handle to maintain a secure seal and avoid splashback. - 2
Check water level and clog status
Observe the water level in the bowl. A high level suggests a deeper blockage; a low level may indicate a partial clog. Do not flush again until you’re ready to attempt clearing. If the water is rapidly rising, stop and safe-guard the area to prevent overflow.
Tip: If you see wastewater approaching the rim, stop and switch to a safe cleanup mode before continuing. - 3
Use the flange plunger effectively
Place the plunger over the drain hole with a firm seal. Push down slowly, then pull up with force, repeating 15-20 times or until water begins to move. Maintain continuous motion to build suction and dislodge the clog.
Tip: Ensure there’s enough water to cover the plunger bell; dry plunging won’t seal properly. - 4
Try the toilet auger if plunging fails
Insert the auger into the toilet bowl and gently push while twisting. When you feel resistance, ease back slightly and rotate to break up the obstruction. Pull the auger out slowly while continuing to rotate.
Tip: Avoid forcing beyond resistance to prevent scratching porcelain or forcing the clog deeper. - 5
Test flush and repeat if necessary
Remove tools, rinse the bowl area, and gently flush to test. If drainage is not smooth, repeat steps 3-4 once more. Do not flood the room with repeated aggressive attempts; pause between cycles to avoid overflow.
Tip: Limit repetitions to avoid stressing the plumbing; if still blocked, move to professional assistance. - 6
Clean up and sanitation
Rinse tools with clean water, then disinfect the plunger and auger after use. Launder towels separately and sanitize the surrounding area. Dispose of waste according to local guidelines.
Tip: Dry all tools completely before storing to prevent mold buildup. - 7
Prevention and maintenance
Adopt better flushing habits: avoid flushing large amounts of toilet paper, and never flush non-flushable items. Consider a toilet paper usage guideline and periodic minor flushes with hot water to reduce buildup. Regular maintenance reduces the chance of future clogs.
Tip: Install a simple toilet paper limit or a dedicated waste bin for non-flushables in bathrooms with kids.
Common Questions
What is the quickest way to unclog a toilet?
Start with a flange plunger to create a strong seal and clear the blockage with steady pumping. If that doesn’t work after several cycles, try a toilet auger carefully. Avoid chemical drain cleaners as a first option.
Begin with a flange plunger, then try a toilet auger if needed. Avoid chemical cleaners as your first choice.
Can I use chemical drain cleaners in a toilet?
Chemical drain cleaners are generally not recommended for toilets. They can damage porcelain, seals, and pipes, and may create dangerous fumes. Safer alternatives are plunger and auger methods.
Chemical cleaners can damage your toilet; safer options are plunger and auger.
When should I call a plumber?
Call a plumber if the clog persists after using both a plunger and a toilet auger, if water continues to back up, or if you notice sewer gas or multiple drains affected. A professional can diagnose deeper drain or sewer issues.
Call a plumber if the clog remains after trying plungers and augers, or if you smell sewer gas.
What’s the difference between a flange plunger and a standard plunger?
A flange plunger has an extended bottom that fits toilets better, creating a stronger seal and more effective suction. A standard plunger is better for sinks or tubs but often fails to seal toilet drains properly.
Flange plungers seal toilets better than standard plungers.
Is it safe to flush after using a plunger or auger?
Yes, but only after you’ve confirmed the clog is cleared. Start with a small flush to gauge drainage, then flush normally if water drains freely. If there’s any hesitation, stop and reassess.
Flush after confirming clearance; if unsure, reassess first.
What homeowner precautions should I take after unclogging?
Clean and sanitize tools, disinfect the area, and monitor for lingering odors or repeated drainage issues. Avoid flushing non-flushables in the future and consider a maintenance routine to prevent future clogs.
Sanitize tools and area, and keep an eye on future clog risk.
Key Points
- Start with a flange plunger for a solid seal.
- If plunging fails, switch to a toilet auger rather than chemicals.
- Never mix chemical cleaners with plungers or augers.
- Test flush after each method to confirm clearance.
- Prevent future clogs with mindful flushing and routine maintenance.