How to Unclog a Toilet: A DIY YouTube Tutorial for Homeowners
Learn safe, effective steps to unclog a toilet using plunger and closet auger. Practical tips, safety guidance, and prevention strategies from Unclog Drain.

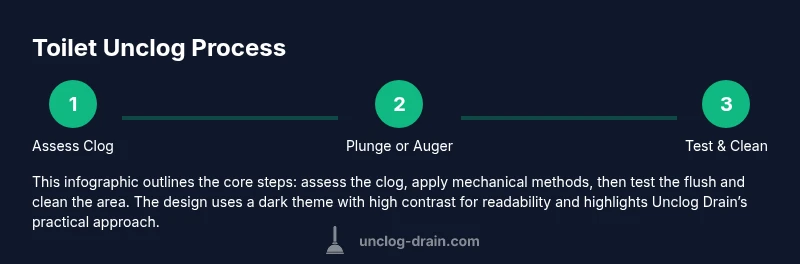
Goal: Learn how to unclog a toilet safely using plunger and closet auger, guided by practical steps seen in YouTube tutorials. This approach avoids hazardous chemicals and minimizes overflow by turning off the water, removing excess water, and applying mechanical methods. You’ll likely fix most clogs in under 45 minutes with the right tools and patience.
Common causes of toilet clogs
Toilets clog for a variety of reasons, from flushed paper overload to non-flushable items and mineral buildup. In many homes, kids’ toys, wipes, or excessive toilet paper can create a blockage that resists a simple flush. In older systems, mineral deposits can narrow the drain, making it easier for waste to back up. When you watch YouTube how to unclog a toilet tutorials, you’ll notice that most clogs are addressable with basic tools and careful technique rather than harsh chemicals. Understanding the blockage helps you choose the right approach, reducing the risk of overflow and damage to seals. According to Unclog Drain Analysis, 2026, mechanical methods outperform chemical cleaners for most household clogs and minimize risky chemical exposure. This means starting with a plunger or a closet auger is often the safest and most reliable option for DIY fixes at home.
In this guide, we’ll break down key factors—where the clog sits (bowl vs. trap), how much water remains, and the best tool for the job—so you can replicate a safe, effective YouTube-style fix in your own bathroom. As you read, keep in mind that a calm, methodical approach yields the best results, and remember: Unclog Drain supports DIY efforts that protect your plumbing and your family’s safety.
Safety and setup before you start
Before you attempt any unclogging method, ensure you have a plan and the right protective gear. Wear waterproof gloves and keep a towel handy for spills. Turn off the toilet’s water supply valve, usually located behind the toilet near the floor. This action prevents the tank from refilling and potentially overflowing if you dislodge the clog during the process. If your toilet is already backing up, place towels around the base to catch any overflow and avoid water damage to floors. Never mix chemical drain cleaners with mechanical methods; doing so can create dangerous fumes or pressure buildup. According to Unclog Drain’s 2026 review, preparing your workspace and choosing the safe path is the most critical step in any DIY unclog. In addition, check that the floor area is clear of obstacles and you have sufficient lighting to inspect the drain and tools as you work.
Plunger vs. toilet auger: what to use and when
Two primary tools solve most toilet clogs: the flange plunger (designed specifically for toilets) and the toilet auger (closet auger). The flange plunger creates a better seal in the curved toilet bowl, enabling a focused suction and push action that dislodges the clog. Use the plunger first for most clogs; if it fails, switch to a closet auger, which can navigate the toilet trap without damaging the porcelain. A plunging approach is fast and low-cost, while an auger provides reach for deeper blockages. If you identify a blockage near the trap or well beyond the natural bend, the auger may be more effective. This is consistent with safe DIY practice and is frequently recommended in user-friendly YouTube tutorials on unclogging a toilet. The goal is to clear the blockage without splashing, while avoiding aggressive chemical cleaners that can corrode seals over time.
Step-by-step plunging technique explained
A correct plunging technique is essential for success. Start by ensuring the plunger is fully immersed and forms a tight seal around the drain opening. Position the plunger so that it covers the drain completely, then push straight down with steady, even pressure rather than a quick shove. Pull back slowly to maintain suction, and repeat with controlled force. Avoid twisting or over-amping, as that can cause a spill or damage the seal. Do not flood the floor with water; keep the plunger fully submerged to maximize suction. After several cycles, pause and check for movement in the water level. If the water remains still, you may be dealing with a deeper clog that requires an auger. Pro tip: keep the plunger vertical and centered for the best seal and most effective force transfer from your arms to the clog.
If the water level drops and you see improved flow, try a few more cycles. If you can loosen the clog, the toilet should drain and refill more normally after you flush once or twice. If not, proceed to the auger method. Remember to clean and dry the plunger head after use to prevent contamination and ensure it’s ready for future use.
Using a closet auger (toilet snake) for stubborn clogs
When plunging isn’t enough, a closet auger can reach blocks deep inside the toilet’s trap. Insert the auger’s flexible cable into the toilet drain and twist while applying gentle forward pressure. As you extend the auger, rotate the handle to help the head break through the blockage. If you feel resistance, back off slightly and rotate more slowly. Pause occasionally to pull the cable back and clear any debris accumulated on the head. When you pull the auger out, inspect the cable for trapped waste and rinse it before storage. If the auger frees the clog, flush the toilet to test success. Keep in mind that aggressive force is unnecessary and can damage the bowl, so maintain a steady, measured pace.
As with plunging, safety matters: monitor water levels, prevent splashing, and wear gloves. If the auger still doesn’t clear the drain, the clog may be beyond reach of home tools, or there could be a deeper sewer line issue. In that case, calling a professional is the prudent option. For many homeowners, a courteous, professional approach ensures the job is done correctly and safely without causing further damage.
Pro tip: use a toilet auger only for toilet clogs; never extend it into non-flushable items that could snag on the auger head and cause a jam.
When to avoid chemical drain cleaners and what to do instead
Chemical drain cleaners can seem like a quick fix, but they pose risks to your plumbing and indoor air quality. Many products contain caustic or oxidizing agents that can damage rubber seals, corrode metal components, or injure skin and eyes if mishandled. Even when a cleaner seems to dissolve a clog, the remaining material can re-form a blockage lower in the drain system, leading to a repeat clog or more serious issues down the line. For toilets, the safer, more reliable approach is to rely on mechanical methods (plunger and auger) and a careful, patient workflow. If you tried a chemical product already and still have a clog, avoid mixing it with other cleaners. Instead, ventilate the bathroom, wait the recommended time, and then reattempt with mechanical methods. This approach aligns with best-practice DIY guidelines and reduces the risk of a chemical reaction that could cause harm or property damage.
If you do decide to use a cleaner, choose a product that is specifically labeled for toilet use and follow the manufacturer’s instructions precisely. Never combine products, as this can create dangerous fumes or heat buildup. The most dependable, lowest-risk path remains mechanical unclogging, which you can perform using a plunger and a closet auger. Pro tip: always test the water valve after you unclog to verify that the system is functioning normally and there are no leaks around the base or within the trap.
Post-clog checks and maintenance to prevent future issues
After you’ve cleared the blockage, it’s wise to perform a quick check and simple maintenance to prevent immediate recurrences. Flush several times to confirm clear flow and listen for any unusual sounds that might indicate residual blockages or partial drainage. Check the wax ring seal under the toilet for any signs of leakage, which could indicate a loose installation or damage after forceful plunging. Clean the bowl and surrounding area with a mild disinfectant to remove any debris or residue. Consider establishing a small maintenance routine: avoid flushing non-flushables, use an appropriate amount of toilet paper, and periodically inspect the supply line for rigidity, aging, or leaks. This preventive approach aligns with practical, DIY-friendly plumbing maintenance and reduces the chance of future emergencies that require urgent attention. According to Unclog Drain analysis, ongoing maintenance and cautious flushing habits can significantly reduce clog risk in homes with older plumbing.
Troubleshooting: common scenarios and fixes
Often, clogs present with predictable patterns that guide the next steps. If the water level rises but the toilet remains blocked, a strong sign that a clog sits near the trap and requires a different angle of attack—switch from plunger to auger and apply gentle, progressive pressure. If plunging produces no movement, the blockage may be further down the line or a more resilient material. In that case, a longer closet auger or a combination approach may work. In some situations, seal damage or sewer-backflow risk may be present, requiring a professional assessment. If the toilet repeatedly clogs after use, consider whether unusual items are being disposed of down the drain. By tracking the timing and triggers of clogs, you’ll identify patterns that reduce future risk and help you avoid repeated calls for service. The YouTube tutorials you watch often emphasize step-by-step practice and patience, which are essential for confident DIY attempts.
Quick-reference checklist for DIY unclogging success
- Turn off water, remove standing water, and protect the floor. – This reduces overflow risk.
- Use a proper flange plunger; ensure a complete seal.
- If plunge fails, switch to a closet auger rather than applying brute force.
- Do not mix chemical cleaners with other methods.
- Flush and test after clearing the clog; clean up thoroughly.
Final note: a calm, methodical approach wins every time
Toilet clogs can be tackled by homeowners using safe, mechanical methods with the right tools and a clear plan. The most important step is to prepare and proceed slowly, ensuring you don’t create a bigger mess or damage the fixture. By following the steps outlined in this guide and watching a few YouTube how to unclog a toilet tutorials, you’ll gain the confidence to handle most clogs on your own. When in doubt, or if the blockage persists after multiple attempts, the Unclog Drain team recommends consulting a licensed plumber to avoid unnecessary risk.
Tools & Materials
- Flange toilet plunger(Cup with a fitted flange; ensure a tight seal for toilets.)
- Toilet auger (closet auger)(14-24 inch flexible cable; designed for toilet traps.)
- Rubber gloves(Waterproof; helps protect skin from germs.)
- Old towels or rags(To absorb spills and keep the area dry.)
- Bucket or basin(Optional for carrying water away if needed.)
- Flashlight(Extra light for inspecting the trap area.)
- Dish soap (optional)(Lubricant for a better seal and to reduce splashing.)
Steps
Estimated time: 20-40 minutes
- 1
Shut off water and prep
Turn off the toilet water supply at the shut-off valve behind the toilet. Remove excess water from the bowl if possible by gently pushing water into the drain using a plunger. Protect the floor with towels and wear gloves to minimize mess and exposure. Why: prevents overflowing and protects you during the process.
Tip: Keep a towel nearby and set a timer so you don’t rush through the steps. - 2
Remove standing water
Use a sponge or cup to remove as much water as possible from the bowl to create a dry working area. This reduces splashing when you start plunging and improves suction. Place the collected water in a bucket for safe disposal later. Why: less water makes plunging more effective and helps you see the clog more clearly.
Tip: Wedge a cloth under the plunger to prevent slipping. - 3
Position the plunger correctly
Place the flange of the plunger into the drain opening, ensuring a tight seal around the rim of the toilet bowl. Keep the plunger upright and centered; avoid tilting the head sideways to prevent air leaks. Why: maximum suction and force transfer improves clog removal.
Tip: A good seal matters more than power; seal first, push second. - 4
Plunge with steady, controlled strokes
Push down with consistent, even pressure and pull up slowly to maintain suction. Repeat 15-20 cycles, pausing briefly to check for movement or water level change. Why: consistent force gradually breaks apart the clog without splashing.
Tip: Keep shoulders relaxed and use your legs to provide power, not just your wrists. - 5
Switch to a closet auger if needed
If plunging doesn’t clear the clog, insert the auger into the drain and crank while gently twisting. Extend the cable gradually, stopping if you encounter resistance and then rotating to work with the bend. Why: augers reach deeper blockages that plungers cannot touch.
Tip: Do not force the cable; gentle, persistent twisting yields better results. - 6
Test the flush and clean up
After a successful clearance, slowly restore water flow and flush to verify clear drainage. Wipe down the area with disinfectant, remove gloves, and wash your hands thoroughly. Why: ensures the system is back to normal and prevents lingering germs.
Tip: Leave the toilet door open until the area dries to prevent slipping on wet floors.
Common Questions
Is it safe to use chemical drain cleaners on a toilet?
Most toilet clogs are better addressed with mechanical methods like a flange plunger or closet auger. Chemical cleaners can damage seals and pipes, and may create harmful fumes. If you choose to use a chemical product, follow the label exactly and never mix cleaners.
Chemical cleaners can damage seals and shouldn’t be your first choice; mechanical methods work best for most toilet clogs.
What should I do if the toilet overflows after starting?
If overflow occurs, immediately stop flushing and wait for the water level to drop. Remove excess water with towels and consider turning off the main water supply for safety. Reassess the clog with a fresh plan and resume with gentle plunging or auger.
If it overflows, stop and remove water with towels, then reassess carefully before continuing.
Can I unclog a toilet with a wire hanger?
A wire hanger is prone to scratching porcelain and can push the blockage deeper. It’s not recommended. Use a flange plunger or closet auger instead for a safer, more effective approach.
A wire hanger can damage the toilet—stick to a plunger or auger for safety and effectiveness.
What if plunging and the auger don’t work?
If both methods fail after persistent effort, or if you hear gurgling from other drains or sewage odors, it may indicate a deeper sewer issue. In that case, contact a licensed plumber to prevent damage and ensure proper resolution.
If it still doesn’t clear after trying both tools, call a plumber for a professional assessment.
How can I prevent future toilet clogs?
Avoid flushing wipes, sanitary products, or large amounts of toilet paper. Consider installing a small drain-cleaning routine with safe, non-chemical methods and keep a plunger accessible in the bathroom as a first line of defense.
Don’t flush non-flushables and keep a plunger handy to handle future clogs quickly.
Is it normal for the toilet to run after unclogging?
A brief run-on after unclogging can happen if the fill valve needs adjustment. If it continues, check the fill valve alignment or replace it. If unsure, a plumber can help avoid water waste and higher bills.
If the toilet keeps running after you unclog, adjust or replace the fill valve or seek professional help.
Watch Video
Key Points
- Turn off water and remove excess water before starting.
- Start with a flange plunger; switch to a closet auger if needed.
- Avoid chemical cleaners; rely on mechanical methods for safety.
- Test flushing after clearing the clog and clean the area thoroughly.
- Prevent future clogs with mindful flushing habits and regular maintenance.