Unclog Toilet Without Plunger or Snake: A DIY Guide
Discover safe, step-by-step methods to unclog a toilet without a plunger or snake. Practical DIY techniques use hot water, dish soap, baking soda, and common tools to clear blockages.

By following safe, plunger-free methods, you can unclog a toilet using common household items like hot water, dish soap, baking soda, and patient application of time. This quick approach reduces mess, avoids heavy-duty tools, and lowers the chance of damaging the porcelain. You’ll learn a reliable sequence, when to pause, and when to seek professional help.
Why this method works and safety considerations
Unclogging a toilet without a plunger or snake relies on principles of physics and household chemistry: heat, pressure, and safe cleaners can move and dissolve the clog, especially when it’s caused by toilet paper, waste, or soap scum. This approach minimizes direct mechanical agitation near the trap, reducing the risk of damaging porcelain or the seals. Before you start, ensure the bathroom is well-ventilated and everyone in the home understands not to mix cleaning agents with bleach or ammonia, which can be hazardous. Wear gloves and eye protection, and keep children and pets away. If the water level rises unusually high or you notice a strong sewer odor, stop and call a plumber. This method is a practical, low-cost first step when a plunger or snake isn’t available.
Pro tip: Document the steps you take so you can describe the process to a plumber if needed. This helps professionals diagnose any persistent issues more quickly.
Quick primer on clog types
Not all toilets clog the same way. Soft clogs formed by toilet paper and waste respond differently than hard mineral buildup in older pipes. A toilet that drains slowly but doesn't fully overflow is often a sign of a soft clog near the trap. A total blockage with persistent standing water suggests a larger obstruction further down the line. This distinction matters because some methods—like a hot-water flush or a baking soda and vinegar fizz—tewer the limits of what the blockage is. If the water remains mostly high after multiple attempts, you may be dealing with a more stubborn obstruction that won’t yield to household fixes.
Key takeaway: Start with the least aggressive method and reassess after each step.
Tools and ingredients you'll need
Collect these items before you begin to minimize interruptions:
- Rubber gloves: Protect hands from waste and chemicals.
- Bucket: For hot water and containment of spills.
- Old towels or rags: Soak up splashes and keep the area clean.
- Dish soap: Reduces surface tension and helps lubricate the path.
- Baking soda: Creates fizz and helps loosen deposits.
- White vinegar: Optional booster for stubborn clogs (do not mix with bleach).
- Measuring cup: For consistency in pouring hot water and cleaners.
- Hot water source: Use near-boiling water with caution.
- Wet/dry vacuum (optional): Can assist with suction if used carefully and safely.
- Toilet brush: For gentle agitation near the rim.
Safety note: Avoid chemical drain cleaners and never mix cleaners with bleach. If a metal object or severe jam blocks the trap, stop and call a professional.
Step 1: Prepare the area and protect yourself
Clear the bathroom, lay down towels to catch splashes, and put on gloves and eye protection. If your toilet tank fills rapidly, turn off the shutoff valve behind the toilet to prevent overflow. Place a bucket under the area to catch any unexpected spills. Consider opening a window or turning on the exhaust fan for ventilation. A tidy workspace reduces the risk of slipping on wet surfaces and makes the subsequent steps easier to manage.
Pro tip: Have a dry, clean cloth handy to wipe down the inner rim after each flush attempt. This keeps your path clear for the next pour.
Step 2: Create a safe hot-water flush
Heat water to a comfortable, near-boiling temperature—hot, but not so hot it could crack the porcelain. Fill your cup or measuring container and pour the hot water into the bowl in a steady, controlled pour. You’ll repeat this in several rounds, allowing time for gravity to help pull the block through the trap. The heat helps soften the blockage, while the weight of the water pushes it downward. Avoid pouring from excessive heights, which can cause splashing and mirrors the same effect with a gentler approach.
Tip: If your toilet water level rises, pause and wait a few minutes before continuing to avoid overflow.
Step 3: Use dish soap and baking soda to lubricate and loosen
Add a generous squirt of dish soap into the bowl, followed by a measured amount of baking soda. The soap reduces surface tension and helps the water flow more easily around the blockage, while baking soda creates fizz that can crack or loosen organic material. Let the mixture sit for a few minutes as the fizzing action works on the clog. After the wait, attempt another gentle hot-water flush to move the softened material down the line.
Pro tip: Do not mix baking soda directly with acidic cleaners like lemon juice in enclosed spaces; stick to dish soap for best results in the toilet.
Step 4: Optional vinegar-baking soda fizz for stubborn clogs
If the clog persists, you can try a vinegar-and-baking-soda fizz. Pour a cup of white vinegar into the bowl, then add baking soda and let the reaction happen. Do not mix with any household bleach products. Allow the fizz to work for several minutes before flushing with hot water again. This method is gentler than harsh chemical cleaners and leverages natural chemistry to dislodge minor mineral buildup or paper-based blockages.
Caution: If you notice a strong chemical smell or feel dizzy, ventilate the area and stop the experiment. Seek professional help if symptoms persist.
Step 5: Gentle flushes and suction methods
Resume flush attempts with hot water and gentle suction if you have a wet/dry vacuum designed for liquids. If using suction, ensure the vacuum is on a low setting and avoid sucking up toilet paper directly into the unit to prevent clogging the hose. A careful, measured approach reduces the chance of splashing and helps you judge whether the clog is yielding. If you don’t own a wet/dry vacuum, rely on repeated hot-water flushes and soap/baking soda cycles instead.
Note: Never use a standard household vacuum for wet waste after a toilet flush; this can be dangerous and unsanitary.
Step 6: When to pause and test
After a few cycles of heat, soap, and fizz, pause to test the toilet’s drainage. If it starts draining slowly but steadily, you’re on the right track. If water remains high or overflows with each attempt, stop and reassess. Over-agitating the trap can push material further into the drain line or crack the porcelain. Patience matters here; rushing can cause more damage or create a bigger mess.
Observation: The goal is a gradual improvement, not a dramatic instant drop in water level.
Step 7: Aftercare and cleaning up
Once the toilet clears, flush with clean water several times to rinse away any residue. Wipe the bowl rim, the floor, and the surrounding surfaces with a mild disinfectant. Wash your hands thoroughly after removing gloves and sanitizing tools. Dry the area well and store cleaning supplies out of reach of children and pets. A quick cleanup reduces odors and makes the next use of the bathroom feel normal again.
Pro tip: Leave the bathroom door open for a few minutes after cleaning to air out any remaining humidity and odors.
Step 8: Alternative techniques if the toilet remains clogged
If the clog persists after multiple attempts, don’t force anything further. Consider professional help or a manual toilet auger from a reputable source. Avoid petroleum-based solvents or aggressive chemical cleaners, which can damage seals and piping. A licensed plumber may identify underlying issues like a blocked main line or vent problems that aren’t resolved by household methods.
Practical decision: If resolving the clog would require disassembly or risk of flood, it’s safer to contact a professional rather than risking expensive damage.
Authority sources and safety recap
For safe, science-based guidance, refer to trusted sources that cover household plumbing maintenance and safety. The EPA provides guidance on safe cleaning practices and environmental considerations. University extension programs offer practical, non-technical advice tailored for homeowners. The CDC covers general household hygiene and sanitation practices that are relevant when handling waste and cleaning fixtures. These sources support the DIY approach when used with care and caution.
Unclog Drain emphasizes safety and gradual, methodical steps over forceful methods that could cause damage. Always prioritize safety, and if in doubt, contact a professional.
Authority sources (references)
- https://www.epa.gov
- https://extension.illinois.edu/
- https://www.cdc.gov
Tools & Materials
- Rubber gloves(Protect hands from waste and cleaners.)
- Bucket(Contain hot water and catch spills.)
- Dish soap(Reduces surface tension and helps lubrication.)
- Baking soda(Fizz action helps loosen organic buildup.)
- White vinegar(Optional booster for stubborn clogs (do not mix with bleach).)
- Measuring cup(Pour hot water and cleaners in controlled amounts.)
- Old towels or rags(Contain splashes and protect floors.)
- Hot water source(Near-boiling water handled carefully to avoid cracks.)
- Wet/dry vacuum (optional)(Only if you have a model that handles liquids and is used with caution.)
- Toilet brush(Gently agitate deposits near the rim.)
Steps
Estimated time: 45-60 minutes
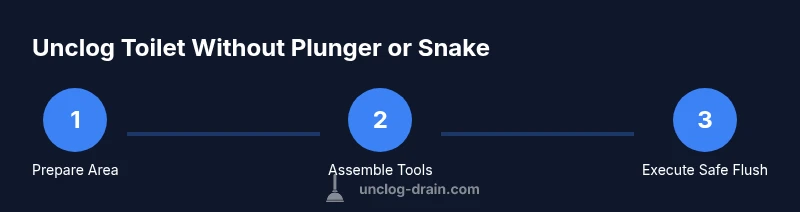
- 1
Prepare the area
Clear the bathroom, lay towels, and put on gloves/eye protection. If possible, shut off the toilet’s water supply to minimize overflow. Gather all tools within reach to minimize trips to the sink. A clean workspace reduces mess and speeds up the process.
Tip: Test the valve before you start to ensure you can control water quickly if needed. - 2
Create a safe hot-water flush
Heat water to near-boiling (not fully boiling) and pour into the bowl in steady pours. Use multiple rounds with small pauses to let gravity work. Avoid splashing by pouring slowly from a controlled height.
Tip: Do not pour boiling water over porcelain if the bowl shows signs of cracking; opt for very hot water instead. - 3
Add soap and baking soda
Add a generous squirt of dish soap followed by baking soda. Allow the mixture to sit for several minutes while it acts on the clog. The combination helps lubricate and destabilize the blockage.
Tip: Wait the full recommended time before testing again to maximize effectiveness. - 4
Optional fizz booster
If the clog remains, add white vinegar and let it fizz. After a short wait, flush again with hot water. Do not mix with bleach or other cleaners.
Tip: If you smell strong odors, pause and ventilate; avoid prolonged exposure to fumes. - 5
Gentle suction (optional)
If you have a wet/dry vacuum designed for liquids, use it cautiously to suction the bowl's interior. Do not force material back into the pipes. Stop if you notice air leaks or strange sounds.
Tip: Always set the vacuum to a low suction level and never use it with cap removed. - 6
Test drainage
After several flush cycles, test the drainage by flushing normally. If water clears gradually and the toilet drains well, you’re close to finished. If not, pause and reassess.
Tip: Avoid repeated aggressive attempts that risk overflowing or damaging the seal. - 7
Final clean and reset
Once clear, flush with clean water a few times to rinse residual material. Clean the bowl and surrounding area with a mild disinfectant. Store tools properly and wash hands thoroughly.
Tip: Leave the bathroom vented for a few minutes to remove lingering moisture and odors. - 8
Consider alternative methods if needed
If the clog persists, avoid forcing the issue with more aggressive experiments. Consider professional augers or a plumber to inspect for deeper drain problems.
Tip: A professional assessment now can prevent bigger problems later. - 9
Safety and maintenance reminders
Never mix cleaners with bleach or ammonia. For future prevention, run hot water and a light cleaning solution down the drain periodically and monitor for slow drainage.
Tip: Regular preventative care reduces the risk of future clogs. - 10
Document the process
Note what works and what doesn’t for future reference. This helps you decide whether DIY methods are sufficient or if a professional is needed.
Tip: Keep a simple checklist so you can repeat the successful steps next time. - 11
Emergency steps if overflow occurs
If overflow happens, stop all actions, turn off the water, and clean up immediately. Remove excess water with towels and sanitize the area after addressing the overflow.
Tip: Water management is crucial to avoid larger messes and water damage. - 12
Reflect and learn
Review what caused the clog and adjust habits accordingly. If the drain remains unreliable, consider long-term prevention strategies.
Tip: Use a maintenance schedule to keep your drains flowing freely.
Common Questions
Can I unclog a toilet without any tools?
Yes. Many clogs respond to safe household methods like hot water flushes, dish soap, baking soda, and patience. If a blockage resists after several attempts, it’s wise to seek professional help.
Yes. You can often unclog a toilet without tools, but if it still won’t clear after several attempts, contact a plumber.
Is it safe to use hot water in the toilet?
Hot water can help loosen organic clogs and push loosened material through the trap. Avoid boiling water to prevent cracking the porcelain. Use near-boiling water carefully.
Hot water helps loosen clogs, but don’t use boiling water to avoid damaging the toilet.
Will baking soda and vinegar harm the toilet?
In most cases they are safe and can help fizz away minor buildup. Do not mix with bleach and avoid using strong chemical cleaners that could damage seals or piping.
Baking soda and vinegar are generally safe, but never mix with bleach.
What should I do if the toilet overflows?
Stop and turn off the water supply, then mop up excess water. If overflow continues or is frequent, stop DIY attempts and call a plumber to prevent water damage.
If overflow happens, shut off the water and call a plumber if it continues.
How many times should I repeat the flush attempts?
Repeat the flush attempts in small cycles and assess after each cycle. If there’s no progress after several tries, pause and seek professional help.
Repeat in small cycles and evaluate progress after each try.
When is it time to call a plumber?
If the clog remains after multiple DIY attempts, if you notice constant backups, or if you’re unsure about the cause, a licensed plumber is the safest next step.
Call a plumber if the clog persists after repeated DIY attempts or if you’re unsure about the cause.
Watch Video
Key Points
- Use heat + soap as a first-line approach
- Avoid mixing cleaners with bleach or ammonia
- Test drainage after each set of steps
- Call a plumber if the clog persists or the risk of overflow increases