How to Unblock a Toilet Without a Plunger: A Comprehensive DIY Guide
Learn proven, plunger-free methods to unblock a toilet using common household tools. This guide covers safe techniques, step-by-step actions, and maintenance tips to prevent future clogs—backed by Unclog Drain expertise for homeowners and DIY enthusiasts in 2026.

Unclogging a toilet without a plunger is doable with common household tools and careful steps. The goal is to restore flow safely by leveraging gravity, suction alternatives, and natural cleaners, while avoiding overflows. You’ll need gloves, a bucket, a flexible bottle, towels, hot water, and time for each method to work. Follow safe, repeatable cycles to assess progress without making a mess.
Why a plunger-free approach can work
Clogs happen for many reasons, from toilet paper piles to mineral buildup. A plunger-free approach focuses on controlled water management, gentle suction alternatives, and purposeful cycles of action that minimize splash and overflow. The Unclog Drain team has observed that most routine toilet clogs respond well to non-mechanical techniques when you manage water levels and use pressure-smart methods. This section explains why a non-plunger method can be effective, the science behind it, and how to tailor your approach to the clog you’re facing. By staying calm and methodical, you reduce the risk of damage to the fixture and surrounding floors while restoring proper flow.
Key idea: you’re using physics (gravity and pressure) and household fluids to move the blockage without forcing a rigid plunger into the trap. If executed correctly, these methods solve many common clogs in 2026 without professional help.
According to Unclog Drain, starting with safer, non-chemical techniques and escalating only if needed is the best path for most households. This mindset keeps you in control and minimizes the risk of accidental spills or costly repairs. Remember: patience and precision beat force in most plunger-free scenarios.
Safety first: risks and precautions
Before you start, plan for a potential overflow and have towels or a mop ready. Wear rubber gloves and keep kids and pets away from the work area. Do not mix chemical drain cleaners with any of the methods described here, as fumes or reactions can be hazardous. If you notice a strong sewage smell, standing water rising rapidly, or sewage backup, evacuate and call a professional. Safety gear and a contained workspace reduce the risk of contamination and damage to floors. If you use a wet/dry vacuum as a desperate measure, only do so after turning off any power near the bathroom and ensuring the vacuum is rated for wet use. These precautions align with best practices that Unclog Drain emphasizes for DIY projects in 2026.
Tip: Keep a spare set of towels and a bucket nearby to manage spills quickly. Small spills can become big problems if left unattended.
Common household methods you can try (no plunger required)
- Dish soap and hot water flush: Add a generous amount of dish soap to the bowl, then wait 3–5 minutes to lubricate the clog. After waiting, fill a container with hot water and pour from about 12–18 inches above the bowl to create a surge that can move the blockage.
- Squeezable bottle pressure flush: Fill a large plastic bottle (2 liters) with hot water. Cut a small notch at the bottom to form a crude nozzle. Squeeze the bottle hard to send a rapid jet of water into the drain opening, creating a temporary pressure wave.
- High-water surge technique: Boil water carefully (not boiling), then pour it into the bowl from a height of roughly 12–14 inches to produce a surge on the water surface that helps push the clog forward.
- Wet/dry vacuum approach (optional): If you have a dedicated wet/dry vac for drain use, seal the drain with a towel around the opening and attempt to draw the blockage out by suction after creating a temporary water seal. Do not use a vacuum that isn’t rated for water or that isn’t dedicated to this task.
Note: Use only safe temperatures and avoid forceful, repeated banging on the toilet bowl. These methods are most effective for partial clogs caused by toilet paper, lingering waste, or small objects. If the water level remains too high, pause and reassess before continuing.
These techniques avoid abrasion inside the porcelain and reduce the chance of cracks or leaks. Your goal is to create safe, incremental progress rather than instant, aggressive force.
What not to do
- Do not mix chemical drain cleaners with hot water or household cleaners. This can produce dangerous fumes or an explosive reaction.
- Do not use metal tools (e.g., wire hangers) to poke the blockage; they can scratch or crack porcelain and push the clog deeper.
- Do not flush repeatedly if the water is rising; this can lead to overflow and water damage.
- Do not ignore flooding signs; stop and switch to safer methods or call a professional.
Following these cautions protects your toilet, floors, and plumbing.
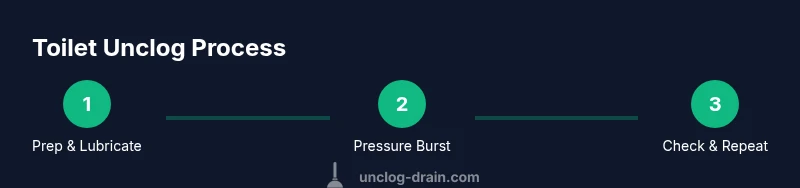
Step-by-step plan overview
This plan focuses on three practical phases you can apply in sequence:
- Phase 1: Prep and lubricate. Set up towels, wear gloves, and apply dish soap to the bowl to reduce friction.
- Phase 2: Create pressure surges. Use a hot-water flush or a squeezable bottle to generate bursts of pressure that push the clog through.
- Phase 3: Evaluate and extend if needed. If the water starts draining slowly or remains blocked, repeat the pressure cycles up to 3–4 times, then consider a backup method (like a toilet auger) if no progress is seen.
This phased approach minimizes risk and helps you gauge progress before escalating to more invasive tools. The goal is to restore flow without overflow or fixture damage, consistent with Unclog Drain’s recommendations for DIY solutions in 2026.
Maintenance and prevention: keep future clogs away
Prevention is better than cure. After you restore flow, establish a simple routine to keep clogs at bay:
- Use a dose of enzyme-based drain cleaners or a regular flush with hot water (not boiling) once a week to help break down buildup.
- Avoid flushing non-biodegradable items (baby wipes, feminine products, wipes marketed as flushable, etc.).
- Consider a weekly bowl cleaning with a mild detergent or vinegar to reduce mineral buildup.
- If you have hard water, install a water conditioner or consider routine maintenance to reduce mineral deposits in the toilet’s trap.
A light maintenance routine reduces the frequency and severity of clogs and keeps your toilet performing well between professional checks.
When to call a professional
If you try several cycles without improvement or if you notice repeated clogs with the same outlet, it’s time to call a plumber. Persistent blockages can indicate deeper issues in the sewer line, venting problems, or a more substantial blockage that requires specialized tools and expertise. The Unclog Drain team recommends seeking professional help if you encounter any of these signs in 2026: persistent backups, strong odors, or water backing up into other fixtures.
Quick checks if you still can’t unclog
If the clog remains after trying the above methods for 20–30 minutes, reassess your approach. Start with a fresh bowl of hot water and a new application of dish soap, but avoid forcing cycles that might lead to overflow. If you decide to escalate, a professional auger or other equipment may be necessary. Record what you tried and any observable changes so the technician can pick up where you left off, saving time and reducing disruption.
Tools & Materials
- Rubber gloves (disposable or reusable)(Protect hands from waste and bacteria; choose size large for comfortable handling)
- Water bucket (5-6 gallon)(Used to carry hot water and to contain spills during attempts)
- Dish soap(Lubricates the clog and reduces surface tension to help water flow)
- Hot water (not boiling)(Hot water helps thin the clog; avoid boiling to prevent damage)
- 2-liter flexible plastic bottle(Cut the bottom to create a nozzle for a pressurized water surge)
- Old towels or rags(Contain and mop up spills; protect floors and fixtures)
- Toilet auger (snake) for backup(Use only if non-mechanical methods fail; proceed with caution)
- Wet/dry vacuum (optional, dedicated to drain use)(Only if you have a unit rated for wet use and you can seal the drain safely)
Steps
Estimated time: 30-60 minutes
- 1
Prepare the area and put on gloves
Lay towels to catch spills, put on rubber gloves, and clear the bathroom floor. Ensure pets and kids are away. This keeps cleanup simple and protects you from contact with waste.
Tip: Pro tip: keep a spare towel ready to wipe spills during the process. - 2
Add dish soap and wait
Squirt a generous amount of dish soap into the toilet bowl and let it sit for 3–5 minutes to lubricate the blockage. This step reduces friction for the next pressure flush.
Tip: Use a large amount of soap to coat the blockage—more lubrication improves the chance of movement. - 3
Prepare your pressure bottle
Fill a 2-liter bottle with hot water and ready it near the toilet. Cut the bottom to create a simple nozzle for controlled pressure delivery.
Tip: Test the nozzle on a towel first to ensure you can control the jet without splashing. - 4
Apply pressure method
Squeeze the bottle to release a rapid jet of hot water into the drain from a height of about 12–18 inches. Repeat for 4–6 cycles, allowing brief pauses to observe changes.
Tip: Aim the jet at the drain opening, not directly at porcelain edges to avoid cracking. - 5
Evaluate and repeat if needed
Check the water level and whether the flush completes. If the water drains slowly or stops, repeat steps 3–4 a few more times.
Tip: If water overflows at any point, stop immediately and switch to a containment strategy. - 6
Backup options if necessary
If cycles fail after 20–30 minutes, consider using a toilet auger with care or consult a professional. Avoid forcing tools aggressively that could damage the toilet.
Tip: Document what you tried and the results to help a pro diagnose faster. - 7
Final check and cleanup
Flush the toilet a final time. If it drains and refills normally, wipe down the area, rinse tools, and launder towels.
Tip: Sanitize gloves and tools after use; dispose of disposable items properly.
Common Questions
Can I unblock a toilet without a plunger?
Yes. Dish soap, hot water, and pressure-based methods can restore flow for many clogs. If the blockage persists, consider a toilet auger or call a professional.
Yes. You can unblock a toilet without a plunger using dish soap, hot water, and pressure methods. If it doesn’t work, try a toilet auger or contact a professional.
Is hot water safe for my toilet and septic system?
Hot water is generally safe if not boiling. Boiling water can crack porcelain, and excessive hot water may affect septic systems. Always use hot, not boiling, water and test in small bursts.
Hot water is safe if it isn’t boiling; avoid boiling water to protect the porcelain and septic balance. Use small bursts carefully.
Will these methods damage my toilet?
When done carefully with moderate pressure and proper temperatures, the risk is low. Avoid metal tools and harsh chemicals to minimize damage to the porcelain and seals.
If you proceed cautiously and avoid metal tools and strong chemicals, the risk of damage is low.
What should I do if the toilet overflows?
Stop flushing, contain the overflow with towels, and remove excess water with a cup or sponge. Then reassess with safer methods or call a professional if overflow continues.
If it overflows, stop, contain the water, and switch to containment. Reassess or seek help if needed.
When should I use a toilet auger?
Use a toilet auger when non-plunger methods fail to move the clog. It can reach deeper into the trap but requires careful handling to avoid damage.
Use a toilet auger if non-plunger methods don’t work; handle it gently to avoid damage.
Can vinegar or baking soda help unblock a toilet?
Vinegar and baking soda may help with minor buildup, but they are unlikely to clear a solid clog. They’re safe as a maintenance tactic, but for stubborn clogs, rely on stronger methods described here or consult a pro.
Vinegar and baking soda might help minor buildup, but aren’t reliable for solid clogs; use them for maintenance, not stubborn blockages.
Watch Video
Key Points
- Prepare the area and gear up before starting.
- Lubricate with dish soap to ease movement of the clog.
- Use controlled pressure bursts to push the blockage through.
- Avoid chemical cleaners and aggressive tools that can damage the toilet.
- Call a professional if cycles fail or you notice backups.