Toilet Unclog: Safe DIY Guide for Homeowners in 2026
A practical, expert guide to unclogging a toilet using safe DIY methods, from plunging to using a toilet auger, plus prevention tips.

Toilet unclog typically means removing a blockage from the toilet trap or drain to restore normal flushing. Start with safe, non-corrosive methods (plunger, toilet auger) before applying chemical cleaners. Always turn off the toilet water supply, wear gloves, and test with small flushes. If the clog persists beyond 15 minutes, stop and reassess.
Common Causes of Toilet Clogs
Understanding why toilets clog helps you prevent and address blockages quickly. According to Unclog Drain, the most frequent culprits are excessive toilet paper, hygiene wipes disposed of in the bowl, and small objects that slip past the trap. Mineral buildup in hard water can also narrow the passage over time, while a blocked sewer line may send debris back into the bowl after repeated flushes. By identifying the root cause, you choose the safest method and avoid unnecessary damage to the porcelain or plumbing.
Common symptoms of a developing clog include slower-than-usual flushing, gurgling sounds, and water that rises toward the rim when you flush. If you notice multiple toilets in the home backing up, this may indicate a sewer-line issue rather than a single fixture. Regular maintenance and mindful disposal habits help reduce the odds of a future clog.
Safe First-Line Methods
Before reaching for chemical cleaners, start with mechanical methods that keep plumbing safe and backed by evidence. Plungers designed for toilets create a strong seal that transmits pressure down the drain, dislodging the clog without harming seals. If your bowl is full, remove some water to improve contact and reduce splash. For a stubborn clog, a mild soap-and-hot-water combination can loosen debris between the trap and bowl, but avoid boiling water which can crack porcelain. If the clog remains after a few attempts, wait a few minutes and re-check the situation, testing with a gentle flush.
Using a Toilet Plunger Effectively
A flange or toilet-specific plunger is essential for best results. Submerge the plunger to cover the drain opening and create a tight seal. Apply firm, vertical strokes with consistent pressure, keeping the handle roughly at chest height for control. Alternate with short bursts of pressure to push air down the line and break apart the blockage. Do not twist the plunger; maintain a straight push-pull motion to maximize suction and minimize splashes. If water leaks around the seal, reposition until you have a complete seal.
Using a Toilet Auger (Toilet Snake)
When plunging alone fails, a toilet auger can reach farther into the trap and either dislodge the obstruction or hook onto it for extraction. Insert the auger tip gently into the drain and rotate the handle while pushing forward. Stop advancing if you meet resistance; forcing past a curve can damage the porcelain or push the clog deeper. Retract slowly to avoid pushing debris back into the bowl, then test with a flush. Keep towels handy to catch splashes, and sanitize the auger after use.
What Not to Do: Pitfalls and Safety
Avoid chemical drain cleaners in toilets—they can damage rubber seals and septic systems, and they release hazardous fumes in enclosed spaces. Do not mix cleaners with drain products, and never pour into a running toilet or while standing on wet floors. Do not use household items like wire hangers or metal tools that can scratch the porcelain or injure the trap. If you hear bubbling or smell sewage, stop and call a professional to inspect the sewer line.
Prevention and Maintenance After Unclogging
Once the toilet flows normally again, take steps to prevent future clogs. Discard wipes and hygiene products properly; flush only toilet paper; consider a cautionary limit on flush volume for older toilets. Regular maintenance includes inspecting the trap and cleanout and watching for signs of slow draining in other fixtures. The Unclog Drain team recommends routine checks and a simple, predictable cleaning routine to keep the system clear. If you have a septic system, avoid flushing non-biodegradable items and use water-efficient fixtures to reduce strain.
Tools & Materials
- Flange plunger (toilet plunger)(Choose a larger bell-shaped plunger with a flange for a better seal.)
- Toilet auger (toilet snake)(Long, flexible steel cable with a curved head.)
- Rubber gloves(Nitrile recommended; protect skin from waste.)
- Old towels or disposable rags(Place around the toilet to catch splashes.)
- Bucket or large container(For water management and cleanup.)
- Flashlight(Improves visibility in dark bowl exterior.)
- Plastic bag for waste disposal(Seal and dispose of waste safely.)
- Dish soap (optional)(Lubricant and helps loosen debris, but not required.)
Steps
Estimated time: 30-45 minutes
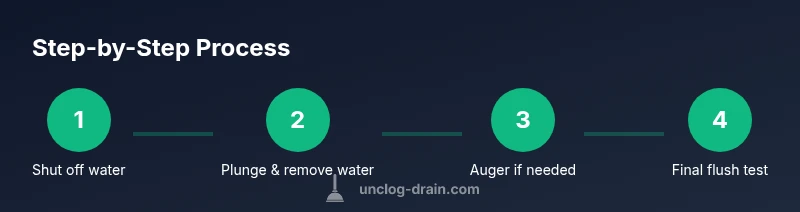
- 1
Shut off the water supply
Locate the shut-off valve behind the toilet and turn it clockwise until it stops. This prevents overflow if the clog releases pressure. Place towels on the floor to catch any splashes and protect the surrounding area. If you cannot reach the valve, locate the main water shut-off for the home and use that as a backup.
Tip: Always have a bucket nearby to catch any water that escapes during preparation. - 2
Remove excess water from the bowl
Use a small cup or the plunger to scoop out water until the bowl is mostly clear. Leaving too much water reduces the effectiveness of plunging and increases splash risk. Keep the water level low enough to see the drain opening clearly while you work.
Tip: A calmer, drier bowl gives you better control during plunging. - 3
Position the plunger for a seal
Place the flange of the plunger inside the drain opening to create a tight seal. Ensure the rim of the plunger covers the entire drain opening. If air leaks, reposition until you have a solid seal and an unobstructed path.
Tip: Cleaner plunger surface ensures a stronger seal; wipe with a wet cloth if needed. - 4
Plunge with controlled strokes
Push down firmly and pull up with steady pressure for 15-20 strokes. Maintain the seal and avoid wiggling the handle, which can break the seal. After a set of strokes, pause briefly and check for movement in the water.
Tip: Keep wrists steady and body over the plunger to maximize pressure transmission. - 5
Pause and re-check
Lift the plunger and observe the water level. If the water drains slowly or the clog breaks free, re-submerge and repeat the plunging cycle. Do not force the plunger beyond comfort; move to the auger if necessary.
Tip: Short cycles reduce splashes and increase control. - 6
Try a mild soap-and-hot-water flush
If the plunger alone fails, add a few drops of dish soap and pour warm (not boiling) water from a height of about a foot into the bowl to help lubricate the trap. Avoid boiling water which can crack porcelain. Gently reattempt plunging after this rinse.
Tip: Soap can help lift grease or sludge; use sparingly to avoid excessive suds. - 7
Use a toilet auger if needed
Insert the auger into the drain and rotate while advancing slowly. Do not force past resistance; back off if you feel a strong obstruction. Retrieve any debris and test the flush again after a careful pull-back and rotation.
Tip: Keep the auger straight to prevent kinking and damage. - 8
Final flush test and cleanup
Flush the toilet slowly to confirm normal operation. If the water drains evenly and the bowl returns to base level, the clog is cleared. Clean and disinfect all tools and wipe down the area before putting items away.
Tip: Sanitize the auger and store it dry to prevent rust.
Common Questions
What is the most common cause of a toilet clog?
Most clogs arise from excessive toilet paper, wipes, or small objects. If flushing repeatedly fails, reassess and address the root cause rather than forcing another flush.
Most clogs are caused by paper, wipes, or small items; avoid repeated flushing and address the cause.
Can I use chemical drain cleaners on a toilet clog?
Avoid chemical cleaners in toilets—they can damage seals and septic systems and create hazardous fumes. Try mechanical methods first.
Avoid chemical cleaners in toilets; use plungers or augers first.
When should I call a plumber?
If plunging and snaking fail, if you hear gurgling, if the toilet overflows repeatedly, or if you suspect a sewer line issue, call a plumber.
If it keeps backing up or you hear gurgling, you should call a plumber.
Is a toilet auger safe for residential use?
Yes, a toilet auger is designed for residential toilets when used correctly. Avoid forcing it and follow the manufacturer’s guidance.
Yes, it’s safe if used properly; don’t force it.
How can I prevent future clogs?
Keep wipes out of the toilet, flush only toilet paper, and consider regular maintenance and mindful disposal habits.
Don’t flush wipes; limit toilet paper; maintain regularly.
Watch Video
Key Points
- Start with safe, mechanical methods first.
- Use the correct tool for the job (plunger vs. auger).
- Avoid chemical cleaners in toilets.
- Know when to pause and call a pro if needed.