The Best Way to Unclog a Toilet: A Practical DIY Guide
Learn the best way to unclog a toilet with safe, practical steps. From plunger technique to using a toilet auger, this DIY guide covers tools, timing, safety, and prevention.

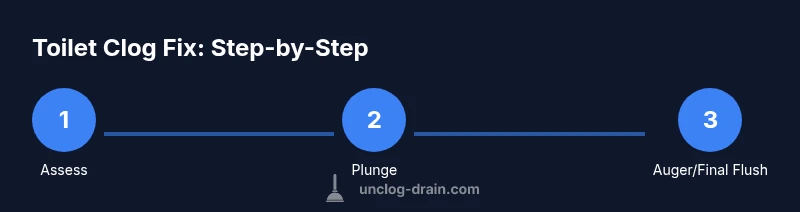
To unclog a toilet effectively, start with simple methods: seal the bowl with a plunger and use firm, consistent strokes to dislodge the blockage. If that fails, try a toilet auger. Avoid chemical drain cleaners as a first option. Wear gloves and eye protection, and never flush repeatedly. If the clog persists, move to professional help. This guide walks you through the best steps.
The best way to unclog a toilet: a practical approach
The best way to unclog a toilet is not a single trick but a practical sequence that relies on safe, mechanical methods first. For many homeowners, starting with the right tools and a calm, methodical plan yields reliable results without harming your porcelain, seals, or septic system. The goal is to restore a normal flush by clearing the obstruction with controlled technique, not by brute force. This approach reduces the risk of overflows or clever, unintended damage and keeps maintenance simple. Throughout this guide, we emphasize using proven methods, recognizing when to stop, and knowing when to call a pro. The overall strategy begins with the least invasive method and progresses to more involved solutions if necessary, always prioritizing safety and sanitation. By following a clear plan, you’ll feel confident tackling most clogs and be prepared for stubborn cases that require a different tool or professional support.
As you begin, assess the situation: is the water rising, slowly draining, or completely still? Most clogs respond to a few targeted actions: plunging, then, if needed, a toilet auger. Avoid chemical cleaners as a first option and never mix cleaners, which can create harmful fumes or damage parts. With the right sequence, most blockages yield to hand pressure and patience. This hospitality-grade approach ensures you protect the fixture and the home’s plumbing while reducing mess and stress. Ahead, you’ll find practical steps, tools, and tips that help homeowners and DIY enthusiasts resolve everyday clogs efficiently.
PPE and safety: preparing to tackle a clog
Safety comes first when you work on a toilet. Shutting off the water supply at the valve behind the toilet prevents overflow if things go off-script. Remove the refill tube from the fill valve to prevent accidental flushing during plunging, and place towels or a bucket nearby for spills. Wear waterproof gloves and eye protection to guard against splashes or sewer gas. Keep children and pets away while you work, and ensure the bathroom is well-ventilated. If you have a septic system, avoid chemical cleaners that disturb bacteria; mechanical methods are safer and gentler for subsystems. Finally, plan for cleanup and sanitizing afterward. A tidy setup reduces chaos and helps you stay focused on the task at hand.
Plunger techniques that work: seal, stroke, and timing
Plungers come in two main types: a classic flange plunger for toilets and a cup plunger for sinks. For toilets, the flange is essential to seal around the bowl’s discharge hole. Start with enough water to cover the plunger bell, insert the flange into the drain, and press to form a tight seal. Use steady, downward strokes with consistent pressure, then pull up with the same rhythm to maintain suction. Keep the handle as vertical as possible to maximize force transfer and minimize splash. Check progress after a few cycles; if the water level drops, you’re on the right track. If the seal breaks or water surges, reposition the plunger and reseal before continuing. Do not rush or slam the plunger, as that can crack the porcelain or push the clog deeper. After several cycles, remove the plunger and flush to test the result. If there’s still resistance, it’s time to move to the auger. A methodical rhythm beats frantic pumping every time.
When to use a toilet auger and how to operate it safely
A toilet auger is designed to reach beyond the curve of the toilet trap and engage the clog. Use it after plunging fails or when the blockage sits beyond the trap. Start by turning the auger handle clockwise to extend the cable while gently feeding it into the drain. Maintain steady pressure and avoid forcing the cable; abrupt movements can scratch porcelain or bend the auger. When you encounter resistance, rotate slightly and push forward a bit more, then retract and pull the clog back. Retrieve the cable slowly and flush to test progress. If the auger advances but the clog remains, repeat with controlled, patient motions. Do not over-penetrate or torque the cable aggressively, which can damage the flush valve or wax seal. After clearing, run water to confirm the fix and inspect for residual issues. If resistance persists, stop and seek professional help to avoid damage. A careful, repeatable approach typically resolves most toilet clogs.
What not to do: chemical cleaners, boiling water, and risky shortcuts
Chemical drain cleaners may seem convenient but pose risks to porcelain, seals, and septic systems. If you use them, follow label directions precisely and never mix cleaners, which can trigger dangerous fumes or explosions. Avoid pouring boiling water into a clogged toilet; extreme heat can crack ceramic. Do not repeatedly flush or force plungers with excessive vigor, as this can damage seals or the bowl. Instead, emphasize mechanical methods and patience. If you must use a cleaner as a last resort, choose a product labeled safe for toilet use and adhere to its dwell time, then resume mechanical clearing for any remaining blockage. Ventilate the room and wear protective gear. After treatment, test with clean water; if the toilet still drains slowly, reassess or call a professional. Remember, chemical fixes are not a universal remedy and can complicate future maintenance.
Alternative methods and DIY tactics that can help
Non-chemical strategies can clear mild clogs or prevent future ones. A tablespoon of dish soap with hot water (not boiling) can loosen grease in the trap; wait a few minutes before plunging. A wet/dry vacuum can remove small blockages from the drain line when used correctly, with caution to avoid backflow. A plumbing snake or toilet auger can grab hair or solids with a back-and-forth motion, but avoid forcing it too aggressively near the bend. Regular maintenance helps too: avoid flushable wipes, reduce toilet paper usage, and occasionally flush with a bucket of water to prevent drying and buildup. For septic systems, spread out water usage and consider periodic professional checks. These tactics can save time and mess for common blockages, but persistent problems or recurrent clogs may require expert assessment and replacement parts.
Maintenance habits to prevent future clogs
Prevention is easier than repair. Establish a simple flushing routine: avoid flushing non-flushables, upgrade piping components where needed, and keep a log of clog events to spot patterns. Treat the toilet area with regular, gentle cleaning to minimize mineral buildup and residue that can trap materials. Use plungers as a first defense and keep an auger accessible for quick response. Regularly inspect the wax ring and seals during routine maintenance and consider professional inspection if you notice slow drainage or gurgling sounds. Finally, educate all household members about what should and should not go down the drain. Consistent habits reduce emergencies and protect your plumbing system for years to come.
When to call a professional and what to expect
If a clog resists standard methods or water backs up into the tub or sink, it’s time to call a plumber. If multiple drains are affected or sewer gurgling is heard, stop attempting DIY fixes and shut off water to avoid damage. A professional can diagnose issues such as a blocked main line, vent problems, or a failing wax seal. Expect a diagnostic visit, possible camera inspection, and a range of repair options suited to your home and budget. While DIY fixes resolve most common clogs, stubborn problems or recurring clogs require specialized equipment and expertise. The goal is to restore safe drainage efficiently without compromising sanitation or triggering leaks.
Quick-start checklist for immediate action
Before you begin, gather the essential tools and prepare a clean workspace. Shut off the water supply, put on gloves and eye protection, and have towels ready for spills. Start with a toilet flange or classic plunger and, if needed, move to a toilet auger. Avoid chemical cleaners as a first resort. If the clog remains stubborn after initial attempts, pause and reassess rather than forcing tools. Test the flush with clean water multiple times to confirm a clear drain and prevent repeat clogs.
Tools & Materials
- Plunger (flange toilet plunger)(Cup-shaped plunger with a flange for toilets)
- Toilet auger (toilet snake)(Flexible cable with hand crank, safe for porcelain)
- Rubber gloves(Waterproof, durable)
- Bucket or towels for spills(Containment and cleanup)
- Flashlight(Improve visibility in the drain opening)
- Safety glasses(Protection from splashes)
- Mild cleaner (optional)(For post-cleanup, not for unclogging)
Steps
Estimated time: 30-45 minutes
- 1
Inspect and prep the area
Shut off the water supply, remove the refill tube, and clear a path for working space. Check the water level to gauge complexity and note potential overflow risk. Prepare towels and a bucket for immediate clean-up.
Tip: Always start with the water off to prevent accidental overflow. - 2
Position the plunger and seal
Place the flange into the drain opening and ensure a tight seal around the rim. Stand in a stable stance to apply consistent pressure, and avoid tilting the plunger; a straight line transfers force best.
Tip: Ensure there is enough water to cover the plunger bell for suction. - 3
Plunge with rhythm
Push down firmly, then pull up with the same pressure rhythm. Repeat in steady cycles for 15–20 strokes, watching the water level for signs of progress. If the seal breaks, stop and reseal before continuing.
Tip: Consistency beats force; a steady rhythm clears more effectively. - 4
Evaluate and decide
Remove the plunger and observe whether the water drains. If progress is seen, repeat plunging a few more cycles. If no movement occurs after several cycles, move to the auger.
Tip: Don’t force the plunger beyond reasonable resistance. - 5
Use the toilet auger
Insert the auger and slowly crank while feeding the cable into the drain. When you feel resistance, rotate gently and advance an inch or two. Retract to pull the clog free, then flush to test.
Tip: Avoid excessive force that can crack the porcelain or bend parts. - 6
Test with water and flush
Run clean water and flush to confirm clearance. If the drain still clogs, repeat the auger sequence once or twice more with care. Do not abandon after a single failed attempt.
Tip: A successful flush confirms blockage clearance beyond the immediate trap. - 7
Clean up and sanitize
Even after a successful fix, disinfect the area and wash hands thoroughly. Reconnect the refill tube and restore water supply, then monitor the toilet for the next flush.
Tip: Sanitize equipment and workspace to prevent contamination.
Common Questions
What is the best first method to unclog a toilet?
Start with a flange-style toilet plunger and a steady plunging rhythm. If there’s no progress after a minute or two, move to a toilet auger. Avoid chemical cleaners as the initial fix.
Begin with a flange plunger and a steady rhythm; if it doesn’t clear after a short time, switch to an auger. Avoid chemicals at first.
Can I use chemical drain cleaners safely on a toilet?
Chemical cleaners can damage toilets and septic systems and pose fumes risks. Use them only as a last resort and strictly follow the product directions. Mechanical methods are usually safer and effective.
Chemicals can damage your toilet and septic system. Use them only as a last resort and follow the label.
When should I call a plumber for a toilet clog?
Call a plumber if plunging and augering fail after several attempts, if water backs up into other drain lines, or if you hear sewer gurgling. A professional can diagnose main line or vent issues and safely resolve them.
Call a plumber if plunging and augering don’t work, or if you hear sewer gurgling.
Is a toilet auger safe on porcelain?
Yes. When used properly, a toilet auger is designed to reach clogs without damaging porcelain. Feed slowly, avoid forced movements, and withdraw carefully after clearing.
Yes. Use it slowly and carefully to avoid damaging the toilet.
Why does a toilet clog keep recurring after fixes?
Recurring clogs often indicate broader issues such as a blocked main line, vent problems, or insufficient septic capacity. Consider a professional inspection to identify root causes and prevent future incidents.
Recurring clogs usually point to a bigger issue; a pro can diagnose and fix it.
Watch Video
Key Points
- Start with non-chemical methods to protect plumbing.
- Use the correct plunger and seal for maximum effectiveness.
- Move to a toilet auger only if plunging fails.
- Avoid chemical cleaners as a first resort; safety matters.
- Call a professional for persistent or recurring clogs.