How to Fix a Clogged Toilet: A Practical DIY Guide
Learn to fix a clogged toilet quickly and safely with step-by-step instructions, tools, and maintenance tips from Unclog Drain. This comprehensive DIY guide covers plunging, using a closet auger, and knowing when to call a plumber in 2026.

In this guide, you will learn how to fix a clogged toilet using safe, practical DIY methods. You'll start with simple plunging, move to toilet augers if needed, and know when to call a plumber. Essential: a plunger, a toilet auger, and protective gloves. This quick answer outlines steps, safety tips, and what equipment is required.
Why Toilet Clogs Happen and Why DIY Works
Toilet clogs happen for a variety of reasons, from oversized objects and a rapid surge of fiber-rich toilet paper to mineral buildup in older pipes. In many homes, the simplest fixes are DIY-friendly and effective when you act with a plan and the right tools. A clear understanding of the flow path—the bowl, the trap, and the drain line—helps predict where the obstruction sits and which tool to reach for first. Unclog Drain's approach emphasizes mechanical methods, proper water management, and patient technique over harsh chemicals. By recognizing common signals like a slow drain, gurgling after a flush, or backups in multiple fixtures, you can decide quickly whether a DIY fix is appropriate or if you should call a plumber. This section also sets expectations: not every clog responds to plungers or augers, and some clogs are symptoms of a broader sewer line problem that requires professional equipment. With the right mindset, you’ll reduce mess, avoid damaging seals, and shorten downtime. Throughout this guide, we’ll keep safety and sanitation at the forefront, because a calm, methodical approach yields the best long-term results for your home in 2026.
Safety First: Protect Yourself and Your Plumbing
Before you begin, set a safety perimeter: lay down towels, keep kids and pets away, and wear waterproof gloves. Mechanical methods rely on force, so protect your hands, eyes, and clothing from splashes. Never mix chemical cleaners with plungers or augers; chemical reactions can foam and splash and may damage porcelain or septic systems. If your toilet begins to overflow, stop the process and shut off the water supply to the toilet (the shut-off valve behind or beside the toilet) to prevent a flood. Once the area is safe, check that the toilet is stable and that the floor underneath is dry to avoid slips. Sanitize the area after you finish, including the plunger and auger handles, to prevent bacteria spread. A cautious, patient approach reduces the risk of collateral damage to seals, gaskets, and the trap. Remember: if you’re unsure about the plumbing system or your home’s septic setup, it is wise to pause and call a professional. This careful start helps you work confidently through the rest of the guide in 2026.
Essential Tools and Materials You Need Before You Start
Gather these tools and supplies so you won’t interrupt your flow mid-project. A flange-style toilet plunger is crucial for forming a proper seal in the toilet bowl. A closet auger (toilet auger) with a protective sleeve helps reach past the U-bend without scratching the porcelain. A pair of thick rubber gloves, a bucket, and old towels are essential for hygiene and cleanup. A flashlight improves visibility inside the bowl and trap, especially if the blockage is deep. Optional but helpful items include a small amount of dish soap to lubricate the auger tip, a protective eyewear option for splash safety, and a trash bag for disposal of any waste. If you don’t have a dedicated auger, some improvised tools can work in a pinch, but never substitute pliers or other metal implements that can crack the bowl. Keeping these items within arm’s reach speeds up the fix and reduces the chance of a second clog while you work.
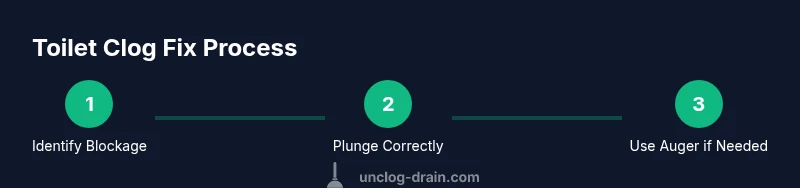
Step-By-Step Guide: Fixing a Clogged Toilet (Overview)
Below is a high-level sequence you’ll follow, with reasons why each move matters. These steps reflect a practical, user-friendly approach that avoids over-reliance on chemicals and emphasizes mechanical methods. Start by securing the area, testing the water supply, and choosing the right tool. Proceed with plunging technique to maximize suction and clearance. If plunging alone fails, switch to a closet auger to dislodge the obstruction at the trap or in the bend. After a successful clearance, test the flush and observe the bowl’s response. Finally, clean, disinfect, and reset the space so the next use won’t spread contamination. If the toilet still won’t flush after these attempts, reassess the blockage and consider professional assistance. This overview lays the groundwork for the detailed Step-By-Step instructions that follow in the dedicated section.
When to Try Alternatives: Plungers, Augers, and Safe Chemicals
Plungers remain the quickest first option when the blockage is near the rim and the water can form an effective seal. If plunging does not move the obstruction after a full, consistent cycle, insert a closet auger slowly and guide it toward the blockage while keeping pressure steady. Avoid aggressive twisting that can crack the porcelain; gentle, deliberate movements typically yield better results. Some homeowners consider chemical cleaners, but these can damage seals, pipes, and septic systems, and they often create hazardous reactions inside a closed bowl. If you perceive a sewer smell, hear unusual noises, or notice water pooling around the base, stop and call a professional. For stubborn clogs that resist plungers and augers, a plumber has access to more robust equipment and may identify upstream issues you can’t see from the bowl.
Troubleshooting Common Issues and Red Flags
If the water rises instead of draining, stop and shut off the water valve behind the toilet to prevent overflow. If the plunger seals poorly or slips, reposition it and clean the rim to improve suction. A repeated back-and-forth motion helps to break the blockage without hammering the bowl. If the auger tip binds or the coil resists, withdraw slowly and inspect for kinks or snagged debris. Porcelain chips around the bowl’s interior can accompany repeated plunging; if you notice cracks, stop and contact a professional. A blocked main sewer line presents differently, with widespread drainage issues in other fixtures; if you suspect that, stop, and call a licensed plumber. Finally, never mix baking soda and vinegar as a single-action flush approach—this combo can create odors but does not effectively clear deeper blockages and may clog pipes in rare cases. Use these signals to decide whether you can continue DIY work or escalate to professional help in 2026.
Maintenance Tips to Prevent Future Clogs
Prevention starts with routine checks and mindful flushing habits. Only flush toilet paper and human waste; avoid flushing wipes, sanitary products, or cooking grease that belong in the trash or a proper disposal system. Install a small screen or hair catcher in bathroom sinks to reduce sediment flow toward the drain; in toilets, a simple routine of gentle flushing and moderate water levels helps prevent blockages caused by rushing paper. Keep a regular schedule of minor maintenance: run a toilet bowl cleaning routine, inspect the trap area for signs of buildup, and be mindful when using septic systems. If you have hard water, consider a monthly rinse to reduce mineral deposits that contribute to clogs. Finally, document any recurring drain problems and track the outcomes of your fixes so you’ll recognize patterns and know when to consult a professional before a major backup occurs in 2026.
What a Pro Does If DIY Fails
When a blockage remains after careful plunging and augering, a professional plumber uses specialized equipment to clear deeper obstructions and inspect the sewer line for upstream issues. They may also perform a camera inspection to locate the blockage precisely and assess pipe integrity. By knowing when to escalate, you protect your home from repeated backups and costly water damage. The goal of this article is to give you practical, safe, and repeatable methods for most common clogs, while highlighting the moments when a pro is the right call. The Unclog Drain team emphasizes that persistent clogs are not a personal failure but a signal that your plumbing system is more complex than it appears. In 2026, a well-timed professional intervention can save time, reduce risk, and prevent damage to floors, walls, and lower-value fixtures.
Tools & Materials
- Flanged toilet plunger(A plunger with a flange (bellows) designed for toilets)
- Closet auger (toilet auger)(50–60 inch length; protective sleeve)
- Rubber gloves(Thick, waterproof gloves)
- Bucket(For spills and cleanup)
- Old towels or rags(Absorbent for spills and drips)
- Flashlight(Improves visibility inside the bowl)
- Dish soap (optional)(A few drops to lubricate the auger tip)
- Safety goggles (optional)(Protect eyes from splashes)
- Trash bag(For waste disposal)
Steps
Estimated time: 45-60 minutes
- 1
Secure area and prep tools
Lay down towels, set aside reusable items, and don your gloves. Ensure children and pets are away from the work area. This initial setup prevents mess spread and keeps you organized as you work.
Tip: Have a bucket handy for spills and a trash bag for disposable items. - 2
Shut off water and assess overflow risk
Locate the shut-off valve behind or beside the toilet and turn it clockwise to stop the flow. If water already overflows, remove the tank lid carefully and use a sponge to soak up excess water, preventing a flood.
Tip: Keep a towel ready to catch splashes and protect the floor from wet patches. - 3
Position the plunger and initiate plunging
Place the flange of the plunger into the drain opening to form a tight seal. With a steady motion, push down and pull up without lifting the seal, repeating for 15–20 seconds. Pause to check water movement.
Tip: Ensure full contact with the bowl rim; a loose seal reduces suction dramatically. - 4
Switch to a closet auger if needed
Insert the auger into the toilet bowl and gently feed the coil toward the blockage while rotating. When you meet resistance, rotate and pull back a few inches, repeating until the obstruction clears or you feel the line open.
Tip: Do not force the auger; forcing can damage porcelain and worsen the blockage. - 5
Test flush and repeat if necessary
Carefully remove the plunger then flush the toilet once. If the flush is weak or the water remains high, retry steps 3–4 with patience. Do not rush; slow, deliberate action yields better results.
Tip: Only perform a second flush after ensuring the trap is clear to avoid overflow. - 6
Clean up and sanitize
Return the water supply valve to its open position slowly. Sanitize all tools, wipe down the surrounding area with disinfectant, and wash your hands thoroughly.
Tip: Let surfaces air-dry to prevent mold growth and store tools properly.
Common Questions
What is the fastest way to fix a clogged toilet?
Typically, start with a flange plunger to form a good seal. If that doesn’t clear the blockage, try a closet auger. Avoid rushing and keep safety in mind.
Start with a flange plunger, then move to a closet auger if needed. Take your time and stay safe.
Can I use chemical drain cleaners in a toilet?
Chemical cleaners can damage toilet seals and septic systems and may cause hazardous reactions in a closed bowl. Use mechanical methods first and only seek professional advice if unsure.
Avoid chemical cleaners in toilets; mechanical methods are safer and usually effective.
What should I do if the toilet overflows?
Shut off the water supply at the valve behind the toilet to stop the flow. Use towels to catch spills and call a plumber if the overflow continues despite precautions.
Shut off the water, mop up the spill, and call a plumber if overflow continues.
Is a toilet auger safe for porcelain?
Yes, when used gently. Do not force the coil; if you feel strong resistance, back off and reposition.
Yes, but move slowly and don’t force the auger.
How can I prevent future clogs?
Flush only toilet paper and waste. Consider a screen to catch debris and maintain a regular cleaning routine to minimize buildup.
Flush only paper and waste, and do routine maintenance to prevent clogs.
When should I call a plumber?
If plunging and using an auger don’t clear the blockage, or if you suspect a sewer line issue, contact a licensed plumber for a professional assessment.
Call a plumber if DIY fixes don’t work or you suspect sewer line problems.
Key Points
- Start with plunging before trying an auger.
- Protect yourself and the home during the process.
- Know when to escalate to a plumber for persistent clogs.