Underground Gutter Drain Cleaning: Step-by-Step DIY Guide
A practical, expert-led guide to cleaning underground gutter drains safely, with step-by-step actions, tools, safety tips, and maintenance advice from Unclog Drain.

You will learn how to safely clean an underground gutter drain: locate the cleanout access, remove built-up debris, flush the line, and test drainage. This guide covers safety gear, essential tools, step-by-step actions, and maintenance tips to prevent clogs and water damage. Whether you’re dealing with a slow gutter line from roof runoff or a buried main line, the techniques emphasize control, cleanliness, and safety. You’ll learn when to try DIY methods and when to call a pro.
What is underground gutter drain cleaning and why it matters
Underground gutter drains carry roof runoff away from your home through buried pipes and sometimes into a municipal system or a stormwater trench. Cleaning these lines is essential because debris like leaves, silt, and small stones can accumulate out of sight, creating slow drainage, odors, and even backups into basements or crawlspaces. A clogged underground drain can also attract pests and mold growth, and it increases the risk of flooded foundations during heavy rain. According to Unclog Drain, routine attention to the underground portions of your gutter system helps protect your home's structure and your family’s health. In practice, this work means inspecting accessible cleanouts, using the right tools to dislodge jams, and flushing the line to confirm clear flow. This section will orient you to the layout, common problem areas, and the safety steps that make this task doable without calling an emergency plumber.
Safety, planning, and choosing the right approach
Before you dive into any underground drainage work, set safety as your first priority. Wear chemical-resistant gloves, eye protection, and sturdy footwear, and use a ladder with stabilizers if you must reach access points. Keep the work area well lit and clear by moving vehicles and obstacles away from the work zone. If you suspect sewer gas or standing water, pause and call a professional; do not enter a confined space. The Unclog Drain team emphasizes planning: identify the actual cleanout location, confirm whether the line has backflow protection, and decide whether to flush with water or attempt mechanical clearing first. Document access points on a simple sketch for future maintenance. Finally, make sure you have a partner or a spotter to assist and call for help if you lose balance or encounter a collapsing curb or manhole lid. This preparation reduces risk and speeds up the job.
Access points and typical underground layouts
Most homes connect to underground drainage via a cleanout at grade, a buried pipe with a removable cap, or a manhole-style access along the right-of-way. In newer homes, the cleanout is often near the foundation or behind an exterior panel; in older houses, you may need to trace from the downspout to find a buried junction. If you have a sump pit or a yard drain, these can also provide entry points. Visuals such as a bright flashlight beam, a mirror, or a digital camera can help you locate the cap or lid. Remember to verify that any access point is designed for tools and flushing, not just for observation. If your system uses multiple branches, test drainage from the farthest point first to confirm full flow, then work toward the near end. For the safety of plants and soil, avoid pressing debris deeper into the line and never force a blockage through the pipe with excessive pressure.
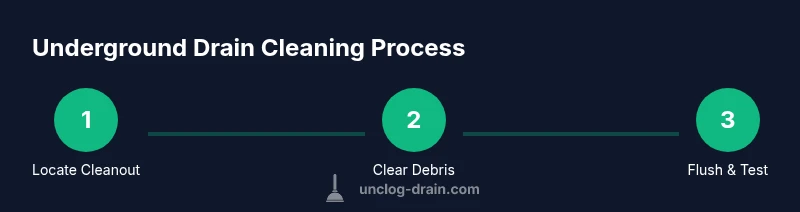
Step-by-step approach to cleaning underground gutter drains
The following steps provide a clear, actionable workflow that keeps you in control while protecting your home. Each action is designed to minimize risk and maximize success.
-
Identify the cleanout access and plan the route. Locate the cleanout cap, map the likely route to the main line, and confirm you have a safe exit if you need to retract equipment. Why: planning prevents messy retries and reduces time crawling in tight spaces. Tip: if you cannot locate a cleanout, stop and call a pro to avoid digging or forced entry.
-
Put on PPE and set up the work area. Wear gloves, eye protection, and a sturdy pair of boots; secure ladders and keep children or pets away. Why: personal safety is non-negotiable when working around buried drainage and potential backflow. Pro tip: keep a spare flashlight and a bucket for debris to minimize scatter.
-
Open the cleanout and perform a preliminary inspection. Loosen the cap slowly, listen for gurgling or trapped air, and note the direction of the line. Why: early signs guide whether the clog is near the entrance or farther down the run. Pro tip: use a camera on a flexible rod to inspect the pipe interior without full entry.
-
Clear debris with a drain snake or auger. Insert the snake into the pipe and gently rotate as you push to break up blockages; resist the urge to force through hard objects. Why: mechanical clearing reduces pack-down and avoids pushing debris deeper. Pro tip: maintain steady pressure and step back if you feel resistance turning into a snag.
-
Flush the line and test drainage. Refit the cleanout cap and run water through the system from the upstream side, watching for smooth flow and absence of backups. Why: flushing confirms clearance and helps identify residual pockets. Pro tip: test at low pressure first and gradually increase to avoid water hammer.
-
Secure the access and document maintenance. Re-tighten caps, clean the area, and log the date, location, and any observations for future maintenance. Why: a clear maintenance log speeds future inspections and reduces guesswork. Pro tip: consider a mesh screen to prevent future debris buildup.
-
Optional follow-up: schedule seasonal checks. If your home has heavy tree cover or irregular rainfall, plan annual or semi-annual cleanouts to prevent surprises. Why: proactive care reduces the risk of costly backups and water damage. Pro tip: pair with leaf guards or downspout extensions to keep debris out of the underground run.
Tools & Materials
- Gutter drain snake / auger(Choose a coil size compatible with buried pipes (1/4 to 1/2 inch thick wire; 1.25–1.5 inch diameter))
- Garden hose with adjustable nozzle(Use a controlled spray to flush without causing backflow)
- Protective gloves(Nitrile or rubber; ensure a good grip)
- Safety goggles(Eye protection against debris and splashes)
- Flashlight or headlamp(Bright, hands-free lighting preferred)
- Ladder with stabilizers(Choose a ladder height that keeps you off the wet ground)
- Mesh screen or drain cover(Prevents future debris from entering the line)
- Trash bucket or bag(Contain debris for disposal)
- Breathing mask (dusty)(Optional for dusty or moldy conditions)
- Camera or smartphone for notes(Document access points and findings)
Steps
Estimated time: Total time: 2-4 hours
- 1
Identify the cleanout access
Locate the cleanout cap or access point and plan the route to the main line. Checking existing diagrams or the house plan helps you avoid unnecessary digging. Ensure you have a safe exit path before starting.
Tip: If you can't locate a cleanout, do not improvise a new entry; contact a pro for safe access. - 2
Prepare PPE and set up area
Put on gloves, goggles, and sturdy footwear. Position your ladder securely and keep children/pets away from the work zone for safety.
Tip: Have a helper assist with deep or awkward positions. - 3
Open cleanout and inspect
Gently loosen the cap and listen for air movement or backflow signals. Look for visible debris and assess how far the clog might be.
Tip: Use a small camera on a flexible rod to inspect the interior without entering fully. - 4
Clear the blockage with a snake
Insert the snake and slowly rotate while advancing; withdraw and reinsert as needed to break apart debris.
Tip: Avoid forcing the snake through solid objects; you may damage the pipe. - 5
Flush and test drainage
Reconnect cap and run water through the line from the upstream end. Observe flow and confirm no backups occur.
Tip: Start with a gentle flow and increase gradually to prevent pressure shocks. - 6
Secure access and document
Tighten the cap securely, clean the area, and note the date, location, and any anomalies for future reference.
Tip: Add a leaf guard or protective screen to reduce future debris entry.
Common Questions
What is underground gutter drain cleaning and why is it important?
Underground gutter drain cleaning removes debris from buried drainage lines to prevent backups, leaks, and damage. Regular cleaning protects your home from water damage and pests and keeps the drainage system functioning properly.
Underground gutter drain cleaning removes debris from buried drainage lines to prevent backups and damage. Regular cleaning protects your home from water problems and pests.
Is this a DIY job or should I hire a pro?
For simple blockages in accessible cleanouts, a careful DIY approach can work with proper safety gear. If access is restricted, you encounter sewer gas, or the layout is complex, hire a professional.
It can be a DIY job if you can safely access the cleanout, but for complex layouts or risk of sewer gas, call a pro.
What are the signs that underground drains are blocked?
Look for slow drainage, backups in gutters or downspouts, damp areas near the foundation, or gurgling sounds in the piping. These indicate a partial or full blockage requiring attention.
Slow drainage, backups, damp spots, or gurgling sounds are signs your underground drain may be blocked.
What tools are essential for this task?
A drain snake or auger, a garden hose with adjustable nozzle, PPE, flashlight, and a secure ladder are essential. Depending on setup, you may also need a camera for inspection.
You’ll need a snake, water hose, PPE, a flashlight, and a sturdy ladder.
How often should underground gutter drains be cleaned?
Frequency depends on climate and tree cover. Many homes benefit from annual or biannual checks, with additional reviews after major storms.
Annual or biannual checks are common, especially after heavy storms.
Watch Video
Key Points
- Plan before you pull the tool, not after
- Use the right tool for the right access point
- Flush and test before finishing
- Document maintenance for easier future checks
- Prevent future clogs with guards and proper routing