How to Unclog a Clean-Out Drain
Discover a proven, step-by-step method to unclog a clean-out drain safely. This Unclog Drain guide covers essential tools, techniques, tips, and prevention for future clogs.

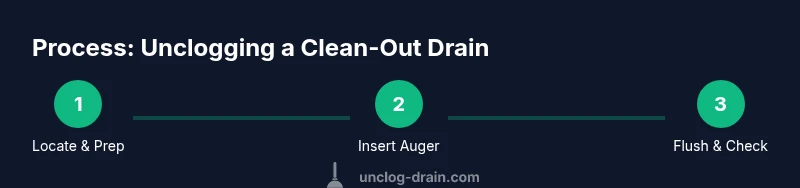
With this guide, you’ll safely unclog a clean-out drain using common tools and a DIY approach. You’ll locate the access, remove the cap, and use a drain auger or snake to break the clog, then flush the line and reseal. Gather gloves, goggles, a bucket, and a flashlight, and follow the step-by-step process.
Why the clean-out drain matters
If you’re facing a clog, knowing how to unclog clean out drain is a practical skill for homeowners. The clean-out access point gives a direct route to clear blockages in the main line, helping you avoid messy overflows. According to Unclog Drain, clean-out drains are designed to be a quick entry point to clear blockages without removing fixtures. In many homes, these access points are placed near foundations or in basements, behind removable plates, or in crawl spaces. Understanding its purpose helps you act quickly and minimize disruption when a backup occurs. Using the clean-out properly can save time and reduce the need for invasive pipe work, which is especially valuable on busy weekends.
Safety and prep before you start
Safety should never be skipped when dealing with a clean-out drain. Sewer gases, pressurized water, and slippery surfaces can cause injuries if you rush. Ventilate the area and wear protective gear: sturdy gloves, safety goggles, and closed-toe shoes. Keep kids and pets away, and have a bucket ready to catch water and debris. If the line might connect to a septic system, avoid harsh cleaners that could upset the microbial balance. A clear workspace reduces the chance of slips, splashes, or accidental contact with contaminated water. Take a moment to plan and check local codes for any special instructions tied to your clean-out type.
Tools and supplies you’ll need
Before you begin, assemble essential tools and materials so you don’t have to pause mid-work. A hand-held drain auger (snake) long enough to reach the blockage, a sturdy adjustable wrench, a flashlight, a bucket, and rags are the core setup. Optional items include pliers for cap removal, a putty knife to check for debris around the cap, and an enzyme-based cleaner for ongoing prevention. Keep extra towels handy and protect the floor with plastic. Having the right toolkit reduces downtime and helps you work confidently through each step.
Understanding the clean-out access: where is it located and what to expect
The clean-out is a built-in access point to the main line, often located outside near the foundation, in a basement utility area, or behind a crawl-space plate. When you remove the cap, you may feel a rush of air or water flow, indicating the line is under pressure or recently used. If the cap is stubborn, apply penetrating oil and wait a few minutes before loosening. Don’t force the cap or the auger; forcing can damage threads or pipes. The goal is to gain access safely and establish a clear path for the auger without introducing leaks.
Step-by-step overview of the unclogging approach
The approach blends mechanical clearing with careful flushing to restore flow. Start by preparing the workspace and loosening the cap, then feed the auger into the pipe until you encounter resistance. Rotate the handle to break up the clog and pull back debris as you go. Extend or reinsert as needed until you observe water moving more freely. Finally, flush with clean water and run a fixture to confirm proper drainage. Avoid chemical cleaners in the clean-out unless you’re following a manufacturer’s guidance and fully understand the pipe materials involved.
Using a drain auger (snake) inside the clean-out
Insert the auger carefully into the clean-out until you reach the blockage. Start cranking the handle to feed the snake, using steady, controlled pressure. When you hit the clog, rotate to help the head break through, then retract slightly to pull debris away. Repeat gentle reinsertion and rotation as needed until the line clears. If you meet persistent resistance, pause and reassess—there may be a longer stretch of piping or a stubborn obstruction that requires alternate methods or professional help.
Alternative methods if the auger can't reach the clog
If the auger can’t clear the blockage, consider longer tools or different approaches. A longer manual snake or a professional power auger can reach deeper obstructions, but they carry a higher risk of pipe damage if used incorrectly. A camera inspection can pinpoint location and severity, guiding your next steps. In some scenarios, the blockage lies beyond the clean-out, and attempting further DIY fixes could worsen the situation. When in doubt, contact a plumber for a safe, thorough resolution.
Chemical cleaners: risks and safer alternatives
Chemical drain cleaners might seem convenient, but they pose risks in a clean-out—especially if the line leads to a septic system or a metal pipe. These products can corrode pipes or create hazardous fumes. If you choose chemical options, select products compatible with your pipe material and strictly follow the label. Safer alternatives include mechanical clearing with a snake, or enzymatic cleaners used as preventative maintenance rather than a primary unclogging method. Enzymes help maintain free-flowing pipes when used regularly as part of a maintenance plan.
Post-cleanout checks and maintenance checklist
After clearing the clog, recap the clean-out and wipe away residue. Run water through nearby fixtures to verify steady drainage, listening for unusual sounds or gurgling. Check for leaks around the cap and along exposed piping. To prevent future clogs, implement a maintenance routine: strainers on sinks, avoid disposing of grease down drains, and consider periodic enzymatic treatments to nurture a healthy biofilm in the pipes. Documenting what you did helps with future DIY attempts and improves outcomes over time.
Maintenance to prevent future clogs
Prevention is easier than repeated clearing. Schedule periodic inspections of your main drain lines and adopt a clog-prevention routine: install strainers in all sinks, avoid pouring fats and solids down the drain, and run hot water to flush residues at the end of each day. Consider a monthly enzyme digest to support beneficial bacteria in the pipes and a yearly check of the clean-out caps for tight seals. Regular care reduces surprises and extends the life of your drainage system.
When to call a professional plumber
If the clog persists after a thorough self-help attempt, or you notice sewage odors, leaks, or backups across multiple fixtures, stop DIY work and contact a licensed plumber. A professional can perform a camera inspection, accurately locate the blockage, and propose solutions that minimize risk to your home. The Unclog Drain Team recommends seeking professional help when you’re unsure about pipe conditions or if backup appears to be a broader plumbing issue.
Tools & Materials
- Rubber gloves(Non-slip, size medium or larger)
- Safety goggles(Protect eyes from splashes and debris)
- Flashlight(Bright LED, hands-free preferred)
- Bucket(Catch water and debris)
- Drain auger / plumber's snake(Manual 3-6 ft or longer depending on pipe length)
- Adjustable wrench(Loosen cap or fittings if needed)
- Channel-lock pliers(Helpful for stubborn caps)
- Old towels or rags(Cleanup and protect surfaces)
- Plastic sheeting(Contain spills)
- Penetrating oil(Loosen seized caps; use sparingly)
- Enzyme-based cleaner (optional)(For ongoing maintenance, not for immediate unclogging)
Steps
Estimated time: 60-90 minutes
- 1
Locate the clean-out access and prepare the workspace
Identify the clean-out cap location, clear the area, and place a bucket to catch spills. This first step minimizes splashes and ensures you can work safely when you remove the cap. Check for any nearby fixtures that could release water once the cap is removed.
Tip: Have a flashlight ready and plan exit routes in case water begins to flow. - 2
Remove the clean-out cap safely
Wrench the cap counterclockwise to loosen it while keeping hands away from the opening. If the cap binds, apply penetrating oil and wait a few minutes before retrying. Lay the cap aside on a clean, dry surface.
Tip: Never pry the cap with a hammer or force it abruptly; this can damage threads. - 3
Insert the auger and start feeding it slowly
Gently push the auger into the pipe until you feel resistance. Begin turning the handle to feed the head forward, applying steady, modest pressure rather than forcing it. The goal is to reach the clog without bending the pipe.
Tip: Keep the auger aligned with the pipe to avoid scraping the interior wall. - 4
Rotate and work the line to break up the clog
Continue rotating as you advance, then pull back slightly to drag debris away from the obstruction. If you meet a stubborn section, pause briefly, then re-enter with a slightly different angle. Clear fragments may appear as you extract the tool.
Tip: Avoid excessive twisting; it can damage fittings or the pipe wall. - 5
Retract and inspect debris
Withdraw the auger slowly and inspect the tip for buildup or entangled material. Remove debris with gloves or a rag before proceeding. If debris remains, repeat steps 3–4 once more to ensure the clog is fully cleared.
Tip: Dispose of waste in a labeled bag to prevent contamination elsewhere in the home. - 6
Flush the line and test drainage
With the cap still off, flush the line using clean water or a hose if available. Check for smooth drainage by running water from a nearby fixture. If flow is consistent, move to the next step; if not, re-run the auger or seek professional assistance.
Tip: Use a controlled flush to avoid a sudden surge that could cause an overflow. - 7
Reinstall the cap and cleanup
Secure the clean-out cap hand-tight, then snug it with a wrench. Wipe away any splashes and store tools properly. Verify no leaks around the cap once water is run again.
Tip: Document the date of maintenance and any observations for future reference.
Common Questions
What is a clean-out drain and where is it located?
A clean-out is a capped access point to the main drain line that lets you clear blockages without removing fixtures. It’s commonly located near foundations outside, in basements, or behind access plates in crawl spaces. Identifying its location helps you act quickly during a backup.
A clean-out is an access point to your main drain, usually found outside or in a basement. It lets you clear blockages directly.
Can I use chemical drain cleaners in a clean-out?
Chemical cleaners can be hazardous to pipes and septic systems and may cause fumes to back up through the clean-out. Mechanical methods like a drain auger are generally safer for the clean-out. If using any chemical product, follow the label exactly and consider the pipe material.
Chemicals can damage pipes or septic systems, so use mechanical methods first and follow the label if you choose a cleaner.
What tools do I need to unclog a clean-out drain?
Key tools include a drain auger or snake, gloves, safety goggles, a flashlight, a bucket, and an adjustable wrench. Optional items are pliers, rags, and enzyme-based cleaners for maintenance rather than immediate unclogging.
You’ll want a drain auger, gloves, goggles, a flashlight, and a bucket at minimum.
What should I do if water backs up after opening the clean-out?
Stop and assess. Do not force the auger further if you feel resistance. If backups persist, shut off nearby fixtures to minimize spread and consider calling a plumber if the clog remains unresolved.
If water backs up, don’t push harder. Stop and reassess, then seek help if needed.
When should I call a plumber?
Call a plumber if the clog persists after a thorough DIY attempt, if you smell sewage, or notice leaks. A professional can perform camera diagnostics and provide a long-term solution with less risk to the home.
Call a plumber if the clog won’t clear or if you notice sewage smells or leaks.
Is it safe to use a power auger for a clean-out?
Power augers can reach deeper clogs but carry a higher risk of pipe damage. Use them only if you have proper training and the right equipment, and consider professional assistance for deeper installations.
Power augers work but can damage pipes; use them with caution or call a pro.
Watch Video
Key Points
- Identify the clean-out access before starting
- Use a drain auger to clear the clog safely
- Flush and test drainage after clearing
- Prevent future clogs with routine maintenance