Main Line Drain Cleaning: A DIY Guide for Homeowners
Learn how to safely clean the main line drain with step-by-step methods, the right tools, and best-practice tips to prevent backups, protect your pipes, and keep your plumbing flowing.

By the end of this guide, you’ll be able to identify signs of a blocked main line, choose the right cleaning method, and safely perform a main line drain cleaning that reduces mess and prevents pipe damage. You’ll learn when to call a pro, what tools to use, and how to minimize waste and backflow risk.
What is the main line drain and why it matters
Your home’s main line drain is the primary conduit that carries wastewater from all fixtures toward the municipal sewer system or a private septic field. When this line slows or backs up, every sink, tub, and toilet can drain slowly or gurgle, and wastewater may pool in basins or near floor drains. According to Unclog Drain, blockages in the main line are often the result of a mix of tree roots, grease, and accumulated debris that gradually constrict flow. Because the main line is typically buried beneath concrete or exterior walls, access is usually gained via a cleanout or a toilet flange. Understanding this helps homeowners act quickly to prevent sewage backups, foul odors, and potential mold growth. Keeping the main line clear safeguards the entire plumbing system and preserves home value.
Signs of a main line blockage and when to intervene
Recognizing early signs can prevent a full-blown backup. Slow drains in multiple fixtures, frequent sewage odors, gurgling sounds, wastewater backing up into sinks or toilets, or damp spots around floor drains suggest a main line issue. If several drains are sluggish at once, avoid flushing large amounts of water and avoid pouring grease down any drain. Early intervention minimizes damage and costly repairs. In some cases, the problem is rooted in external conditions like tree roots or seasonal ground shifts, which require professional assessment for safety and long-term solutions.
Choosing the right approach: manual, mechanical, or hydro jetting
DIYers have three main options: manual augers (plumbing snakes), powered mechanical snakes, and hydro jetting. Manual snakes are best for shallow blockages or localized debris; mechanical snakes reach deeper into the line but require careful handling to avoid pipe damage. Hydro jetting offers a powerful clearing method using high-pressure water but should be performed by a trained technician to avoid pipe damage or moisture intrusion. For most residential main lines, starting with a manual auger and reserving hydro jetting for persistent issues is a prudent strategy. Always avoid harsh chemical drain cleaners for the main line, as they can damage pipes and septic systems.
Safety, waste handling, and environmental considerations
Working on the main line involves exposure to sewage, so PPE is essential. Wear gloves, eye protection, and long sleeves; keep pets and children away. Use a bucket and towels to control spills, and never mix cleaners with other chemicals. If you have a septic system, consider its health; aggressive chemicals can disrupt beneficial bacteria. Dispose of debris in accordance with local regulations, and wash hands thoroughly after the job.
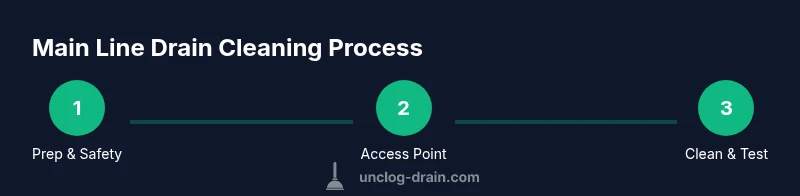
Step-by-step overview for context (no duplicate steps)
This section provides a high-level workflow to complement the detailed steps below. Start with safety gear and area preparation, gain access to the main line via the cleanout or toilet flange, insert the auger and work carefully to break up the blockage, then flush the line to verify flow. Expect multiple passes if needed and always document results for future reference.
Aftercare and prevention: keeping main lines clear
Once the main line is clear, flush with warm water and watch for steady flow from fixtures. Establish a maintenance routine: avoid flushing non-dispersible items, direct grease to the trash, and periodically inspect exterior cleanouts. Consider root barriers or annual camera inspections for older homes. The goal is proactive prevention rather than reactive fixes. The Unclog Drain team emphasizes consistency: small, regular checks prevent big disruptions and extend the life of your plumbing.
Authority sources and further reading
To support DIY decisions, refer to authoritative resources that cover safe wastewater handling, plumbing best practices, and sewer system maintenance. The EPA provides general guidance on wastewater safety, while university extension programs offer practical, home-focused advice on maintenance and prevention. These sources add depth to any DIY approach and help homeowners make informed decisions.
Tools & Materials
- Manual drain snake (auger), 3/8 inch diameter(60–100 ft length recommended for main line access; ensure the coil can reach the cleanout or toilet flange)
- Toilet auger (optional for toilet flange access)(Use only if accessible without harming the toilet seal)
- Protective gloves (rubber or nitrile)(Waterproof and chemical-resistant; snug fit)
- Safety goggles(Protect eyes from splashes and debris)
- Flashlight or headlamp(Inspect the access point and line with good lighting)
- Bucket or container(Contain wastewater and debris; have towels handy)
- Rags or towels for cleanup(Keep the work area dry and safe)
- Enzymatic or bacteria-based drain cleaner (optional, for maintenance)(Use sparingly and only after the line is clear to prevent re-blockage)
Steps
Estimated time: 45-90 minutes
- 1
Prepare safety gear and area
Put on gloves and eye protection. Clear the work area of children and pets. Lay towels to catch any drips and have a bucket ready for debris. This minimizes exposure to sewage and keeps the workspace organized.
Tip: Double-check that you have the correct PPE and avoid rushing the setup. - 2
Access the main line cleanout or toilet flange
Locate the cleanout cap or the toilet flange access point. Remove the cap slowly to prevent a burst of backflow; place a rag to block immediate spray and prepare to manually inspect the opening. This lets you assess how far the line is open before inserting the auger.
Tip: Never force the cap if it’s stuck; apply moderate turning pressure and use lifting flicks to avoid stripping threads. - 3
Insert the auger and feed into the line
Insert the auger into the access point and feed it gently toward the blockage. Rotate the handle clockwise as you push, allowing the wire to bend around curves and break up debris. Stop if you meet strong resistance that doesn’t yield after a few inches.
Tip: Maintain steady pressure and avoid forcing the tool through a hard obstacle; back off if you encounter resistance. - 4
Retrieve debris and reattempt as needed
Withdraw the auger slowly while continuing to rotate to pull debris back toward the access point. If you feel surrendering resistance, reinsert and advance again in small increments. This helps to gradually clear the line without damaging pipes.
Tip: Take short, controlled passes rather than forcing extended runs in one go. - 5
Flush the line and test flow
Run warm water from fixtures to flush the line and observe whether drainage returns to normal. If water still backs up or drains slowly, repeat the auger passes or set aside for a professional inspection if needed.
Tip: Document results and ensure the area is fully dry after testing; avoid running large volumes of water if the line is still suspect.
Common Questions
Do I need to hire a professional for main line drain cleaning?
Many homeowners can handle basic main line cleaning with a manual drain snake and careful technique. However, persistent clogs, repeated backups, or accessibility issues (like a difficult cleanout) may require a licensed plumber with specialized equipment.
For many clogs, a DIY approach works, but consult a pro if the blockage persists or access is poor.
What are common signs of a main line blockage?
Multiple fixtures draining slowly, gurgling sounds, sewage odors, or backups into sinks and toilets often signal a main line issue. Prompt action reduces damage and cleanup costs.
Look for slow drains in different rooms and unusual sewage smells.
Can hydro jetting damage plumbing?
Hydro jetting can clear stubborn blockages but should be performed by trained professionals on the right pipe types. Incorrect use can damage pipes and lead to leaks.
Hydro jetting is effective but must be done by an expert to avoid damage.
What tools are essential for DIY main line cleaning?
A manual drain snake, protective gear, a flashlight, and basic cleanup supplies are essential. A toilet auger can help if the toilet flange is involved.
You’ll need a snake, gloves, goggles, and good light.
Should I use chemical cleaners for the main line?
Chemical cleaners should generally be avoided for the main line because they can damage pipes and septic systems and may not address the root cause of a main line clog.
Chemicals aren’t the best route for main line clogs.
What maintenance prevents future main line clogs?
Regular drain maintenance, proper disposal of grease, and periodic inspections (including camera inspections for older homes) reduce the likelihood of major blockages.
Keep up with small checks and routine cleanouts.
Watch Video
Key Points
- Identify signs early to prevent backups.
- Choose the right tool and use proper safety gear.
- Avoid harsh chemicals on the main line.
- Test flow after each intervention and document results.