How to Unclog a Main Drain: A DIY Guide
Learn practical, safe methods to unclog a main drain at home. This guide from Unclog Drain covers tools, steps, safety tips, and maintenance to fix blockages quickly and prevent future backups.

By the end of this guide you will safely unclog a main drain using a structured, non-destructive approach. Start with basic tools and safe remedies, then progress to mechanical aids, all while observing safety precautions. If blockages persist or odors worsen, consult a professional. Unclog Drain emphasizes avoiding chemical drain cleaners on the main line.
Why unclog main drain matters
Unclog main drain is essential to prevent backups, basement flooding, and foul odors that disrupt daily life. A slow drain on one fixture can signal a broader problem in the home’s plumbing network. By addressing the blockage early, you can reduce the risk of a total sewer backup and costly damage. According to Unclog Drain, quick intervention on a clogged main drain helps preserve pipes and protect your home’s value.
This guide outlines a practical, step-by-step approach homeowners can perform safely, using common tools and clear safety practices. You’ll learn how to prepare, access the main line, and apply a sequence of methods—from basic plunging to mechanical augers—that minimize mess and pipe stress. The goal is to restore steady drainage without triggering leaks or cross-contamination. While some clogs respond to simple methods, others require more thorough clearing or professional assistance. The emphasis throughout is safety, cleanliness, and a plan you can repeat when future blockages arise.
Common causes of main drain clogs
Main drain blockages arise from a mix of routine use and improper disposal. Unclog Drain analysis notes that grease, soap scum, hair, and food waste collected over time are frequent culprits in the home’s primary sewer line. In addition, flushable wipes, sanitary products, and even hair products can contribute when they reach the main stack. Over time, mineral scale from hard water and mineral deposits can narrow pipe sections, especially where sewer lines curve or change diameter. Tree roots can invade older clay or subsoil lines, creating branches that snag debris and slow flow. Understanding these causes helps you select the safest initial method and avoid making the problem worse. Remember that a clogged main drain is usually a symptom of a longer-standing issue in the drainage system, not a single event.
Tools and safety considerations
Before you begin, assemble a clean and dry workspace and put on protective gear: gloves, safety goggles, and a mask if you’re sensitive to sewer odors. A sturdy bucket and plenty of towels help manage spills. The essential tools for unclogging a main drain are a plunger (cup style) and a plumber’s snake or drain auger; these allow you to apply pressure and physically break up the blockage without chemicals. A flashlight helps you inspect the cleanout and see how far the obstruction extends. A screwdriver or adjustable wrench is handy for removing the cleanout cover, if required. Optional items like a wet-dry vacuum, enzyme-based cleaners, or a garden hose with a spray nozzle can support cleanup and post-clearance maintenance. Do not mix chemical cleaners with mechanical methods, and never pour hot water into a blocked septic system unless you’re certain of pipe compatibility. With the right PPE and a clean workspace, you reduce the risk of splash injuries and exposure to sewage.
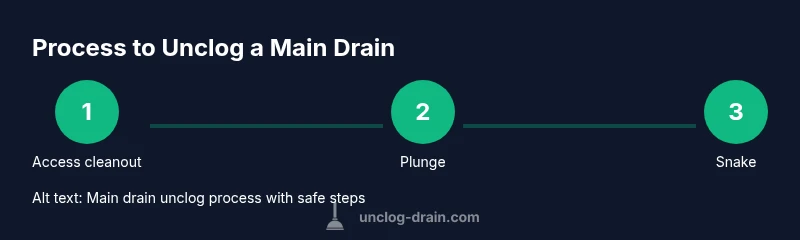
Step-by-step overview (non-destructive first)
The general approach to unclogging a main drain prioritizes non-destructive methods to protect pipes and seals. Start by gaining access to the cleanout and assessing how the blockage behaves: does water back up into one fixture, or is flow blocked across multiple drains? Begin with mechanical methods—plunging and gentle agitation—before attempting more invasive techniques. If you use a plunger, ensure a tight seal around the opening and work with controlled, firm strokes to avoid pushing debris deeper. If the clog resists, switch to a plumber’s snake, feeding it slowly while turning the handle to grab and break up material. After dislodging debris, slowly flush the line with hot water or a mild, enzyme-based cleaner to help clear remaining residue. Finally, test by running several fixtures at once to confirm flow has returned. Throughout, document any changes in flow and odors to help a professional diagnose persistent issues in the future.
Aftercare and maintenance tips
Once you’ve restored drainage, take steps to prevent future main drain clogs. Regularly schedule a light maintenance routine that includes flushing with hot water (careful with temperature and pipe type), avoiding flushables not designed for sewer lines, and using enzyme-based cleaners to support natural digestion of organic material. Keep drain covers clean and free of grease that could bleed into the stack. If your lifestyle produces a lot of kitchen grease, consider a grease trap or pour-no-grease method to keep fats from entering the main line. Observe how quickly drains respond after heavy usage, like during dishwashing or showering, and adjust waste disposal habits accordingly. Finally, maintain documentation of blockages and remedies to help future DIY efforts or provide context to a professional if you need a service call. The goal is not just to clear a single clog but to reduce the chances it recurs and to know when to escalate to a plumber.
Tools & Materials
- Protective gloves(Rubber or nitrile; ensure a comfortable fit)
- Safety goggles(Protect eyes from splashes)
- Plunger (cup plunger)(Cup plunger with flat rim)
- Drain snake / auger(Manual or drill-powered)
- Bucket(To collect wastewater)
- Towels/rags(Old towels for cleanup)
- Screwdriver or wrench(To remove cleanout cover)
- Flashlight(Illumination for dark spaces)
- Enzyme-based cleaner(Use after clearing to maintain)
- Wet-dry vacuum(Optional for spills)
Steps
Estimated time: 45-90 minutes
- 1
Prepare and access
Put on protective gear. Locate the main cleanout and turn off the closest water source if accessible to prevent backflow. Remove the cleanout cover carefully and inspect for obstructions.
Tip: Have a rag ready; water may spill when the cover is removed. - 2
Clear workspace
Place a bucket under the area, clear nearby obstacles, and ensure good lighting. This keeps the work area safe and reduces the risk of drops and splashes.
Tip: Keep a second bucket handy for collecting debris. - 3
Plunge the access
Seal the opening around the plunger and give several firm, controlled pushes to create pressure and dislodge the clog.
Tip: Avoid excessive force to prevent pipe damage. - 4
Use a drain snake
Insert the snake into the cleanout and rotate while pushing forward to break up blockage. Retract slowly to pull out debris.
Tip: Keep the snake straight to avoid kinking. - 5
Flush and test
Run hot water gradually to flush dislodged material. Check other fixtures; if water drains slowly, repeat the snake approach.
Tip: Do not use boiling water if pipes are PVC; check manufacturer guidance. - 6
Escalate if needed
If the main drain remains sluggish after repeated attempts, document the blockage and plan for a professional inspection.
Tip: Note odors, water level, and times to share with a plumber.
Common Questions
What is the main drain?
The main drain is the home's primary sewer line that collects wastewater from all fixtures. It feeds into the municipal sewer or septic system. Understanding its location helps target blockages safely.
The main drain is your home's main sewer line, and it collects wastewater from all fixtures.
Can I use chemical drain cleaners for a main drain?
Avoid chemical cleaners on the main line. They can damage pipes and interact with septic systems. Use mechanical methods or enzyme-based solutions instead.
Avoid chemical cleaners on the main drain; they can damage pipes.
Is it safe to use a plumber's snake on the main line?
A plumber's snake can be effective, but use caution. Avoid forcing the tool through bends and backflow risk. If you meet strong resistance, stop and reassess.
Yes, with caution; don’t force the snake through tight bends.
When should I call a plumber?
Call a plumber if the clog persists after multiple attempts, if you notice sewer backups, or foul odors. Professional help helps prevent pipe damage and ensures the issue is resolved.
Call a plumber if it stays clogged after several tries or you have backups.
What safety precautions should I take?
Wear protective gloves and goggles, ventilate the area, and avoid mixing cleaners. Keep kids and pets away from the work area and never force tools into the main line.
Wear gloves and goggles, and keep the area clear of kids and pets.
Will hot water help?
Hot water can help flush loose debris after a blockage is cleared. Do not use boiling water on PVC pipes without confirming compatibility.
Hot water can help flush things out, but avoid boiling water for PVC pipes.
Key Points
- Assess blockage safely before any tool usage
- Start with non-destructive methods (plunger) before augers
- Inspect and access the main cleanout correctly
- If unresolved, call a professional promptly