DIY Unclog Drain: A Practical Step-by-Step Guide
Learn a safe, step-by-step approach to unclog drains using common tools. This guide covers diy unclog drain techniques, safety tips, and prevention strategies for homeowners.

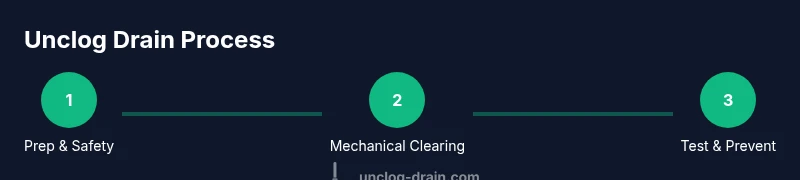
By following this guide, you will diagnose a clog, prepare safely, and clear most common drains using basic tools. You’ll start with a plunger, then progress to a hand auger or snake, and optionally use baking soda and hot water for a gentle flush. According to Unclog Drain, a calm, methodical approach minimizes damage and boosts success.
Why diy unclog drain matters
A diy unclog drain project is often doable with household tools and a clear plan. This approach saves money, teaches homeowners practical skills, and reduces the downtime of essential sinks. Framing the task as a hands-on project also boosts confidence and helps you understand how your plumbing works. The phrase <em>diy unclog drain</em> reflects a practical, hands-on approach that keeps leaks and damage to a minimum when done safely.
This approach aligns with safety guidance from Unclog Drain and emphasizes mechanical methods first while deferring to professional help when hazards or complexity rise. A calm, methodical plan reduces messy spills and prevents rushed decisions that could damage pipes or traps. Keep a clear workspace, shut off water as needed, and work in well-lit areas to stay in control throughout the process.
Understanding your clog type—whether it’s a kitchen sink, bathroom sink, or shower drain—helps you choose the right method. Some clogs respond quickly to plunging, while others require a snake or trap cleaning. By recognizing the differences, you can tailor your approach and minimize unnecessary steps.
Common causes of residential clogs
Most residential clogs originate from everyday use. Hair, soap scum, and toothpaste build up in bathroom drains; grease, coffee grounds, and food particles accumulate in kitchen lines. In showers, mineral deposits and body oils can contribute to slow drainage. Foreign objects accidentally flushed down toilets can cause stubborn blockages. Understanding these causes helps you select the right technique—mechanical clearing first, and only then chemical options if appropriate.
A well-maintained drain line often resists clogs longer than one that’s neglected. Regular inspection and preventive habits—such as using strainers, avoiding pouring grease down the drain, and flushing with hot water occasionally—can dramatically reduce emergency calls. The goal is to keep the line clear enough to avoid full backups that require professional intervention.
Tools & Materials
- Cup plunger (sink/ toilet if needed)(Choose a bell-shaped plunger for sinks; a flange plunger for toilets.)
- Handheld drain snake or auger(A flexible snake helps reach blockages beyond the trap.)
- Bucket(Use for catching water and debris.)
- Gloves(Waterproof gloves protect skin from contamination.)
- Safety goggles(Protect eyes from splashes.)
- Rags or towels(Contain spills and keep area clean.)
- Adjustable wrench or slip-joint pliers(Useful if you remove the P-trap.)
- Hot water(Keep a kettle or pot handy for quick flushes.)
- Baking soda and white vinegar (optional)(Gentle, non-chemical flush alternative.)
Steps
Estimated time: 45-60 minutes
- 1
Inspect and prep safety
Before touching the drain, shut off the water supply if needed, gather your tools, and put on gloves and goggles. Clear the area of belongings that could get wet, and place a bucket under the trap if you plan to remove it. This step reduces mess and protects you from contact with potentially contaminated water.
Tip: Wear eye protection even if you’re focusing on a simple plunge to avoid splashes. - 2
Gather essential tools and materials
Lay out your plunger, snake, bucket, and towels within easy reach. If you’re removing the P-trap, have the wrench ready and an old towel to catch any residual water. Confirm you have hot water available for a flush after clearing the clog.
Tip: Keep a spare towel handy for a quick cleanup after finishing each step. - 3
Plunge with proper technique
Seal the overflow (if applicable) and ensure the plunger cup is fully covered by water. Use strong, steady pushes to create air pressure that dislodges the clog. If water begins to drain, continue plunging for 15-30 seconds then pause to check results.
Tip: Maintain a firm seal and avoid pounding; gentle, consistent pressure often works best. - 4
Operate a hand auger to reach deeper blockages
Insert the snake into the drain and turn the handle clockwise to feed it into the pipe. When you feel resistance, rotate and gently push forward, then retract to pull debris back. Repeat until you feel the blockage break free or are unable to advance further.
Tip: Avoid forcing the snake; slow, deliberate movements reduce pipe damage. - 5
Check the P-trap and clear debris
If the blockage seems near the trap, carefully disconnect the P-trap with an adjustable wrench. Clean out any hair or gunk with a rag, then reassemble. Reconnect water supply and run water to test flow.
Tip: Place a towel under the trap to catch initial spills and prevent a mess. - 6
Flush and test the drain
With the trap reinstalled, run hot water for 60 seconds to clear remaining debris. Re-test with the sink or tub to ensure free flow. If the drain is still slow, repeat steps or move to a professional service.
Tip: Always finish with a verification flush to ensure the line is fully clear.
Common Questions
What is the quickest way to unclog a sink drain?
Most quick results come from a proper plunging technique followed by a handheld auger if needed. Start with a snug seal and steady pressure, then progress to the snake if plunging fails. Avoid harsh chemicals as a first option.
Start with a good plunge, then try a snake if needed; avoid chemicals first.
Can I use baking soda and vinegar to unclog a drain?
Baking soda and vinegar can help with light buildup and maintenance but are not reliable for stubborn clogs. They may loosen debris, allowing water to pass, but often require mechanical methods for a full unblock.
Baking soda and vinegar can help a little, but you’ll likely need a plunger or snake for real clogs.
Should I remove the P-trap to clear a clog?
Removing the P-trap can help clear hair and debris trapped there. Be prepared for residual water and use a bucket. Reassemble carefully to prevent leaks.
Yes, you can remove the P-trap to clear debris, but be prepared for a mess and leaks if not resealed properly.
Is a drain snake safe for toilets?
Toilets require a toilet auger, not a standard snake, to avoid damaging the porcelain. If you’re unsure, consult a pro. Do not force equipment that doesn’t fit.
Toilet clogs need a toilet auger; use the right tool to avoid damaging the bowl.
When should I call a professional plumber?
If the clog recurs after multiple attempts, if you smell sewer gas, or if water backs up into other fixtures, a licensed plumber should assess the system. Persistent backups may require camera inspections.
Call a plumber if the clog keeps returning or you notice sewer gas or backups in multiple fixtures.
Are chemical drain cleaners safe for septic systems?
Many chemical cleaners are not septic-safe and can disrupt beneficial bacteria. If you must use cleaners, choose septic-safe formulas and follow label directions or avoid them altogether for DIY unclog drain situations.
Avoid harsh chemicals in septic systems; they can disrupt the septic bacteria.
Key Points
- Prepare and protect yourself before starting
- Use mechanical methods first for most clogs
- Avoid over-reliance on chemical cleaners
- Test flow after each method
- Prevent future clogs with regular maintenance