How to Unblock a Dishwasher Drain: A DIY Guide
Learn safe, proven DIY steps to unblock a dishwasher drain. This guide covers safety, common causes, tools, step-by-step methods, and prevention tips to restore drainage quickly.

According to Unclog Drain, unblocking a dishwasher drain is a safe, hands-on task you can perform with common tools. The goal is to restore proper drainage by removing clogs, inspecting the drain hose and trap, and flushing the line with hot water. This quick guide outlines key steps, required safety measures, and practical methods to unblock dishwasher drain quickly and safely.
Why dishwasher drains clog and how to unblock dishwasher drain safely
Dishwasher drainage problems happen when food particles, grease, or mineral buildup cling to internal components, or when the drain hose or P-trap is obstructed. Clogs can cause water to back up into the dishwasher or the sink, leading to unpleasant odors and potential leaks. According to Unclog Drain, most drainage issues originate in the filter, hose, or trap assembly, not in the pump itself. By understanding where clogs form, you can choose the most effective approach without resorting to harsh chemicals. This section explains the common culprits and how to approach unblocking the drain safely, using mechanical means and routine maintenance to prevent future incidents. You’ll learn how to spot a clogged filter screen, a kinked drain hose, a blocked P-trap, or a disconnected air gap, and why addressing these points early saves time and water. A deliberate, methodical approach reduces mess and risk while keeping your dishwasher in peak condition. The Unclog Drain team emphasizes patience and organization; rushing through the steps without validating each potential blockage can push the clog deeper or spread debris into the home’s plumbing. Start with the easiest-to-reach areas and move toward deeper components if needed. If you’re unsure, pause and review the safety steps again; nothing beats caution when dealing with electricity and water together.
Safety prerequisites and prep before you start
Safety comes first when unblocking a dishwasher drain. Begin by unplugging the unit if accessible and turning off the circuit breaker to prevent any risk of electric shock. If your dishwasher is hardwired, contact a licensed electrician or switch off the corresponding breaker. Have a plan for spills—place towels or rags around the base and keep a bucket handy. Wear rubber gloves and eye protection as a precaution against splashes. Open the cabinet carefully to avoid pinching hoses. Clear the area so you can work safely without tripping over cords or damp flooring. The prep phase also includes gathering your tools and confirming that you can access the drain connections under the sink or behind a kick panel. A calm, organized prep reduces surprises during the actual unclogging process and aligns with the safety-first advice from Unclog Drain. If you smell burning plastic or notice arcing at the outlet, stop and consult a professional immediately.
Understanding drain components: hose, trap, and air gaps
A dishwasher drain system often includes a pump, a drain hose, a trap or check valve, and sometimes an air gap on island sinks. The drain hose carries wastewater from the dishwasher to the sink or disposal. If the hose is kinked, crushed, or falls below the water line, backflow and slow draining can occur. The P-trap or trap assembly holds water as a barrier against sewer gases, and a clogged trap is a common source of slow drains. An air gap prevents backflow into the dishwasher when you have an island sink. If you notice leaks or a gurgling sound, inspect these parts first. Understanding how these components interact helps you diagnose where the blockage originates and whether you can address it with basic tools or if you need to escalate the task. Unclog Drain notes that most issues relate to the hose and trap rather than the pump itself, so focus your checks there first.
Diagnosing common blockage scenarios
Blockages can form in several places. Screen filters and debris at the bottom of the dishwasher are frequent culprits. A kinked or collapsed drain hose slows or stops drainage. The P-trap may accumulate food particles or soap scum, creating a stubborn clog. If the dishwasher connects to a garbage disposal, ensure the disposal is clear and the knockout plug is removed if this is a new installation. If an air gap exists, inspect for mineral buildup around the cap. A slow drain or standing water after a cycle often points to a trap or hose issue rather than the pump. The Unclog Drain team emphasizes a methodical check of each component, starting at the dishwasher’s interior filter, then moving to hoses, traps, and any system connections to the sink or disposal. Remember to test frequently after each adjustment to isolate the source accurately.
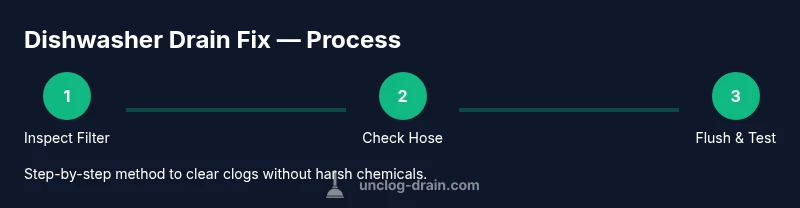
Step-by-step overview of methods (plunger, auger, flushing)
There are several practical methods to unblock a dishwasher drain, depending on the blockage location. Start with mechanical methods—like a plunger or a drain snake—before resorting to flushing with water. Plunging can dislodge shallow clogs near the trap, while a drain auger reaches deeper into the hose or trap. Flushing with hot water helps dissolve grease and soap scum in the hose and trap. Avoid harsh chemical drain cleaners, especially in a dishwasher, as these can damage hoses and the pump. If you face a stubborn clog that doesn’t respond to mechanical techniques, reassess the situation. In some cases, the blockage lies deeper in the plumbing, and professional assistance may be the safer and more effective option. The goal is to restore flow while keeping the system intact. Throughout this process, maintain a clean, dry work area and document every step so you can replicate the method in the future if needed.
Post-cleanup checks, testing, and maintenance
After clearing the blockage, reattach all hoses and filters securely. Run the dishwasher empty on a hot cycle to verify proper drainage and iron out any remaining debris. Check for leaks around the connections under the sink and behind the kick panel. If water drains normally and there are no leaks, you’ve likely resolved the issue. If water still backs up or you notice a wet area, stop and re-check each connection in the opposite order you inspected it. Clean the filter and interior parts, and wipe the area dry. Keeping a routine maintenance schedule—cleaning filters monthly, inspecting hoses every few months, and avoiding large food scraps—helps prevent future blockages. The Unclog Drain team recommends documenting the checks so you can track the symptoms and timing of blockages, which makes future DIY attempts quicker and more confident.
Prevention: tips to avoid future clogs and maintenance routine
Preventive care reduces the likelihood of future clogs. Regularly clean the dishwasher filter and check the spray arms for obstructions. Use a strainer in the sink above the disposal to catch particles before they reach the dishwasher hose. Periodically flush the drain line with hot water to dissolve buildup, and avoid pouring grease or heavy food items down the drain. Ensure the drain hose has a proper slope and is not kinked or crushed. If you have a garbage disposal, run it periodically to keep the connection clear and check the knockout plug is removed if applicable. A simple yearly inspection of hoses, clamps, and connections can prevent expensive repairs. The Unclog Drain team reiterates that prevention is easier than recovery, and small, consistent maintenance is the best long-term strategy.
Tools & Materials
- Rubber gloves(Protect hands from debris and sharp edges)
- Bucket(Catch water and keep the work area clean)
- Flashlight(Bright light for inspecting under the sink and inside panels)
- Old towels or rags(Mop up spills and protect flooring)
- Plunger (flat or accordion)(Dislodge clogs in the drain line)
- Drain snake / auger (48–60 inch)(Reach deeper into the drain line to break up clogs)
- Screwdriver or pliers(Disconnect hoses or clamps if needed)
- Dish soap (mild)(Lubricate hoses during removal if needed)
- Kettle or pot for hot water(Provide hot water for flushing after clearing)
Steps
Estimated time: 60-90 minutes
- 1
Power down and prep
Power down the unit by unplugging it if accessible, and switch off the circuit breaker to the dishwasher. Clear the work area and wear gloves. This reduces the risk of shock and keeps things sanitary while you inspect the internal components.
Tip: Always confirm the power is off at the outlet or breaker before opening the panel. - 2
Access the drain area
Open the lower front panel or kick panel, depending on your model. Remove the filter and lay towels around the base. A flashlight helps you inspect for visible debris and where the clog begins.
Tip: Take pictures as you go so you can reassemble correctly. - 3
Remove visible debris from the filter
Carefully pull out any food particles, soap scum, or debris from the filter and sump area. Rinse the pieces with warm water before returning them to their place. This often resolves shallow clogs quickly.
Tip: Do not force debris; use gloves to handle buildup safely. - 4
Check the drain hose
Trace the hose from the dishwasher to the sink or disposal. Look for kinks, crush points, or disconnections. If accessible, detach a short section to inspect for hair or residue causing a blockage.
Tip: Keep a bucket handy when disconnecting to catch water. - 5
Plunger or drain snake attempt
If the clog isn’t obvious, attempt a plunger on the drain side or use the snake to reach deeper into the hose. Rotate the auger slowly and retrieve any debris.
Tip: Work gently to avoid damaging hoses or clamps. - 6
Flush and test the flow
Reconnect hoses, run hot water into the sink, and start a test cycle on the dishwasher. Look for a steady flow and listen for changes in drainage. If water still pools, move to the auger for a deeper clear.
Tip: Never mix chemicals with the dishwasher drain during testing. - 7
Reassemble and observe
Secure all connections, reinstall the filter, and wipe the area dry. Run a full cycle to confirm drainage is normal and monitor for leaks during the cooldown.
Tip: Keep a close eye on the first post-cleaning run for signs of reuse of debris. - 8
Document and maintain
Note the problem source and the steps taken so you can repeat the process next time. Schedule regular filter cleanings and hose inspections to prevent future clogs.
Tip: A simple maintenance log saves time on future DIY fixes. - 9
Final safety check
Ensure there is no residual water on the floor, and replace any panels or guards safely. If you cannot resolve the issue or you smell gas or see sparking, contact a professional.
Tip: When in doubt about electrical safety, call a pro.
Common Questions
Can I use chemical drain cleaners to unblock a dishwasher drain?
No. Chemical drain cleaners can damage dishwasher hoses and the pump, and they can create hazardous fumes. Use mechanical methods first and resort to professional help if needed.
No. Chemical cleaners can damage the dishwasher; stick to pliers, a plunger, and a drain snake for safe DIY fixes.
Is it safe to unplug the dishwasher or switch off power during maintenance?
Yes. Always unplug the unit and switch off the circuit breaker before opening any panels. This reduces the risk of electric shock while you inspect or disassemble components.
Yes. Turn off power at the outlet or breaker before you begin any work.
What if water still drains slowly after cleaning?
If drainage remains slow, the clog may be deeper in the plumbing or in the disposal connection. Reinspect the hose and trap, consider using a longer drain snake, or call a professional if the issue persists.
If it is still slow, recheck the hose and trap or consider professional help.
Should I remove the dishwasher from the cabinet to access the drain?
Usually not necessary. Access through the kick panel or under-sink area is sufficient. If extensive disassembly is required, consult a professional.
Usually you can access it from underneath; if unsure, call a pro.
How often should I clean the dishwasher drain and filters?
Clean the filter and inspect the drain every 1-3 months, depending on usage. Regular maintenance reduces the chance of stubborn clogs.
Clean the filter every few months to keep clogs away.
Watch Video
Key Points
- Identify the most likely blockage early (filter, hose, or trap).
- Use mechanical methods first and avoid harsh chemicals.
- Test drainage with a hot cycle to confirm clearance.
- Inspect hoses for kinks and traps for buildup regularly.
- Document steps for easier future DIY maintenance.