How to Unclog JP Drain at Home
Learn safe, practical steps to unclog JP drains using common tools. This expert DIY guide from Unclog Drain covers methods, safety, maintenance, and when to call a pro.

By the end of this guide, you will confidently unclog JP drains using common tools, safe methods, and preventative steps. You’ll learn when to try plungers, when to use a drain snake, and how to avoid chemical hazards. According to Unclog Drain, simple, safe techniques beat harsh chemicals for most residential clogs.
Understanding JP Drain Clogs
JP drains can clog for many of the same reasons as standard household drains, but regional habits and pipe configurations sometimes influence how they clog and how you should approach them. In most homes, clogs form when a combination of hair, soap scum, grease, food particles, and mineral buildup accumulates over time. The Unclog Drain Analysis, 2026, indicates that the majority of residential drain jams originate in the trap or lower piping near the fixture, rather than deep in the sewer line. When you tackle a JP drain, start by identifying whether the blockage is in a sink, a tub, or a toilet, as the approach differs. Keep in mind that repetitive clogs often signal a broader drainage issue, such as a vent problem or a partial blockage downstream. A calm, methodical approach yields the best results, and untrained aggressive probing can push the clog further or cause leaks. As you proceed, remember that the goal is to restore flow without damage to seals, traps, or the pipes themselves. In this guide, you’ll discover practical, non-chemical methods first, then safe chemical options only if needed. The Unclog Drain team emphasizes that most home clogs respond to mechanical methods and routine maintenance rather than harsh cleaners.
Safety First: What Not To Do
Skipping safety gear or underestimating the risk of splashback can lead to eye injuries or skin irritation. Never mix chemical drain cleaners with other cleaners or with bleach; reactions can release hazardous gases. Do not apply heat or boiling water to plastic pipes if you’re unsure of the pipe material, as extreme temperatures can warp fittings. Avoid using metal tools that can nick or puncture soft PVC pipes. The Unclog Drain team also warns against using chemical agents as a first line of defense, since they can damage gaskets and seals and may not reach the deepest part of a clog. If you have a septic system, avoid harsh products that can disrupt the beneficial bacteria. Always work slowly, and if you encounter gas or a strong sewage odor, stop and seek professional help. In short, safety and patience are your best allies when addressing JP drain clogs.
Quick Diagnostic Checks
Start with simple checks before you dive in with tools. Look for standing water only in the fixture that’s backing up; a shared trap or vent issues may affect multiple fixtures. Gurgling sounds, slow draining after use, or water backs up into sinks without a clear obstruction are all clues. Check the P-trap under the sink; if you can access it safely, remove any obvious debris by hand with the water off and the stopper out. If you use a camera or a flashlight, look for grease buildup, hair accumulations, or solidified soap scum in the trap arm or near the bend. Note whether the toilet drains slowly or has air in it when flushing, which could indicate vent problems. If you determine that the clog is near the fixture and not in the main sewer line, mechanical methods are usually effective and safer than chemicals. The Unclog Drain team recommends documenting findings to guide your next steps and avoid unnecessary disassembly or damage.
Manual Methods: Plunger and Pipe Snake
Mechanical methods are the first line of attack for JP drain clogs. A cup-style sink plunger or a flange toilet plunger can create suction that dislodges many blockages. If a plunger alone doesn’t clear the drain, a hand-crank drain snake (augur) can break up or hook debris for removal. When using a snake, insert the coil slowly, rotate while advancing, and pull back to bring debris out in short, controlled bursts. Always cover any overflow outlets with a wet rag to maintain pressure and to prevent splashing. Use a bucket to catch water and debris. If you can access the trap, you may need to dismantle the U-bend to clear hair and residue directly. The keys are steady pressure, patience, and keeping the work area clean to avoid recontamination.
Chemical Alternatives: Pros, Cons and Safety
Chemical drain cleaners can be tempting for stubborn clogs, but they carry risks. They may damage PVC or rubber seals, and they often fail to reach deeper blockages. If you choose to use a chemical, follow the product’s instructions exactly, ensure good ventilation, and wear eye protection and gloves. Never mix products, and avoid mixing drain cleaners with baking soda and vinegar, which can cause fizzing and splattering. For septic systems, choose products labeled safe for septic use and avoid harsh oxidizers that disrupt beneficial bacteria. In most residential cases, mechanical methods are safer, more cost-effective, and more reliable for JP drain clogs. If a chemical is used, flush with plenty of clean water afterwards and observe for any leaks or smells that indicate damaged seals.
Step-by-Step Practical Guide (Non-Chemical)
This section expands on the practical, non-chemical workflow for unclogging JP drains. It includes preparing the workspace, choosing the right tool, and performing a sequence of actions designed to restore flow with minimal risk to plumbing components. Start by putting on gloves and safety goggles, then clear the area under the sink or around the toilet. If you’re dealing with a sink, remove the sink strainer to access the drain; for toilets, remove the cap to reveal the toilet flange. Assemble your plunger and/or drain snake, have a bucket ready for water, and place towels to manage spills. Begin with plunging to create suction, then switch to a snake for deeper clearing. After you feel movement or hear the water start to drain, flush with hot water to help dissolve soap scum. Reassemble any parts, run water, and observe for a steady flow. If the clog persists after 30-45 minutes of focused effort, consider moving to a professional service. The goal is to clear the blockage while preserving seals and pipe integrity. The Unclog Drain Team recommends documenting the process for future reference and reviewing routine maintenance to prevent recurrence.
Toilet vs Sink Drains: Differences in Approach
Toilet clogs are often more stubborn due to solids and the toilet trap, while sink drains experience grease and hair buildup. When addressing a toilet, avoid excessive plunging that can crack the porcelain; use a toilet auger designed for toilets. For sinks, a longer snake may be required to reach the elbow in the trap arm. Additionally, ensure you’re using the appropriate plunger type: a flange plunger for toilets and a cup plunger for sinks. If you have a double sink, work with both basins simultaneously to balance pressure. Understanding the distinct access points and trap configurations helps you select the most effective technique for JP drain clogs.
When to Call a Pro: Red Flags
If there is standing water on multiple fixtures, a sewage smell, or if the clog resists mechanical methods after substantial effort, it’s time to call a professional. Recurrent clogs may indicate deeper issues such as a broken pipe, crushed line, or vent problems that require camera inspection and specialized equipment. If you notice slow draining after attempts or if you’re unsure about the pipe material or trap conditions, a licensed plumber can diagnose and repair safely, protecting your home’s plumbing system. The Unclog Drain Team emphasizes that timely intervention can prevent more costly damage and disruption.
Maintenance and Prevention Plan
Preventing clogs is easier than clearing them. Create a simple prevention plan: install a mesh screen in sink drains, wipe grease into the trash instead of the sink, and run hot water for 15-30 seconds after each use in kitchen sinks. Periodically clean the P-trap by disassembling it with water off, removing debris, and reassembling securely. If you have a garbage disposal, run it with cold water, avoid fibrous foods, and pause before turning off to prevent splashing. For bathrooms, brush hair and soap scum from drains, consider a periodic warm-water flush, and use a minimal amount of chemical cleaners when necessary, always following product directions. The Unclog Drain team recommends scheduling a quarterly drain check to catch problems before they become clogs, and using a natural cleaning routine with baking soda and hot water as a preventive measure.
Common Mistakes to Avoid and Quick Wins
Common mistakes include using excessive force on pipes, skipping safety gear, and relying solely on chemicals. Quick wins include keeping a proper plunger on hand, maintaining a clean P-trap, and addressing clogs early before they develop into bigger issues. Be mindful of vent blockages that can cause gurgling and slow drainage; clearing the vent can improve performance across fixtures. Always remove the trap cautiously and prevent debris from falling back into the line. The key is to approach JP drain clogs with a clear plan, appropriate tools, and the right sequence of steps. By following these practices, you’ll save time and reduce the risk of damage to your plumbing system.
Tools & Materials
- Cup-style sink plunger and/or flange toilet plunger(Choose the right type for the drain you’re working on)
- Drain snake / auger (manual)(1/4 to 1/2 inch coil, 3-6 ft length)
- Bucket or large container(To collect water and debris)
- Rubber gloves(At least 3-4 mil thickness)
- Safety goggles(Protect eyes from splashes)
- Towels or rags(Clean up spills)
- Flashlight(Good lighting in under-sink area)
Steps
Estimated time: 60-90 minutes
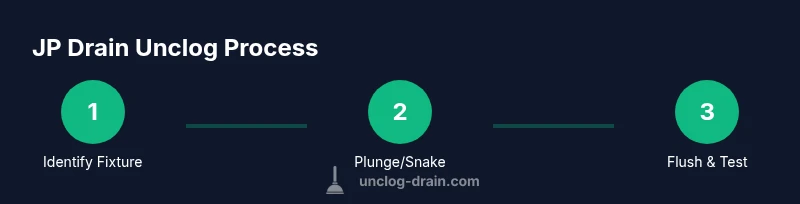
- 1
Prep and safety
Put on safety goggles and gloves. Clear the workspace under the sink or around the toilet. Ensure the area is dry to prevent slips and have a bucket ready for any water that backs up. This prepares you for a controlled, low-risk intervention.
Tip: Check the tool layout before you start so you don’t fumble under the sink. - 2
Identify the drain type
Confirm whether you’re dealing with a sink or a toilet drain. This determines which plunger to use and whether a toilet auger is needed. If you have a double sink, decide whether both sides need simultaneous attention.
Tip: Knowing the drain type prevents unnecessary tool switching. - 3
Clear the immediate area
Remove the strainer or cover if accessible. Clean any obvious debris by hand with the water turned off. This reduces immediate blockages and makes subsequent plunging or snaking more effective.
Tip: Keep debris in a trash bag, not the sink or toilet. - 4
Plunge to create suction
Position the plunger to seal the drain and push and pull with strong, consistent pressure. Maintain the seal and avoid overexerting to prevent leaks. If water doesn’t rise and fall consistently, switch to a different technique.
Tip: Use warm water to help create a better seal if the surface is dry. - 5
Advance with a drain snake
Insert the coil into the drain and rotate the handle while feeding the snake forward. When you encounter a clog, retract and pull out the debris. Repeat cycles until you feel the blockage loosen.
Tip: Keep the snake aligned with the pipe to avoid kinking. - 6
Flush and test the drain
Run hot water for a minute to help dissolve remnants. Re-test drainage by running water slowly, then at full flow to confirm clearance. Observe for gurgling or slow drainage.
Tip: If the water drains slowly, repeat the snake steps instead of forcing more water. - 7
Reassemble and tidy up
Reassemble any trap components and covers. Wipe down the area and store tools properly. Ensure seals are tight to prevent leaks.
Tip: Double-check the P-trap for proper orientation after reassembly. - 8
Protect against future clogs
Adopt simple routines like avoiding grease down the drain, using screens, and flushing hot water weekly. Regular maintenance reduces the likelihood of recurring clogs.
Tip: Establish a short monthly check for slow drains.
Common Questions
What is the first sign of a clogged JP drain?
Common early signs include slow drainage, gurgling sounds, and water backing up in the affected fixture. If you notice multiple fixtures slow or stop, the issue may be deeper in the main line. Addressing early signs with mechanical methods can prevent a larger blockage.
Look for slow drainage and gurgling; if several fixtures are affected, consider a professional check.
Can I unclog JP drain without chemicals?
Yes. Most JP drain clogs respond to mechanical methods like plunging and snaking. Chemicals are optional and may be avoided for safety and pipe integrity. If you try mechanical methods first and the clog remains, you can consider a chemical option carefully following the product instructions.
Mostly yes. Start with plunging and snaking, then consider chemicals only if needed.
How long does it take to unclog JP drain with a plunger?
Time varies with clog depth and fixture type, but a typical plunge attempt can take several minutes. If there’s no improvement after multiple cycles, switch to a snake rather than forcing more plunging.
A few minutes per cycle; if no improvement after several attempts, switch methods.
Is using a drain snake dangerous for JP drain?
A drain snake is generally safe when used correctly, but improper use can scratch pipes or injure you. Keep hands away from the coil and wear gloves. If you encounter significant resistance, stop and reassess.
Used correctly, it’s safe; don’t force the snake and protect yourself.
When should I call a professional for a JP drain clog?
If the clog persists after a thorough mechanical attempt, if you hear sewage smells, or if several fixtures are affected, it’s time to call a licensed plumber. Prompt professional help can prevent pipe damage and protect your home’s plumbing system.
If it doesn’t clear with mechanical methods or you smell sewage, call a pro.
Watch Video
Key Points
- Start mechanical methods first for JP drain clogs.
- Use the correct tool for the fixture (sink vs toilet).
- Safety gear reduces risk of injury during DIY unclogging.
- Prevent future clogs with screens and regular maintenance.
- Call a pro if the clog persists beyond mid-effort.