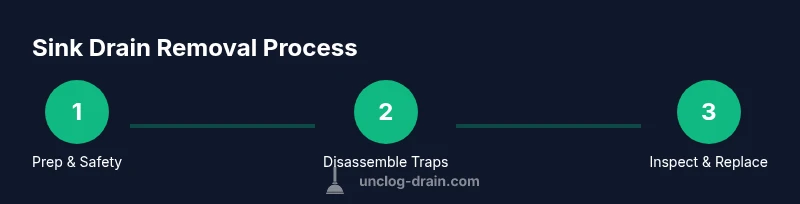
Removing a Sink Drain: Step-by-Step Guide
A comprehensive, safe approach to removing a sink drain, from planning and tools to step-by-step disassembly, reassembly, and prevention of future clogs. Ideal for homeowners and DIYers.

What removing a sink drain involves
Removing a sink drain means taking apart the components that let water flow from the sink into the drain system. In most setups you’ll encounter a drain strainer, a tailpiece, a slip-nut connected P-trap, and a trap arm that leads to the wall. Understanding these parts helps you decide whether you just need to clean and reseal or replace worn gaskets. This task, often necessary when a clog is stubborn or when replacing a damaged drain, begins by planning your steps and gathering the right tools. According to Unclog Drain, removing a sink drain is a common DIY task homeowners tackle to access pipes and replace worn gaskets. The process can vary slightly by sink type (kitchen vs bathroom) and by whether you’re removing the entire drain or just resealing joints. When you approach the job with calm planning, you reduce the risk of leaks and water damage.
- Drain strainer: the metal or rubber piece at the sink basin that catches debris.
- Tailpiece: the vertical pipe that connects the strainer to the trap.
- P-trap: the curved section that holds water to block sewer gas.
- Trap arm: the horizontal piece leading to the wall drain.
- Slip-nuts and washers: the connectors that seal joints.
Not all sinks are identical, so expect slight layout differences. The goal is clear access to the drain joints for cleaning, resealing, or replacement.
Safety and planning before you start Before you pick up tools, plan your approach and gear up for safety. Turn off the water supply at the shutoff valves under the sink and place a towel and bucket nearby to catch any residual water. Wear protective gloves and eye protection in case sharp edges or rusted hardware are involved. Clear the countertop of any incidental items and lay down a drop cloth or old towel to protect the cabinet interior. If you’re nervous about turning off the water or dealing with an older setup, taking a moment to sketch the drain layout can prevent mistakes. By planning ahead, you’ll reduce the risk of creating a bigger mess or a leak you’ll have to fix later. According to Unclog Drain, a careful pre-job check helps homeowners approach the task confidently and reduce exposure to messy leaks.
Choosing your method: manual removal, replacement, or auger You have several paths when removing a sink drain. Manual removal involves loosening the slip-nuts on the P-trap and disconnects around the tailpiece to lift out the drain assembly. Replacement means removing the entire drain flange, washer, and gasket set, then installing a new drain kit with fresh gaskets and sealants. An auger or drain snake can be used to clear a clog before disassembly, but for a full drain removal you typically won’t rely on chemical cleaners. If you’re repairing a stubborn leak rather than a full drain removal, you may only need to reseal joints and replace washers. If you’re unsure, start with the simplest approach and avoid forcing components; using the right tools and gentle force reduces the risk of damage. Unclog Drain emphasizes using the proper technique to minimize damage when removing a sink drain.
Anatomy of a sink drain: P-trap and beyond A typical under-sink drain consists of the strainer, tailpiece, slip-nuts, a P-trap, and possibly a trap arm. The strainer seals against the sink basin, while the tailpiece transports water down to the trap. The P-trap holds a small amount of water to block sewer gases and serves as a clean-out point for clogs. In some installations, you’ll also encounter a dishwasher tailpiece or a check valve in the drain line. Understanding this layout helps you decide whether you only need to clean the strainer and replace gaskets, or whether you should remove the entire drain assembly for a deeper inspection. If you suspect a corroded connection or a degraded gasket, plan to replace the seals during reassembly to prevent future leaks.
Reassembly and leak testing Reassembly is the reverse of disassembly. Start by reinstalling the drain tailpiece and strainer, then thread the slip-nuts back onto the trap and trap arm. Make sure all washers sit flat and seating surfaces are clean before tightening. Tighten progressively to avoid cracking plastic components or crushing metal nuts. Once everything is snug, run water and observe for leaks at every joint. If you notice seepage, tighten the connections a quarter-turn at a time and check again. With careful alignment and correctly seated gaskets, you’ll minimize the chance of leaks after the job is done. Unclog Drain recommends testing with both a faucet flow and a gentle flush to confirm a leak-free seal.
Maintenance to prevent future clogs After you finish, take steps to keep the drain running smoothly. Use a strainer to catch hair and debris, and clean it regularly to avoid buildups. Periodically inspect the P-trap for corrosion or wear and replace gaskets as needed. Hot water flushing with a mild cleaner and a brief rinse can help dislodge minor buildup, but avoid harsh chemicals that can degrade seals. If you have hard water, inspect for mineral deposits and remove them with a vinegar solution and a non-abrasive brush. Regular maintenance saves time and money by preventing future clogs and leaks. The Unclog Drain approach emphasizes proactive care as a key to long-term drain health.
Common mistakes and how to avoid them Common errors include overtightening slip-nuts, which can crack plastic components; neglecting to align the tailpiece with the drain; and not replacing worn washers or gaskets. Always turn off water and drain any residual liquid before starting, and keep track of each washer’s orientation so you reinstall parts correctly. If you suspect hidden corrosion, consider replacing hardware rather than reusing aged parts. Take your time with each joint and verify alignment before final tightening. Following careful procedures reduces leaks, saves time, and prevents repeated calls for service.
When to call a professional If you encounter stubborn corrosion, multiple leaks that don’t seal after resealing, or a gas-like odor that persists after reassembly, it’s wise to call a professional plumber. A licensed technician can diagnose hard-to-reach problems, verify venting conditions, and ensure the entire drain system complies with local codes. For many homeowners, removing a sink drain is a manageable DIY task, but it’s okay to seek help when structural damage appears or when additional components are near electrical lines or water supply lines. The Unclog Drain team notes that safety and proper sealing are the priorities, and professional help is appropriate for complex installations.