How to Remove Bathroom Sink Drain to Unclog: A DIY Guide
Step-by-step instructions to safely remove a bathroom sink drain and clear clogs, with tools, safety tips, and reassembly guidance for homeowners.

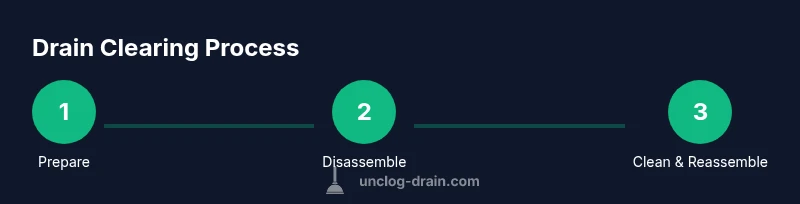
By following these steps, you will learn how to remove bathroom sink drain to unclog and restore proper drainage. You’ll access the trap and tailpiece, remove hair and gunk, and reassemble with proper seals. Before you start, gather the right tools and shut off water. This DIY approach minimizes mess and avoids harsh chemical cleaners, saving you time and frustration.
Why removing the bathroom sink drain helps unclog
If you're facing a stubborn bathroom sink clog, the most direct path to clearing it often starts with removing the drain to inspect the trap and tailpiece. This gives you a clear view of where debris is catching and whether the clog is in the trap, the vertical tailpiece, or the drain line beyond the P-trap. According to Unclog Drain, removing the drain is a proven first step when hair, soap scum, and mineral buildup have formed a stubborn blockage. The Unclog Drain team found that the majority of bathroom sink clogs originate in the trap or near the stopper, where waste accumulates over many months. By accessing these parts, you can clear the clog without relying on harsh chemicals and you can replace worn washers or seals that often cause slow drainage after a cleaning. This approach also helps you verify that the pipe connections are intact and that there are no hidden leaks hiding behind the basin. Learning how to remove bathroom sink drain to unclog is an essential skill for DIY homeowners. If the clog is deeper in the main line, you may still need professional help, but most common bathroom sink clogs respond well to accessible disassembly and cleaning.
Safety first: tools, safety gear, and prep
Before touching any plumbing, protect yourself and the space. Wear sturdy gloves and eye protection to guard against hair, soap scum, and dirty water. Shut off the water supply to the sink and place a bucket underneath where the trap connects to catch residual water. Lay down towels or old rags to absorb spills and keep the area clean. Use a flashlight to illuminate dark corners of the cabinet so you don’t miss small blockages or corroded fittings. Keep pets and kids away from the work area. A quick wipe-down after each step reduces mess and prevents slips. Remember, this task involves disassembling plumbing components, so plan for a 20–60 minute window depending on your setup and any surprises in the trap. The goal is a clean, leak-free drain that resumes normal flow.
Drain layout and common layouts you might encounter
Bathroom sink drains typically consist of a stopper or pop-up assembly, a tailpiece, a P-trap, and a trap arm connecting to the wall drain. Understanding this layout helps you target the clog without unnecessary disassembly. Some sinks use a grid or lift rod stopper, while others have a purely mechanical stopper inside the drain. If your sink has a curved P-trap, the bend is a frequent hair magnet. In many cases, the clog forms at the trap or the tailpiece where hair and soap accumulate. Inspect for rust, cracks, or worn washers—these issues can mimic clogs by limiting flow or causing slow drainage. This knowledge helps you decide whether disassembly is worth pursuing or if you should switch to an alternative method such as a mechanical auger.
Tools and materials you’ll need (overview)
Before you begin, gather essential tools and materials to minimize trips to the hardware store. A bucket, rubber gloves, adjustable wrench, channel locks, two screwdrivers (flathead and Phillips), a hand auger or plumber's snake, and clean rags are the core items. A replacement slip-nut kit and a spare washer can save a mid-project trip. Have a flashlight handy for visibility, and a few extra towels to catch spills. If you don’t own a hand auger, you can use a commercial drain snake or opt for manual methods first. The goal is to keep everything contained, dry, and organized so you can finish with a clean, leak-free drain.
Disassembly basics: stopper and tailpiece access (step-by-step overview)
Accessing the stopper and tailpiece is often the easiest way to reach the clog without removing the entire drain assembly. By lifting out the stopper mechanism, you expose the interior of the tailpiece and the top of the P-trap. This section provides an overview of the steps required to safely disconnect, inspect, and prepare the components for cleaning. Use a bucket under the trap to capture water, and loosen slip nuts gradually to avoid damaging threads. Take photos before disassembly so you can re-create the original alignment. If you encounter resistance, stop and reassess rather than forcing parts apart, which could crack the fittings or strip threads.
Cleaning the trap and lines: removing hair, soap scum, and mineral buildup
The P-trap is the most common place for clogs to form. Once the trap is free, inspect for hair and debris that have accumulated around the curve. Remove all visible material by hand, then use a stiff brush and a bit of warm, soapy water to scrub the interior surfaces. Rinse the trap thoroughly with water before reassembling. If the trap shows cracks or heavy corrosion, replace it rather than attempting a repair. While cleaning, check the tailpiece for scale buildup, which can also slow drainage. A clean trap and tailpiece ensures a smoother water flow and reduces the chance of a future clog.
Reassembly and leak testing: seals, nuts, and final checks
Reassemble the drain in the reverse order of disassembly. Tighten slip nuts by hand, then snug them with a wrench—do not overtighten, which can crack plastic parts or strip threads. Reinstall the stopper assembly and restore the water supply. Run water slowly to test for leaks, starting with a gentle stream and then a stronger flow. Check under the sink for drips or moisture around seams. Wipe away any residual water to prevent mold growth in the cabinet. If leaks appear, tighten fittings a touch more or replace damaged washers and seals.
Troubleshooting and when to call a pro
If you still have a sluggish drain after clearing the trap, re-check the trap seal and ensure the trap arm is free of obstructions. Hair and mineral deposits can migrate further into the drain line, especially if you have hard water. Persistent leaks or cracked fittings indicate damaged pipes that may require professional repair. Avoid chemical drain cleaners immediately after disassembly; they can interact with exposed metals and plastics and may not reach the clog effectively. For stubborn or deep-seated clogs, a licensed plumber can use specialized tools to clear the line without damaging your fixtures. The goal is to restore full drainage safely and efficiently while preventing future backups.
Authority sources and further reading
For safety and best practices in household plumbing, consult reputable references. You can explore government and university resources on home maintenance, water safety, and proper tool use. These sources provide general guidance on safe DIY plumbing and when to seek professional help.
Tools & Materials
- Bucket(Plastic or metal, at least 1 gallon)
- Rubber gloves(Non-latex if sensitive; long sleeves recommended)
- Adjustable wrench(For slip-nut connections)
- Channel locks/pliers(Grip metal nuts firmly)
- Screwdrivers (flathead and Phillips)(For stopper assembly and hardware)
- Plumber's snake/hand auger(8–12 feet length preferred)
- Towels or rags(To absorb spills and keep area dry)
- Flashlight(To see inside the drain cabinet)
- Replacement slip-nuts and washers(Optional if worn or cracked)
- Replacement P-trap or sealant(Optional if damaged or corroded)
Steps
Estimated time: 30-60 minutes
- 1
Shut off water and prep area
Begin by turning off both hot and cold supply valves under the sink. Place a bucket directly beneath the P-trap to catch dirty water. Lay towels on the cabinet floor to absorb spills and protect surfaces. This preparation minimizes mess and reduces the chance of water damage during disassembly.
Tip: Have a flashlight ready to illuminate hidden corners; good lighting speeds up the process. - 2
Remove the stopper and access the drain
Detach the stopper mechanism as needed to expose the tailpiece and the top of the P-trap. If the stopper is held by a screw, use the appropriate screwdriver to release it. Gently lift the stopper and set it aside with its linkage; take a quick photo of the setup for reassembly.
Tip: Keep small parts in a labeled dish to prevent misplacement. - 3
Loosen slip nuts and remove the P-trap
Place a bucket beneath the trap, then loosen the slip nuts on the trap’s elbows with the adjustable wrench or channel locks. Slowly remove the P-trap, catching any remaining water in the bucket. Inspect the gasket and washers for wear and replace if necessary.
Tip: Support the trap with one hand to avoid twisting the pipes and damaging fittings. - 4
Inspect, clean, and clear debris
Disassemble the trap and wash debris from the interior with warm soapy water. Use a stiff brush to remove hair and soap scum stuck to the trap walls. Rinse all pieces thoroughly before reassembly to ensure a clean seal and free flow.
Tip: Check the inlet and outlet holes for any hair-packed clogs; a small wire or brush can clear them. - 5
Reassemble the drain and seal connections
Reinstall the P-trap and tighten slip nuts by hand, then snug with a wrench. Reattach the stopper assembly as it was originally configured (refer to the photo you took). Ensure the seals sit evenly and the trap sits level to prevent leaks.
Tip: Don’t over-tighten; overtightening can crack plastic components. - 6
Test for leaks and finalize
Turn the water back on and run a slow stream through the sink to check for leaks. If a drip appears, tighten connections slightly and re-test. Wipe away any residual water and verify smooth drainage before closing the cabinet.
Tip: If leaks persist after tightening, disassemble again to re-seat the washers or replace damaged parts.
Common Questions
Do I need to remove the drain if the clog is in the main sewer line?
Not always. If you suspect the clog is beyond the P-trap or in the main line, try a hand auger or call a professional. Many shallow clogs respond to trap cleaning, but deeper blockages may require more advanced tools.
If the clog seems deeper than the trap, a hand auger may help, but you might need a pro for main-line issues.
Can I reuse old slip nuts and washers?
You can reuse them if they are undamaged and seated well. If you notice cracks or wear, replace them to prevent leaks.
Reuse only if they’re intact; replace worn pieces to prevent leaks.
What if the P-trap is corroded or cracked?
A cracked P-trap should be replaced. Switch to a new trap that matches your pipe size and material to ensure a proper seal.
Replace a cracked P-trap with a compatible new one.
Is it safe to use chemical drain cleaners after disassembly?
Avoid chemical cleaners after disassembly. They can react with exposed metals and plastics and may push clogs further or damage fittings.
Don’t mix chemicals after disassembly; they can cause damage.
How long does this process typically take?
Most homeowners complete the job in 30–60 minutes, depending on access and any complications found during disassembly.
Expect about half an hour to an hour, depending on your setup.
When should I call a plumber instead of DIY?
If you notice persistent leaks, corroded pipes, or you cannot safely remove the stopper or trap, it’s wise to contact a licensed plumber.
Call a plumber if you can’t safely complete the job or detect ongoing leaks.
Watch Video
Key Points
- Prepare area, turn off water, and have a bucket ready.
- Access the trap to identify the clog's location.
- Clean the trap thoroughly and inspect seals for wear.
- Reassemble carefully and test for leaks before finishing.