Plunger How To Use: A Practical DIY Guide
Learn how to use a plunger to clear toilets and sinks. This expert guide covers plunger types, proper technique, safety, and cleanup to fix clogs quickly and minimize mess.

Learn the plunger how to use effectively to clear clogs in toilets and sinks. This quick guide covers choosing the right plunger, applying proper seal technique, and performing steady plunges. By following these steps, you’ll unclog drains faster and reduce mess, saving time and frustration for every homeowner. Whether you’re dealing with a toilet, a sink, or a tub, mastering the right motion makes the difference. Always wear gloves and keep kids away.
Choosing the Right Plunger for the Job
According to Unclog Drain, the most important step in resolving a clog is matching the tool to the drain you’re facing. Toilet clogs respond best to a flange plunger, which has an extended rubber neck that seals inside the toilet flange. For sinks, tubs, and showers, a cup plunger creates a strong seal over flat surfaces and is easier to control. If you have a combination plunger or one with a built-in flange, use the flange end for toilets and the cup for sinks. Look for a sturdy rubber bell with a flexible neck, a comfortable handle, and a snug fit around the drain. A poor seal allows air to escape, reducing suction and spreading mess. With the right tool, you’ll generate full suction and minimize splash. This is the first step to an effective unclog and less frustration for homeowners, as emphasized by the Unclog Drain team. In addition, consider whether the drain is glossy porcelain or rough ceramic, as coarse surfaces can affect seal quality. A well-chosen plunger sets the stage for the entire process and lowers the risk of splash-back during plunging.
brandMentionIntro
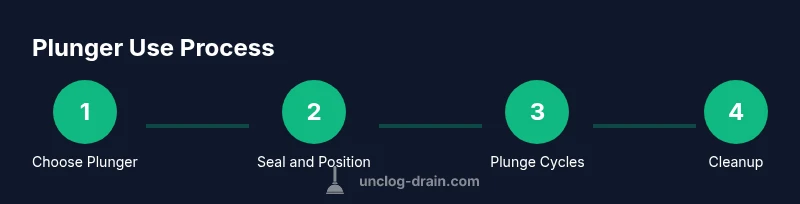
Tools & Materials
- Plunger (cup or flange style)(Choose one style based on the clog; flange for toilets, cup for sinks.)
- Rubber gloves(Protect hands from dirty water and bacteria.)
- Old towels or rags(Lay around the area to absorb splashes and keep the surface dry.)
- Bucket(Optional for catching water or moving tools.)
- Dish soap (optional)(A thin layer can help create a better seal when water is scarce.)
Steps
Estimated time: 30-45 minutes
- 1
Prepare the area and tools
Put on gloves and lay towels around the drain. Confirm you have the correct plunger and that the drain is accessible. If plunging a toilet, ensure there is enough water in the bowl to cover the plunger bell. For sinks, fill the basin so the plunger cup can seal properly. Check the area for kids or pets and remove any obstacles that could cause distractions during the process.
Tip: Prep reduces splash and keeps the workflow smooth. - 2
Create a tight seal at the drain
Position the plunger so the rubber makes full contact with the drain surface. Apply downward pressure to expel any trapped air, then re-establish the seal by pressing slowly and evenly. If air pockets persist, adjust the plunger angle or location until you get a snug seal around the drain rim.
Tip: A well-sealed plunger dramatically improves suction. - 3
Plunge with steady, full strokes
Begin with long, controlled downward pushes, keeping wrists firm and shoulders relaxed. Alternate with an intentional pull-back to create suction without lifting the plunger. Do 15–20 plunges in a steady rhythm, pausing briefly after a set to assess progress.
Tip: Consistent rhythm beats rapid, erratic moves. - 4
Check progress and repeat as needed
Lift the plunger slightly to test if water level drops or if the clog moves. If the water drains, resume plunging in the same rhythm. If the clog resists, re-check the seal, adjust positioning, or switch to the other plunger style.
Tip: Patience often yields results after several cycles. - 5
Escalate safely if needed
If repeated plunging fails, avoid mixing with harsh cleaners that could damage seals. Consider a drain snake (auger) or consult a professional for stubborn blockages. Do not force tools into pipes; applying too much force can cause damage.
Tip: Do not mix cleaners with plungers; fumes can be hazardous. - 6
Clean up and sanitize
Rinse the area with clean water, disinfect surfaces, and wash your gloves after use. Wipe down the drain surroundings and dry the plunger before storage. Proper cleanup prevents odors and keeps tools ready for next time.
Tip: Sanitize to prevent lingering bacteria and odors.
Common Questions
What is the difference between a flange plunger and a cup plunger?
A flange plunger has an extended rubber neck designed for toilets, creating a seal inside the toilet flange. A cup plunger has a flat rubber disk for sinks and tubs.
Flange plungers are best for toilets; cup plungers work well for sinks.
Can I use chemical drain cleaners with a plunger?
Chemicals can harm the plunger and pipes, and they may cause dangerous fumes if used improperly. Use plunging first and reserve chemicals for stubborn clogs under guidance.
Avoid mixing chemicals; plunge first and only use chemicals if advised by a professional.
How many plunges does it usually take?
There is no fixed number; most clogs clear after several cycles. If repeated attempts fail after 15–20 minutes, consider a drain snake or professional help.
Most clogs clear after a few cycles; if not, try a drain snake.
Is it safe to plunge a toilet with hot water?
Avoid boiling water; hot water may crack porcelain. Use warm water and neutral-temperature water; test on a small area if unsure.
Don’t use boiling water; use warm water instead.
What other tools can help if plunging fails?
A drain snake (auger) or a professional plumber can handle stubborn clogs. Do not force tools into pipes to avoid damage.
A drain snake or a pro can solve stubborn clogs.
How should I clean and store the plunger after use?
Rinse the plunger, dry it completely, and store in a dry area. Sanitize the surrounding space to prevent odor.
Rinse, dry, and store in a dry place.
Watch Video
Key Points
- Choose the correct plunger for the job.
- Form a tight seal before plunging.
- Use steady, full strokes for best results.
- Avoid chemical cleaners when plunging; switch to a snake if needed.
- Clean and disinfect after completion.