How to Unclog Print Head: A DIY Guide
Step-by-step, printer-safe methods to unclog a print head using nozzle cleaning, manual cleaning, and prevention tips for reliable inkjet performance.

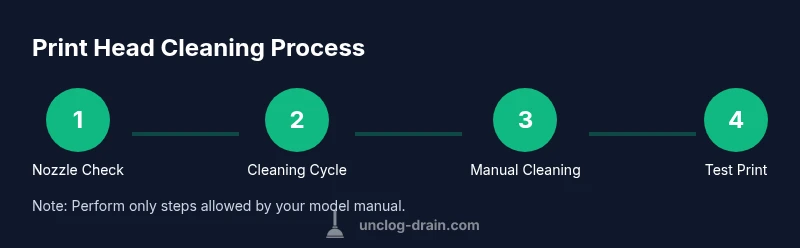
To unclog print head, start with a nozzle cleaning cycle, then manual cleaning with distilled water and lint-free swabs. If ink remains, try a controlled soak of the print head in printer-safe cleaning solution for a few minutes, then re-test. Gather distilled water, isopropyl alcohol, soft cloths, gloves, and a manufacturer-approved cleaning kit. Avoid harsh solvents and never force-clean.
Understanding print head clogs
In an inkjet printer the print head is the component that ejects ink through tiny nozzles onto the paper. When ink dries inside the nozzles or when foreign matter accumulates, you get gaps, streaks, or missing colors. The goal of unclog print head is to restore consistent ink flow and sharp printed results. Common culprits include old or poor quality ink, extended periods of inactivity, and exposure to high humidity. By understanding how clogs form you can choose the right cleaning approach, avoid damage to the head or cartridges, and extend the life of your printer. This guide emphasizes safe, practical steps you can perform at home without expensive service calls. The Unclog Drain team notes that careful handling and following the printer manual for model specifics is essential when tackling print head issues.
Safety first when cleaning printers
Always power down and unplug the printer before starting any maintenance. Work in a dry area and keep liquids away from power supplies and control panels. Wear gloves to protect skin and use lint-free cloths or swabs to avoid fiber debris. If using liquids, apply them to the cleaning swab, not directly onto the head or electronics. Maintain a clean, organized workspace and never force components that resist gentle cleaning. Following these safety guidelines reduces the risk of electrical shock or damage to the print head while you work on unclog print head issues.
Quick diagnostic checks
Begin with a nozzle check or test page to identify the severity of the clog. If colors are missing or misaligned, you likely have a partially clogged head. Run a built-in nozzle cleaning cycle, then print another test page. If the problem recurs, note which colors are affected and how long the issue has persisted. Regularly performing test patterns helps you monitor print head health and catch clogs early, before they become stubborn. Remember to document results so you can track improvements over time.
Basic cleaning cycle
Most inkjet printers include a nozzle cleaning or head cleaning feature. Start with the standard cleaning cycle through the printer’s control panel or software. After the cycle completes, print a test page or nozzle check pattern. If streaks persist, repeat the cycle once or twice, allowing brief cooldowns between runs. This routine is often enough to unclog print head in mild cases and prevents unnecessary disassembly. Keep a log of cycles per color to tailor future maintenance.
Manual cleaning with swabs and solution
If automatic cleaning isn’t enough, gently clean the print head area with a distilled water moistened lint-free swab. Avoid soaking or submerging the whole assembly unless the printer manual approves it. Work carefully around the cabling and cartridge seats, using small circular motions to lift dried ink from the nozzle face. Dry the area with a clean swab before testing. This hands-on method is a common next step for stubborn clogs when unclog print head proves resistant to cycles.
Soaking the print head (where allowed)
Soaking the print head in a printer-safe cleaning solution can help dissolve dried ink. Only perform soaking if your printer model explicitly allows it and follow the manufacturer guidance. Use a shallow dish and ensure the soak time stays within recommended limits, typically several minutes. After soaking, rinse with distilled water and dry thoroughly before reinstalling cartridges. Do not soak electronic components or connectors not designed for immersion, as this can cause damage.
Aftercare and prevention
To reduce future clogs, use high-quality ink and keep the printer in a stable environment away from extreme heat or humidity. Run regular cleaning cycles when the printer is infrequently used, and print a page every few days to keep nozzles from drying. Store cartridges correctly and replace them promptly when aging. If clogs reoccur, consider a deeper clean or professional service, but routine maintenance regularly prevents most issues and helps you avoid more serious repairs.
When to call a professional
If you have tried nozzle checks, multiple cleaning cycles, and careful manual cleaning without success, it may indicate a head failure or internal sealing problem. Persistent clogging that affects all colors, or damage signs like warped print head surfaces, warrants professional service. Before contacting a tech, capture test prints and note your cleaning history—this helps the technician diagnose the issue faster. The decision to call a pro is often based on safety, potential for further harm, and the printer's value.
Printer-specific tips
Inkjet printers vary by model, so always consult the user manual for head cleaning permissions and soaking restrictions. Some models support head resaturation via built-in utilities; others require cartridge removal or head replacement. For laser printers, the concept differs; this guide focuses on inkjet print heads. Use manufacturer-approved cleaners whenever possible and avoid untested solvents that may void warranties or damage seals.
Troubleshooting common issues
If prints show color misalignment or banding after cleaning, run cartridge alignment and a fresh nozzle check. Persistent streaks or gaps may indicate clogged channels not accessible by cleaning fluids alone. Replacing aging cartridges or upgrading to higher quality inks can resolve many quality issues. When in doubt, follow model-specific troubleshooting steps in the user manual and perform tests on plain paper to assess results.
Tools & Materials
- Printer manufacturer-approved cleaning solution(Use only if recommended; follow label guidance)
- Distilled water(For rinsing and flushing nozzles)
- Isopropyl alcohol (70%)(Only if recommended by manufacturer)
- Lint-free cotton swabs(For precise nozzle cleaning)
- Lint-free microfiber cloth(For wipe-downs)
- Gloves(Protect hands during cleaning)
- Small shallow dish or tray(For soaking or holding fluids)
- Absorbent towels or paper towels(Catch drips and keep area clean)
- Manufacturer-approved maintenance kit(Optional but helpful for stubborn clogs)
Steps
Estimated time: 60-90 minutes
- 1
Power down and prep
Power off the printer and unplug it. Remove any paper and cartridges from the print area to access the print head safely. Gather your cleaning supplies and set up a clean workspace to avoid fibers on sensitive surfaces.
Tip: Verify the printer is completely off before touching any internal components. - 2
Run diagnostic checks
Perform a nozzle check or test pattern to identify the affected colors. Run the built-in cleaning cycle once or twice to see if the lines improve before attempting manual work.
Tip: Note which colors fail the test to target the correct nozzles. - 3
Access the print head
Open the printer access panel according to your model. Remove cartridges carefully and avoid touching copper pads. Keep track of cartridge positions to reinstall correctly.
Tip: Consult the user manual for model specific steps to access the head. - 4
Manual cleaning with swabs
Dampen a lint-free swab with distilled water and gently wipe the nozzle face. Use small circular motions to lift dried ink without applying heavy pressure. Dry the area with a clean swab after wiping.
Tip: Never soak the head directly unless the manual allows it. - 5
Rinse and refresh
If needed, lightly rinse the nozzle area with distilled water and let it air dry for a few minutes. Avoid leaving the head wet for too long near electronics.
Tip: Keep liquids away from connectors and control boards. - 6
Soak the print head (where allowed)
Some models permit a brief soak in printer-safe cleaning solution in a shallow tray. Do not exceed the recommended time and never immerse electronics. Dry thoroughly before reinstalling cartridges.
Tip: Only soak if your model explicitly supports it. - 7
Reinstall cartridges and test
Place cartridges back, reassemble the printer, and run a full nozzle check. Print a test page to verify color alignment and resolve any residual streaks.
Tip: Run at least one more clean cycle if needed after the test page. - 8
Document and monitor
Record the steps taken and the results of each test print. Monitor nozzle health over the next few days and schedule periodic maintenance to prevent future clogs.
Tip: A maintenance log makes it easier to identify recurring patterns. - 9
Know when to stop
If results do not improve after thorough cleaning and soaking (where allowed), professional service may be required. Avoid pushing the print head beyond its limits.
Tip: Preserve warranty by following model specific guidelines.
Common Questions
What is a print head and why does it clog?
The print head is the part that ejects ink onto the paper. It clogs when dried ink or debris blocks the nozzle openings, causing color gaps or streaks. Regular cleaning helps maintain its function.
The print head is the inkjet nozzle assembly. It clogs when ink dries or debris blocks the openings, which you can often fix with cleaning cycles and careful wiping.
Can I use kitchen cleaners or vinegar to unclog a print head?
No. Do not use vinegar, bleach, or other household cleaners. They may damage the print head seals and void warranties. Use only fluids recommended by the printer manufacturer.
Avoid household cleaners. They can harm the print head and void warranties. Stick to manufacturer approved cleaners.
How often should I clean the print head?
Clean when you notice color gaps, streaks, or after long idle periods. Regular light cleaning is better than deep disassembly. Follow the model's recommended maintenance schedule.
Clean when you see gaps or streaks. Don’t wait too long between cleanings; regular light maintenance helps prevent big clogs.
Will cleaning damage the printer?
If you follow the manual and use manufacturer approved cleaners, cleaning is low risk. For soaking or disassembly, only do what the manual permits. If in doubt, stop and seek professional help.
Cleaning is usually safe when you stay within manufacturer guidelines. Don’t soak parts that aren’t designed for immersion.
What should I do if the clog returns after cleaning?
If the clog recurs after cleaning cycles and a manual clean, there may be a deeper issue like head damage or clogged feed paths. Consider professional service or head replacement if needed.
If clogs keep coming back, it may be a deeper head issue. A professional check is a good next step.
Does soaking always help unclog print head?
Soaking can help some printers but not all. Only soak if the model explicitly allows it and for the time specified by the manual. Improper soaking can damage the head.
Soaking can help certain models. Only do it if the manual allows and you follow the exact time recommendations.
Watch Video
Key Points
- Start with nozzle cleaning before manual work
- Only use printer approved cleaners
- Test after each step to gauge effectiveness
- Prevent future clogs with regular maintenance