How to Unclog an Ink Cartridge: Quick DIY Fixes at Home
Learn safe, step-by-step methods to unclog ink cartridges. Includes printer cleaning cycles, nozzle checks, and test prints. From Unclog Drain.

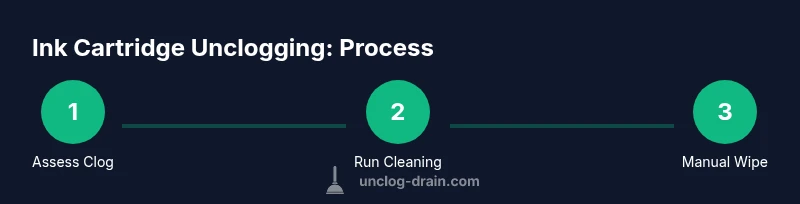
How to unclog ink cartridge in printers? Start with the printer’s built-in cleaning cycle, then inspect nozzle alignment. If prints still streak, remove the cartridge and wipe the nozzle with a lint-free cloth dampened with distilled water. The Unclog Drain team recommends starting with manufacturer-recommended steps before attempting any manual soaking. This quick guide outlines safe, printer-friendly methods to restore print quality.
What causes ink cartridges to clog
Ink cartridge clogs happen when ink dries in the tiny nozzle openings or when pigments crystallize after exposure to air. Most printers rely on the printhead to deliver ink accurately; if the nozzles dry out or become contaminated, you’ll see streaks, gaps, or missing colors in prints. According to Unclog Drain, a common cause is infrequent use combined with storage in environments with fluctuating humidity. Understanding the difference between a clogged cartridge and a blocked printhead helps you choose the right remedy. Treating a cartridge as a whole unit is usually safer than attempting to dismantle the printhead. For most home users, a routine cleaning cycle from the printer settings resolves many issues without disassembly.
Using your printer’s cleaning cycle and nozzle test
Most modern printers include a dedicated cleaning utility designed to flush ink through the nozzles. Start by running a standard cleaning cycle, then print a nozzle check or test page to identify which colors are affected. If only one color is problematic, you can focus on that channel while avoiding unnecessary cleaning of other colors. Repeating the cycle once or twice often clears light blockages, but avoid excessive cycles, which waste ink and may wear the printhead. The Unclog Drain team notes that patience with test pages yields better results than rushing cycles.
Manual cleaning of nozzle surfaces (safe, non-destructive)
If the nozzle area looks dry or tacky, gently wipe the exterior with a lint-free microfiber cloth dampened with distilled water. Do not scrub the printhead aggressively; instead, use light, circular motions to lift dried ink around the nozzle opening. For stubborn residues, you can dab a small amount of distilled water or isopropyl alcohol on the cloth and carefully cleanse the immediate nozzle area. Always keep electronics dry and avoid liquid pooling near electrical contacts.
When to replace cartridges or seek professional help
If you continue to see streaks or missing colors after multiple cleanings and manual wipes, the cartridge itself may be exhausted or damaged. In some cases, a new cartridge solves the issue, especially if the printhead has never been properly flushed by the manufacturer. If you’re under warranty or the printer is under service plans, consult the manufacturer’s guidance before attempting any aggressive soaking or dismantling. The Unclog Drain guidance is to escalate when basic steps fail to restore print quality.
Tools & Materials
- Lint-free microfiber cloth(Used to wipe nozzle surfaces and contacts without leaving fibers)
- Distilled water(Dampens cloth for safe cleaning; avoid tap water minerals)
- Isopropyl alcohol 70%(Optional for stubborn residue; do not apply to electronics)
- Bowls or shallow dish(Optional if soaking printhead area; avoid soaking entire cartridge)
- Soft brush or cotton swabs(Gently lift dried ink around the nozzle openings)
- Gloves(Keeps hands clean when handling ink cartridges)
Steps
Estimated time: 45-60 minutes
- 1
Power down and remove cartridge
Turn off the printer and unplug it. Open the cartridge access area and carefully lift the affected cartridge straight out of the slot. Place it on a clean surface with the nozzle facing up to inspect for dried ink.
Tip: Handle cartridges by the sides to avoid touching electrical contacts. - 2
Run the built-in cleaning cycle
Navigate to the printer’s maintenance or tools menu and start the standard cleaning cycle. This flushes ink through the nozzles and can clear light blockages. After completion, print a nozzle check page to evaluate results.
Tip: If the printhead settings allow, run the cycle twice but avoid excessive cleaning cycles. - 3
Inspect and wipe the nozzle area
Examine the nozzle surface for visible ink buildup. Dampen a lint-free cloth with distilled water and gently wipe the exterior and the immediate nozzle area. Do not apply liquid directly into the ink port or onto electrical contacts.
Tip: Use minimal moisture; excess liquid can seep into sensitive areas. - 4
Optional: soak the nozzle tip (cautious step)
If recommended by the cartridge maker and the printhead is removable, soak the nozzle tip in warm distilled water for 3–5 minutes. Remove and dry completely before reinstalling. Do not submerge the electronics or the plastic exterior beyond the nozzle.
Tip: Only perform soaking if you’re confident about the cartridge design and your device’s guidance. - 5
Dry and reinstall the cartridge
Gently pat the cartridge dry with a clean cloth and reinstall it into the printer. Ensure it seats correctly and the locking mechanism clicks. Reconnect power and run a fresh cleaning cycle followed by a nozzle check.
Tip: If the cartridge shows moisture or water marks, allow extra drying time before reinsertion. - 6
Test print and adjust
Print a test page to verify color alignment and density. If the print is still inconsistent, repeat the cleaning cycle once more or move to cartridge replacement. Avoid forceful scrubbing inside the printer.
Tip: Document which color blocks remain blocked to guide future maintenance. - 7
Use alcohol only on contacts (not nozzle)
If the electrical contacts appear dirty, use a cloth lightly dampened with isopropyl alcohol to wipe the metal contacts. Do not apply alcohol to the nozzle or into the ink ports. Allow to dry fully before reinsertion.
Tip: Alcohol can cause staining or degrade some plastics; test on a small area first if uncertain. - 8
Decide on replacement or service
If streaks persist after multiple attempts, assess whether the cartridge is exhausted or damaged. Replacement is often cost-effective, especially for older cartridges. Consider professional service if the printer is under warranty or service plan.
Tip: Keep a log of attempts and outcomes to avoid repeating ineffective steps.
Common Questions
Can I fix a clogged ink cartridge without buying a new one?
Often you can resolve minor clogs using built-in cleaning cycles and careful nozzle cleaning. If the problem persists after several attempts, replacing the cartridge may be more cost-effective.
You can usually fix minor clogs with cleaning cycles; if it persists, consider replacement.
Is soaking a cartridge safe?
Soaking is only recommended by some manufacturers and should be limited to the nozzle area if allowed. Do not soak the entire cartridge or electronic components.
Soaking can help, but only if the maker allows it and you avoid electronics.
What should I avoid when cleaning ink cartridges?
Avoid harsh solvents, bleach, and direct liquid exposure to the cartridge’s electronic contacts. Also avoid shaking vigorously, which can spread ink.
Avoid harsh chemicals and wet electronics; shake rarely if ever.
Why does a printhead clog even after cleaning?
Dry ink or long storage gaps can crystallize in nozzles. Repeated cycles and gentle nozzle cleaning help, but persistent issues may indicate end-of-life for the cartridge.
Nozzle drying or crystallization causes stubborn clogs; cycles help but may require replacement.
How often should I run cleaning cycles?
Use cleaning cycles as needed, not as a routine every week. If you print infrequently, run a quick cycle before important prints.
Clean only when needed; don’t overdo it, or you’ll waste ink.
Will cleaning void my warranty?
Few cleaning steps outlined by manufacturers void warranties, but aggressive disassembly often does. Check your printer’s warranty terms.
Check the warranty terms; avoid disassembly unless guided by the maker.
Watch Video
Key Points
- Start with the printer's cleaning cycle.
- Use distilled water for wiping and avoid liquids near electronics.
- If block persists, consider cartridge replacement.
- Document results to optimize future maintenance.