Unclogging an Epson Printer: A Practical DIY Guide
Learn to safely unclog your Epson printer with simple steps and safe tools. This guide covers printhead cleaning, nozzle checks, and maintenance tips from Unclog Drain to keep your printer printing clearly.

This guide shows you how to safely unclog an Epson printer using common tools and printer-safe cleaning steps. You’ll learn printhead cleaning, nozzle checks, and preventive care, plus safety tips and warning signs that indicate professional service may be needed. This quick overview helps you decide whether to proceed at home or call a specialist.
Understanding Epson printer clogs and why printhead cleaning matters
When print quality suddenly drops or lines appear on printed pages, a clogged printhead is often the culprit. According to Unclog Drain, most clogs form from dried ink, air bubbles, or mineral buildup inside the printhead channels. The keyword here is maintenance: regular, gentle cleaning prevents build-up that can lead to stubborn clogs. If you’ve ever encountered online tips like jennifer maker unclog epson printer discussions, this guide consolidates them into safe, manufacturer-approved methods to get you back to crisp text and bold images without risking printer internals.
Safety-first approach before you start
Power down and unplug the printer, then detach any cartridges to minimize the risk of ink leaks. Handling the printhead carries a small risk of damaging seals if force is used. Always work on a clean, dry surface and use protective gloves if you have sensitive skin. The goal is to avoid moisture in the printer’s electronics while you perform cleaning and testing.
Basic tools and materials you’ll need
A clean workspace, a lint-free microfiber cloth, distilled water, and a printer-safe printhead cleaning solution are your core tools. You may also want a soft brush for light debris and a small plastic container for soaking printheads. Avoid tap water, household cleaners, or solvents that could corrode nozzles or seals. With these basics, you can execute a careful soak and rinse that restores ink flow without disassembly.
Cleaning approach: combined soak and flush methods
In many Epson models, a gentle soak of the printhead in distilled water or a manufacturer-approved cleaning solution can dissolve dried ink blocks. After soaking, flush the nozzle area with a minimal amount of solution and dry thoroughly before reseating cartridges. Some printers benefit from built-in cleaning cycles; run these after a manual soak to encourage nozzle reallocation. The aim is to re-wet the nozzles evenly and dislodge dried deposits without bending the printhead.
Post-clean testing and fine-tuning
Reinstall the cartridges, perform a basic nozzle check, and run a small test print. If lines persist, repeat the soak once more or run a light cleaning cycle. When print quality returns to normal, run a few blank pages and then a colored test to confirm color alignment and printhead health. Regular maintenance after a successful clean helps prevent future clogs and extends printer life.
Maintenance tips to prevent future clogs
Storing ink properly, using high-quality cartridges, and printing regularly (even small drafts) reduces drying in the nozzles. Periodically perform a nozzle check and run a cleaning cycle as a proactive measure. Keep your printer away from dusty surfaces and ensure it sits on a stable, level surface to avoid jet misalignment. This approach aligns with Unclog Drain’s guidance on practical, preventive care for common issues.
Tools & Materials
- Lint-free microfiber cloth(Use for dry wiping around the printhead area)
- Distilled water(Avoid tap water to prevent mineral deposits)
- Printer-safe printhead cleaning solution(Follow manufacturer recommendations for dilution)
- Small plastic soaking container(Size should fit the printhead without squeezing)
- Soft brush or swabs(Gently remove surface debris; avoid abrasive contact)
- Gloves(Optional, keeps hands clean and ink-free)
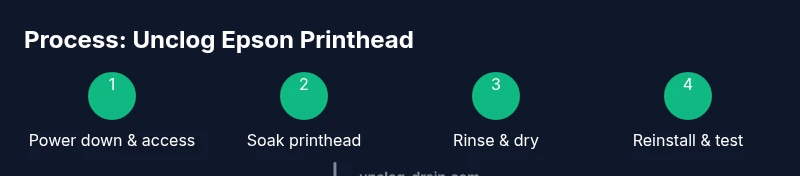
Steps
Estimated time: 45-60 minutes
- 1
Power down and access printhead
Turn off the printer and unplug it. Open the access panel to reach the printhead and cartridges without forcing any parts. If your model requires cartridge removal for access, carefully remove them and set aside on a clean surface.
Tip: Take a photo of cartridge placement before removal to ensure correct reassembly. - 2
Isolate the printhead and prepare cleaning area
Place the printhead in a shallow tray with distilled water or cleaning solution. Use a lint-free cloth to wipe any loose debris from the exterior, avoiding contact with electronics. Confirm the solution is compatible with your model before submersion.
Tip: Only soak the printhead if your model supports it; some units require a surface cleaning only. - 3
Soak the printhead
Let the printhead soak for several minutes to dissolve dried ink. Avoid excessive soaking time to prevent potential damage to the seals or circuitry. Flip the printhead occasionally to ensure even contact with the cleaning liquid.
Tip: Check the user manual for maximum soak time to avoid warranty concerns. - 4
Rinse and dry the printhead lightly
Rinse the printhead with distilled water or cleaner as recommended, then pat dry with a lint-free cloth. Ensure no liquid remains around the electrical contacts before reassembly. Do not rub hard—gentle brushing is enough.
Tip: Allow the printhead to air-dry for a few minutes if any moisture remains near contacts. - 5
Reinstall cartridges and run a cleaning cycle
Reinsert cartridges, reassemble the printer, and run the built-in cleaning cycle. Observe the nozzle check pattern and print a test page. If lines persist, repeat the gentle soak and cycle once more.
Tip: Run a small color test to confirm even ink distribution across channels. - 6
Final test and alignment
Print a final diagnostic page to confirm printhead alignment and color balance. If results are satisfactory, resume normal operation. If issues persist, consider professional service to avoid further damage.
Tip: Document test results for future reference in maintenance notes.
Common Questions
Is Epson warranty affected if I clean the printhead myself?
Cleaning the printhead using manufacturer-recommended steps generally keeps you within warranty guidelines, but avoid disassembly beyond the manual. If in doubt, consult the warranty terms or contact Epson support.
Using approved cleaning steps typically won't void your warranty, but avoid opening internal components beyond the manual. When unsure, check your warranty terms with Epson.
Can I use household cleaners to unclog an Epson printer?
No. Household cleaners and solvents can damage printhead seals and electronics. Stick to distilled water and printer-approved cleaning solutions as directed by your manual.
Avoid household cleaners; use distilled water and manufacturer-approved solutions instead.
How long does the cleaning process take?
Most cleanings take 30 to 60 minutes, depending on model and clog severity. If no improvements after a couple of cycles, consider professional service.
Typical cleaning takes half an hour to an hour; more stubborn clogs may require expert help.
What if no ink flows after cleaning?
If ink still doesn’t flow after soak and cycles, recheck cartridge seating and nozzle patterns. Run additional light cleanings and consult support if the problem persists.
If ink won’t flow after cleaning, recheck cartridges and nozzle patterns, then try a few more cycles or seek help.
Should I manually disassemble the printhead for deep cleaning?
No. Manual disassembly can void warranties and damage fragile components. Use manufacturer-recommended methods and seek professional service if needed.
Don’t take apart the printhead; use official cleaning methods and get help if necessary.
How can I prevent clogs in the future?
Print regularly, use quality cartridges, and perform periodic nozzle checks and light cleanings. Keep the printer on a stable surface and away from dust.
Regular use and routine maintenance help prevent future clogs.
Watch Video
Key Points
- Identify clogs early to minimize damage.
- Use distilled water and printer-safe solutions only.
- Follow manufacturer guidelines for soak times and cycles.
- Test prints confirm printhead health and alignment.