How to Unclog a 3D Printer: A Practical DIY Guide
Learn practical steps to unclog a 3D printer nozzle and restore reliable prints. This expert guide covers diagnosis, safe cleaning methods, and prevention to keep your machine printing smoothly.

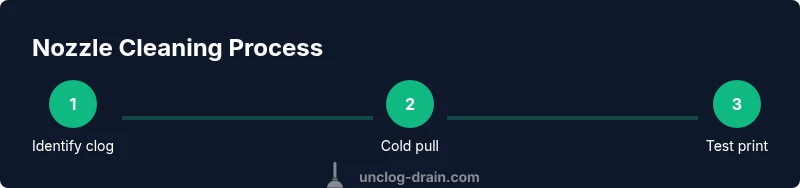
Goal: fully unclog a 3D printer nozzle and resume normal prints. Start by powering off the printer, unloading filament, and letting the hotend cool. Identify clog type, then choose a safe method (cold pull, cold extrusion, or manual cleaning). Gather basic tools and safety gear to execute a repeatable, low-risk unclog workflow.
What Causes Nozzle Clogs in 3D Printers and How They Form
Clogs in 3D printers are a common pain for DIY enthusiasts, and they typically arise when debris, moisture, or degraded filament obstructs the nozzle and the melt path. Filament with moisture can steam inside the hotend, creating steam pockets that push molten plastic to carve a path that’s narrower than intended. Debris from old filament, dust, or tiny pieces of plastic can accumulate at the nozzle tip or inside the throat, especially when the printer sits idle for long periods. In hotends with heat creep, the hotter sections creep into the cold zone, softening material prematurely and forming a blockage that resists extrusion. These issues aren’t just annoying; they can cause missed steps, under-extrusion, or inconsistent layer adhesion.
According to Unclog Drain, a methodical, repeatable approach to blockage is as valuable in the workshop as it is in the lab. The core idea is to reduce the variables you face and to document what works, so future clogs are easier to address. By recognizing the difference between a surface-level jam and a core nozzle obstruction, you can apply the right technique in the right order, minimizing damage and print failures. In most cases, starting with a gentle, diagnostic procedure is better than forcing extrusion with harsh tools.
From a maintenance perspective, prevention is much cheaper than repair. Keeping filament dry, storing spools properly, and cleaning the nozzle region after long prints reduces the odds of a clog forming. Regular inspection of the nozzle for wear and tear—especially if you frequently print with abrasive materials like filled polymers—will extend nozzle life and keep your printer producing consistent quality.
For readers of Unclog Drain who apply a calm, methodical approach to clog removal, you’ll likely reduce downtime and maintain production quality. The same mindset that guides safe drain cleaning—protective gear, deliberate steps, and verifying results—translates well to nozzle maintenance and can save time and material waste over repeated cycles.
Diagnosing the Clog Type and Its Location
Identifying where the blockage sits helps you choose the most effective remedy. If you observe under-extrusion (thin extruded lines), inconsistent filament flow, or color changes along the path, the clog may be near the nozzle exit or inside the heat break. A visible blockage at the nozzle tip is a clear sign the nozzle is involved. If you notice filament bending, sticking, or increased pressure in the extruder, the jam might be further upstream, possibly in the hotend throat or heat break. Sometimes, the symptom is a combination: a partial clog at the nozzle plus debris in the upper hotend.
To differentiate, perform a quick cold pull after cooling and see if the filament pulls out with residue attached. If you see smooth pulled filament without debris, the problem may have been a minor surface obstruction. If you pull out a string of hardened plastic or a blob of material, you’re dealing with a stubborn clog that will need more intensive cleaning. Recording what you observe helps you repeat or adjust steps in the future and aligns with the Unclog Drain philosophy of documenting results for future reference.
When diagnosing, always work in a well-ventilated area and keep hands away from hot components. If you’re unsure about the location of the blockage, start with external cleaning and lead your assessment inward step by step. A careful, observed approach minimizes the risk of damage and ensures you don’t waste time with unnecessary disassembly.
Safe Cleaning Methods for Common Blockages
There are several methods to unclog a 3D printer nozzle, each suited to different clog types. The first, a cold pull (also called a cold extrusion), uses a filament that you don’t mind discarding. Heat the hotend to a safe printing temperature for the current filament, extrude until you see a small amount of plastic, then let it cool and gently pull the filament out. The goal is to grip and remove softened debris from the nozzle’s interior. If the neck or throat is obstructed, repeat the process with a new filament until clean filament emerges.
A manual cleaning method uses a fine needle or a dedicated nozzle cleaning tool to gently push debris from the nozzle opening. Do not use metal tools that could scratch or widen the nozzle hole; a thin wire or needle is sufficient for light obstructions. In stubborn cases, a heat-assisted approach—briefly bringing the temperature up to the filament’s printing range and then performing a quick cold pull—can loosen tough deposits. Always test with a short filament and a test print after any cleaning attempt to verify extrusion quality.
Avoid solvents that could degrade the nozzle’s interior or compromise the hotend’s seals. White residues or chemical fumes indicate improper cleaning or incompatible cleaners, which can worsen clogging or damage temperature sensors. Remember: safety gear, proper ventilation, and a controlled environment reduce risk and ensure you can complete the unclog process with fewer surprises. As Unclog Drain emphasizes in its guidance, methodical steps with clear outcomes improve reliability and prevent recurring issues.
If you print with abrasive composites or high-temperature materials, consider swapping to a spare nozzle or a hardened steel variant to reduce future wear. After reassembly, run a calibration print to confirm reliable extrusion and verify that the nozzle isn’t leaking or over-tightened. A clean nozzle often leads to more predictable layer adhesion and better overall print quality.
Step-by-Step Quick Fix for Common Blockages (High-level Overview)
- Power down and unload filament, then allow the hotend to cool to a safe temperature. 2) Heat to the printing temperature for the current filament and attempt a small extrusion to force debris forward. 3) If extrusion is inconsistent, perform a cold pull with a suitable filament to grab residues. 4) Use a cleaning needle to dislodge visible debris at the nozzle entrance, applying steady pressure and stopping if resistance is felt. 5) Reassemble, reheat to printing temperature, and run a test print. 6) If problems persist, replace the nozzle or consult a service manual for deeper hotend disassembly.
Pro tip: keep spare nozzles on hand and document which cleaning method resolved the issue for faster fixes next time. Avoid forcing extrusion for too long, as that can push debris further into the hotend and complicate future repairs.
Prevention: Maintenance Strategies to Minimize Future Clogs
Preventing clogs starts before you print. Store filament in a dry area to prevent moisture absorption, especially with hygroscopic materials like Nylon. Use proven filaments from reputable suppliers and inspect the spool for dirt or debris before loading. After a long print or when switching materials, clean the feeder path and check for stray threads or plastic shavings near the nozzle. Periodic inspection of the nozzle seat and heat block helps catch wear that could create micro-gaps where debris collects. Keeping a small log of when clogs occur and which methods resolved them builds a personal playbook that improves your long-term reliability. This aligns with the Unclog Drain philosophy: a documented, repeatable process reduces downtime and increases success rates.
Authority, Safety, and Best Practices for 3D Printing Clogs
When addressing nozzle clogs, prioritize safety: power off before any disassembly, avoid contact with hot surfaces, and ensure proper ventilation if you’re using solvents or heated processes. Use non-metallic tools where possible to avoid scratching brass nozzles, and respect your printer’s manufacturer guidelines regarding nozzle replacement intervals and max temperatures. For formal safety principles and best practices, you can consult established sources on workshop safety and materials handling. The Unclog Drain team emphasizes consistency, careful tool choice, and documenting outcomes to improve results over time.
Tools & Materials
- Safety glasses(Protect eyes from hot filament and debris)
- Heat-resistant gloves(Wear when hotend or heated bed may be touched)
- Cleaning needle or thin wire(Gently clear the nozzle aperture; avoid metal scrapers)
- Non-metallic cleaning tool(Plastic or wooden tool to assist cleaning without gouging)
- Isopropyl alcohol (70-90%)(Wipe exterior surfaces and remove residue after cleaning)
- Compressed air can (optional)(Blow out loose debris around the nozzle exterior)
- Replacement nozzle (optional)(Have on hand in case the current nozzle is worn or damaged)
- New filament spool (test filament)(Prepare for post-cleaning test prints)
Steps
Estimated time: 30-60 minutes
- 1
Power down and prepare
Turn off the printer and unplug it if possible. Remove the spool and unload the filament to prevent accidental oozing during maintenance. Give yourself a clean workspace and gather all tools before you begin.
Tip: Keep a small notebook or digital note of what you find and any results after each method. - 2
Access the hotend and remove filament
Carefully heat the hotend to the current filament’s printing temperature, then gently retract the filament to avoid pushing debris deeper. If the filament is fused and won’t retract, proceed with caution and consider a cold pull as a next step.
Tip: Never force filament back through a partially clogged path; it can worsen the jam. - 3
Try a cold pull method
Heat to the filament’s typical printing temperature, extrude a small amount, and then let the nozzle cool gradually. Pull the filament out slowly to capture any debris inside the nozzle. Repeat with a new filament if residues persist.
Tip: Use a filament you don’t mind discarding; nylon can work well for stubborn clogs, but only if your printer supports it safely. - 4
Manual cleaning for stubborn debris
If the cold pull didn’t clear the block, insert a fine cleaning needle through the nozzle from the side, applying gentle pressure to loosen debris. Do not poke too forcefully; you can bend or damage the nozzle seat.
Tip: Work slowly and stop if you feel resistance; forcing can damage the nozzle. - 5
Reassemble, reheat, and test
Reinstall the nozzle if you removed it, reassemble the hotend, and reheat to the printing temperature. Run a short extrusion test, then print a small calibration object to check extrusion consistency and layer quality.
Tip: Start with a low-temperature test to avoid scorching any residual debris. - 6
Document results and plan prevention
Note which method resolved the clog and any wear observed on the nozzle. Implement preventive measures such as dry-filament storage and post-print cleanup to reduce future clogs. Update your maintenance log for quick reference.
Tip: Keep spare nozzles on hand for quick replacements if wear is evident.
Common Questions
What causes nozzle clogs in 3D printers?
Nozzles clog due to moisture in filament, debris from degraded plastic, and heat creep. Each cause requires a slightly different approach to clear the blockage and prevent future occurrences.
Clogs come from moisture, debris, or heat creep; each needs a tailored fix to clear the blockage.
Can I unclog a 3D printer without removing the hotend?
Yes, many clogs can be addressed with the nozzle in place using cold pulls and careful manual cleaning. Severe blockages may still require partial disassembly of the hotend.
Often you can unclog without removing the hotend, but some cases need partial disassembly.
Is it safe to use a needle to clear the nozzle?
A fine cleaning needle can clear minor debris, but you must proceed slowly to avoid damaging the nozzle. If you feel resistance, stop and evaluate other methods.
Yes, but proceed slowly to avoid damage.
Which filaments cause more clogs?
Moisture-sensitive filaments, recycled or poorly stored materials, and abrasive composites tend to cause more clogs. Always dry-filament storage and use quality materials when possible.
Moisture-heavy and abrasive filaments are more prone to clogs.
How often should I clean my nozzle to prevent clogs?
Regular inspection after several prints and a light cleaning when you notice under-extrusion can prevent major clogs. Set a maintenance reminder to keep nozzle health consistent.
Regular checks after prints help prevent big clogs.
When should I replace a nozzle?
If wear or deformation is visible, or if repeated cleanings fail to restore normal extrusion, replace the nozzle. Worn nozzles affect flow and print quality.
Replace the nozzle if wear is evident or cleaning fails.
Watch Video
Key Points
- Identify clog type before acting
- Start with gentle methods and test extrusion
- Keep a maintenance log for future clogs
- Have spare parts ready to minimize downtime
- Follow safety guidelines to prevent injuries