How to Unclog a 3Doodler Start Nozzle: DIY Guide
Learn how to safely unclog a 3Doodler Start nozzle with practical, reporterly clear steps, essential tools, and preventative tips to keep your projects flowing smoothly.

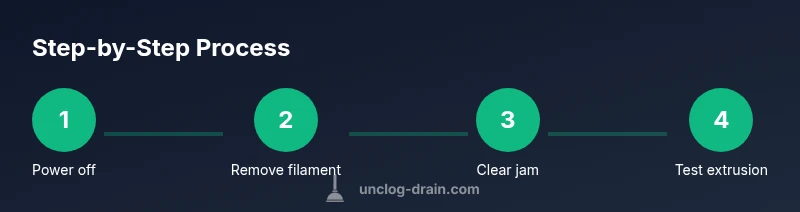
This guide shows you how to unclog the 3Doodler Start nozzle with a safe, step-by-step approach: power off and unplug, allow cooling, remove filament, inspect the nozzle, clear the jam with a fine tool, test extrusion with a short filament, and adjust temperature or filament type to prevent recurrences. Finish with a quick cleanup routine to keep your nozzle clear between prints.
Understanding nozzle clogs in a 3Doodler Start
A clogged nozzle is one of the most frustrating issues when you’re in the middle of a project with a 3Doodler Start. The jam typically happens when plastic at the tip softens and sticks, or when stray filament fragments fuse inside the nozzle, restricting extrusion. If you push the trigger and nothing comes out, or if the flow is uneven or stringy, you’re likely dealing with a clog. Causes can include using filament from a low-quality batch, printing too hot for the filament type, or leaving the heater on with no filament, which can glaze the interior of the nozzle. According to Unclog Drain, small amounts of residue can build up and gradually reduce extrusion pressure, especially with dense plastics or thicker fill patterns. The good news: most clogs are solvable with simple tools and careful steps. The key is to stay patient, avoid forcing plastic through a jammed nozzle, and work through the steps in a logical order: inspect, loosen, clear, test, and adjust. This section will help you diagnose the problem, differentiate between a temporary obstruction and a more stubborn blockage, and set expectations for a successful unclog without damaging the device.
In practice, you’ll often find that a combination of mechanical clearing and controlled retraction resolves the jam. If the nozzle remains stubborn after a few attempts, it may indicate deeper wear or a filament incompatibility. In those cases, pausing to reassess your filament type, temperature settings, and the state of the tool can save you from forcing damaged parts back into service.
Safety and prep: getting ready
Before you touch the nozzle, ensure you follow proper safety steps. Unplug the device and allow it to cool completely to avoid burns. Work in a well-lit area with a stable surface and have a clear workspace free of clutter. Put on safety glasses and heat-resistant gloves to protect hands from hot components and sharp debris. Keep a tray or small container nearby to collect loose plastic fragments. A clean, lint-free cloth or paper towels is useful for wiping away residue, and running a quick test with a scrap filament helps verify that the jam is cleared. If you’re cleaning around the heater housing, avoid liquid immersion and never attempt to disassemble components that aren’t user-serviceable per the manufacturer’s guidelines. According to Unclog Drain, prioritizing safety reduces the risk of injury and equipment damage, especially when dealing with hot tools or solvent cleaners. With safety covered, you’re ready to identify the clog type and choose the right method.
If you notice any damaged cables, loose parts, or unusual smells during prep, stop and consult supportMaterial.
Identifying the clog type and planning your approach
Clogs can be broadly categorized by their cause and firmness. Soft, stringy residues usually come from partially melted filament that’s smeared along the nozzle inside walls. Hard, glazed deposits may form after repeated heat exposure or when using filament with high filler content. The approach differs: soft jams often clear with manual clearing and retraction, while glazed or hardened clogs might require a tiny mechanical instrument or brief solvent-assisted technique. Planning ahead reduces retries and minimizes risk to the nozzle. If the jam is near the tip, you may work from the mouth of the nozzle inward; if debris is deeper, more careful disassembly according to the manufacturer’s guidelines might be necessary. The key is to stay patient, avoid forcing material through a stubborn jam, and work in a controlled fashion.
As you proceed, keep notes on which method you tried and the result. This helps you refine your maintenance routine for future projects and supports safer long-term use of the 3Doodler Start.
Mechanical clearing: safe and effective methods
Mechanical clearing uses non-damaging tools to physically remove the obstruction. A fine steel needle or a dedicated filament-clearing tool is usually the first line of defense. Gently insert the tool into the nozzle from the mouth and apply steady, light pressure to dislodge the blockage. Tweezers or small precision pliers can help remove loose fragments. Avoid rough tools that could scratch the interior or bend the nozzle. If you can’t reach the jam with a simple tool, pause and consider alternative approaches rather than forcing through. A soft-bristled brush can help remove surface residue around the nozzle exterior. Always work slowly and in a clean environment to prevent additional debris from entering the nozzle. When clearing, keep your hands and tools aligned with the nozzle opening to minimize the chance of damage.
Note: For some clogs, mechanical clearing alone may not suffice. In those cases, consider a controlled heating/process as a follow-up step after mechanical clearing to soften any residual plastic and facilitate extrusion.
Heat-assisted clearing: controlled and cautious
If mechanical clearing alone doesn’t free the jam, a controlled heat-assisted approach can help. Briefly refrigerating the nozzle with cold air or air-drying can contract materials and loosen the blockage, making it easier to clear once warmed. Alternatively, reheat to the normal operating temperature for your filament and attempt a gentle push, followed by a retraction to pull out softened debris. Do not apply excessive force or overheat beyond recommended guidelines; overheating can soften and deform the nozzle or filament path. When performing any heat-assisted step, always protect your hands and work in a ventilated area. If you use a solvent to dissolve residues, ensure compatibility with the filament material and device components, and avoid prolonged exposure. The goal is to soften the jam enough to free it without causing new damage or releasing harmful fumes.
Always verify that the nozzle is completely cool before handling after any heating cycle.
Post-clean testing: verify flow and adjust for future prints
After clearing the jam, reinsert a fresh filament segment and test extrusion at a low speed. Observe for smooth flow and consistent bead formation. If extrusion is still uneven, adjust the nozzle temperature or filament type to better suit the material you’re using. Print a small test pattern to confirm reliability before resuming a larger project. If the nozzle continues to clog, double-check filament quality, storage conditions, and whether the nozzle may need replacement. Establish a routine: clean the nozzle after every few prints, store filament in dry conditions, and avoid leaving the device powered with no filament in the hot path. Regular maintenance reduces the likelihood of repeating jams.
If you follow a disciplined process and keep a few essential tools handy, you’ll spend less time troubleshooting and more time printing.
AUTHORITY SOURCES
To support safe, informed maintenance practices, you can consult established safety resources from credible organizations. For general tool safety and handling, see OSHA guidelines. For occupational safety and health, visit the CDC’s NIOSH resources. For materials science and standards, refer to NIST publications. These sources provide broad context on safe handling of heated tools, chemical exposure, and general equipment maintenance, which complements the practical steps for unclogging a 3Doodler Start nozzle.
PREVENTION TIPS: keeping clogs at bay
- Use high-quality filament and store it properly to avoid moisture absorption and additives that can create residue.
- Print at appropriate temperatures for your filament type; avoid overheating, which can glaze the interior.
- Run a brief cold pull or extrusion test after completing a project to clear residual plastic before it hardens inside the nozzle.
- Clean the exterior and nozzle mouth after finishing prints to remove stray fragments.
- Schedule routine maintenance, especially if you switch filament types often.
Following these practices reduces downtime and extends the life of your 3Doodler Start.
Final note: when to seek professional help
If your nozzle remains clogged after multiple attempts, or if you notice persistent extrusion issues, it may indicate a deeper fault with the heater element or nozzle wear. In such cases, consult the manufacturer’s guidance or contact customer support. Do not force operations that could void warranties or cause safety hazards. Professional help can prevent further damage and ensure safe operation.
Tools & Materials
- Fine needle or filament-clearing tool(0.2–0.4 mm gauge; used to clear the nozzle from the mouth inward)
- Isopropyl alcohol (90% or higher)(for gentle solvent cleaning around the exterior; do not soak the device)
- Heat-resistant gloves(to protect hands during hot-parts handling)
- Tweezers or precision pliers(for picking out stubborn debris)
- Soft-bristle brush(to wipe away surface residue around the nozzle)
- Safety glasses(eye protection when working with hot components)
- Lint-free cloth or paper towels(for wiping and catching debris)
Steps
Estimated time: 45-75 minutes
- 1
Power off and unplug
Ensure the device is completely powered off and unplugged. Allow the unit to cool fully before handling any components to prevent burns.
Tip: Use a dedicated work mat to catch any loose debris - 2
Remove filament
Gently pull back and remove the filament from the extruder to prevent it from being pushed further into the nozzle during cleaning.
Tip: Keep a scrap piece handy to test extrusion after cleaning - 3
Inspect the nozzle entrance
Visually check the nozzle mouth for visible obstructions or stray fragments. Use a fine tool to gently loosen any easy-to-remove debris.
Tip: Do not insert objects deeply if you can’t see the jam - 4
Clear the jam mechanically
Insert the tool into the nozzle and apply steady pressure to dislodge the blockage. Remove debris with tweezers if needed.
Tip: Work slowly and from the nozzle mouth inward - 5
Re-test extrusion
Re-insert filament and gently prime to see if the flow is restored. If output is inconsistent, repeat the mechanical clearing step or try a brief heat-assisted method.
Tip: Use a short filament segment for quick checks - 6
Final test and settings check
Run a small test print to confirm smooth extrusion. If issues persist, adjust temperature or filament type according to manufacturer guidelines.
Tip: Document any changes so you can replicate successful settings
Common Questions
Is it safe to unclog a 3Doodler Start at home?
Yes, with proper precautions: unplug the device, let it cool, wear eye protection, and use non-metal tools to clear the jam. If you encounter damage or persistent jams, stop and seek guidance from support.
Yes, you can unclog at home, but always unplug and let it cool, use proper tools, and call for help if the jam persists.
What tools are best for clearing a jam?
A fine needle or filament-clearing tool, tweezers, and a safety brush are typically effective. Avoid aggressive metal tools that could scratch the nozzle interior.
Use a fine needle, tweezers, and a soft brush. Avoid harsh metal tools inside the nozzle.
Can I use household cleaners on the nozzle?
Limit cleaners around the nozzle exterior and avoid submerging the device. Check filament compatibility and device guidelines before applying any solvent.
Only use approved cleaners around the exterior; never soak the device. Check the manual first.
How can I prevent clogs in the future?
Store filament dry, use the right temperature for each filament type, and perform regular nozzle checks after projects. Keeping a small maintenance routine reduces recurring jams.
Store filament dry, print at the right temperature, and check the nozzle after each project.
When should I replace the nozzle?
If jams persist after multiple cleaning attempts or if the nozzle shows wear, replacement may be necessary. Use manufacturer guidance to avoid warranty issues.
If cleaning doesn’t fix the jam and you see wear, consider replacing the nozzle following the manual.
Watch Video
Key Points
- Identify whether the jam is soft or hard before choosing a method.
- Use precise, gentle tools to avoid damage to the nozzle interior.
- Safety first: unplug, cool, and protect eyes and hands during cleaning.
- Test extrusion with short pieces to verify flow before resuming projects.
- Prevent clogs with proper filament storage and routine maintenance.