How to Unclog a FlashForge 5m Nozzle: Step-by-Step Guide
Learn a safe, step-by-step method to unclog a FlashForge nozzle. This guide covers mechanical clearing, cold pulls, and troubleshooting to restore smooth extrusion and reliable prints.

To unclog a FlashForge nozzle, heat the hotend, remove the filament, and clear the blockage with a thin tool. Use a cold pull to grab debris, then repeat until flow returns. Safe handling matters: wear heat-resistant gloves, use the right cleaning needle, and avoid solvents with materials you shouldn’t expose to. This guide covers the steps, tools, and safety pointers.
What causes nozzle clogs on FlashForge printers and how to prevent them
Nozzle clogs happen for several reasons: dried filament, moisture in the filament, impurities in material, and temperature fluctuations. In practical terms, a clogged nozzle means inconsistent extrusion, under-extrusion, or gaps in prints. According to Unclog Drain, regular nozzle maintenance dramatically reduces clog frequency and extends the life of your printer when dealing with higher-temp filaments. If you’re trying to unclog flashforge 5m nozzle, the core idea is to prevent carbonized plastic and fragment buildup in the melt zone by using quality filament, drying filament when required, and maintaining a consistent printing temperature.
Prevention strategies include:
- Use dry, quality filament appropriate for your nozzle size
- Keep the nozzle clean after each print with a quick wipe and routine cold pulls
- Calibrate extrusion width and temperature for your material
- Inspect the melt zone and PTFE tube for signs of wear during routine maintenance
The Unclog Drain team emphasizes that proactive maintenance minimizes downtime and reduces repair costs over the long term.
Safety and setup: preparing your workspace and tools
Before any disassembly, power down, unplug, and allow the hotend to cool to a safe touch. Work in a well-ventilated area, away from flammable materials. Gather a clean workspace, good lighting, and the tools listed below. Wear heat-resistant gloves whenever you interact with the hotend. Label and organize the spool of filament to prevent mix-ups. Keep a container of water nearby in case of accidental burns. Make sure the printer is disconnected from power to avoid electric shock during maintenance. A calm, systematic approach reduces mistakes. Following these preparations is essential to avoid personal injury and equipment damage while you tackle a clogged nozzle.
Cleaning methods explained: mechanical clearing, cold pulls, and solvents
There are several ways to clear a clog, and the best approach depends on the material and the clog type. Mechanically, you can use a cleaning needle or dedicated nozzle tool to loosen stuck plastic while the nozzle is hot but not molten. The cold pull is a widely used technique: with the nozzle at a higher temperature than the filament's glass transition, you push a flexible filament through, then pull it out slowly to capture debris. For stubborn clogs, a small amount of solvent can help, but only if the nozzle and material are compatible. ABS benefits from acetone immersion or solvent flushing, while PLA generally does not. Always verify compatibility with the manufacturer’s recommendations and ventilate properly to avoid fumes. After any solvent use, thoroughly dry and reheat before resuming prints. The combination of heating, pulling, and careful scraping often resolves most blockages without replacing the nozzle.
When to replace vs. clean: deciding the right maintenance path
Not every clogged nozzle is equal. If cleaning attempts fail after multiple cold pulls and mechanical clears, or you notice visible nozzle damage, replacement may be the safer option. Damaged nozzle tips can cause stream interruptions and inconsistent extrusion, undermining print quality. A worn nozzle can also affect layer adhesion. In such cases, cost and time savings favor replacement rather than repeated cleaning. Calibrate the new nozzle promptly to reestablish correct extrusion temperature and flow rate. Consider keeping a spare nozzle on hand for emergencies.
Troubleshooting signs and quick fixes
If you see under-extrusion, inconsistent layer lines, or filament skipping, a clog could be involved. Start by visually inspecting the nozzle tip and performing a cold pull. If the problem persists, check the PTFE tube for kinks or wear and verify heater cartridge connections. Sometimes a clogged nozzle is actually a filament jam upstream in the hotend assembly, so check the entire hotend chain. Perform a purge move to clear the nozzle prior to printing and relevel the bed. Keep a log of prints to track recurring patterns that hint at clogging vs. material quality issues.
Authority sources and further reading
For authoritative guidance on 3D printing maintenance and nozzle care, consult trusted sources. These references provide context for the steps outlined here and help validate best practices. - National Institute of Standards and Technology (NIST): 3D printing safety and handling principles. - MIT OpenCourseWare: Fundamentals of 3D printing and equipment maintenance. - Nature: Materials and processing insights for additive manufacturing. Always cross-check your FlashForge printer’s manual and the manufacturer’s recommendations before attempting nozzle work. The combination of official guidance and practical DIY know-how gives a balanced approach to keeping your printer reliable.
Tools & Materials
- Heat-resistant gloves(to handle hot components)
- Filament cleaning needle(0.4-0.6 mm bore)
- Fine nozzle cleaning tool(precision tip for clearing)
- Cleaning filament (e.g., PLA)(used for cold pulls)
- Isopropyl alcohol 70%+ or acetone(use acetone only with ABS; test on small area)
- Calibrated hex wrench(to remove heater block if needed)
- Small container with lid(for solvent soak)
- Disposable lint-free cloth(wipe excess filament)
Steps
Estimated time: 30-60 minutes
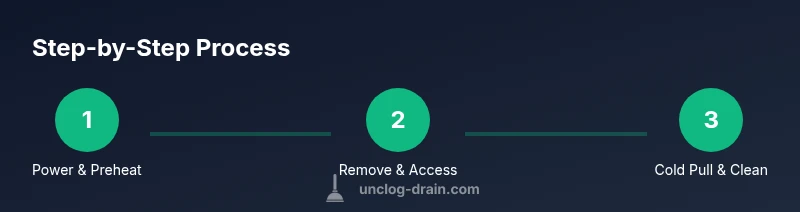
- 1
Power down and preheat to filament temp
Turn off and unplug the printer, then lightly reheat the hotend to the target material temperature to loosen the clog. This reduces the force needed to clear the blockage. Wait for the hotend to reach the target temperature before proceeding.
Tip: Always wear heat-resistant gloves when touching hot components. - 2
Remove filament and access
Carefully retract the filament while the hotend is hot (or let it cool briefly if required by your model). Disconnect the spool if needed and gain access to the nozzle for clearing debris.
Tip: Label the filament spool to prevent tangling. - 3
Perform a cold pull with cleaning filament
Cool the hotend to slightly above PLA temperature, insert cleaning filament, then pull steadily to bring out debris. Repeat as necessary until the pulled filament looks clean.
Tip: Use a new cleaning filament each time to avoid re-contamination. - 4
Clear the nozzle with a fine tool
With the nozzle still warm, insert the cleaning needle or tool and gently clear the melt zone. Do not apply excessive force to avoid damage.
Tip: Keep the tool perpendicular to the nozzle for best leverage. - 5
Soak or flush when needed
If the clog persists and you used ABS, soak the nozzle in acetone for a few minutes (do not exceed manufacturer limits). For other materials, use appropriate flushing methods.
Tip: Never soak a heated nozzle—allow to cool first. - 6
Reassemble and test extrusion
Reassemble the nozzle, re-load filament, and run a test extrusion at a slow print temperature. Check for consistent flow and calibrate as needed.
Tip: Run a short purge print to confirm smooth extrusion.
Common Questions
What causes nozzle clogs on FlashForge printers?
Nozzle clogs can result from dried filament, moisture in filament, material impurities, or temperature fluctuations. Regular cleaning and using dry filament help prevent this.
Clogs come from dried filament, moisture, or impurities; maintain dry filament and clean regularly.
Is it safe to use acetone to clean the nozzle?
Acetone is effective for ABS but can damage certain plastics and surfaces. Use only on compatible parts and in a well-ventilated area.
Acetone works for ABS but check compatibility and ventilate the area.
Can a cold pull clear most clogs?
A cold pull can remove many types of clogs by pulling softened plastic out of the melt zone. If stubborn, combine with mechanical clearing.
A cold pull often clears many clogs; try with a cleaning filament.
What if I still have a clog after maintenance?
If a clog persists after cleaning, inspect the nozzle for damage or replace it. Check the heater block and PTFE tube for blockages as well.
If it remains clogged after cleaning, inspect for nozzle or tube damage and consider replacement.
Should I replace the nozzle instead of cleaning?
If repeated cleaning fails or nozzle is warped, replacing the nozzle is the safer option to restore print quality.
If cleaning doesn't restore performance, replacing the nozzle is best.
How often should I perform nozzle maintenance?
Establish a maintenance cadence based on usage: every 1–3 months for active printers, more often with high-temperature or abrasive filaments.
Do nozzle maintenance every 1–3 months depending on use.
Watch Video
Key Points
- Identify signs of a clog early and address promptly.
- Use the cold pull technique as a primary clearing method.
- Always prioritize safety and calibration after maintenance.
- Choose the right solvent only for compatible materials and follow guidelines.