Unclog a 3D Pen: A Practical DIY Guide
Learn to unclog a 3D pen safely with a step-by-step approach, essential tools, and maintenance tips. This 2026 guide covers common jams, safe disassembly, nozzle cleaning, and long-term prevention to keep extrusion smooth.

You can unclog a 3D pen by safely disassembling the nozzle, removing jammed filament, and testing extrusion with a fresh filament. Start by unplugging the pen and letting the hotend cool, then inspect for obvious jams or worn parts. This guide covers common jam causes, safe techniques, and ongoing maintenance to keep the nozzle clear.
Understanding 3D Pen Clogs: Common Causes and Symptoms
3D pens rely on plastic filament being melted and pushed through a micro-nozzle to create shapes. Clogs derail this process by preventing smooth extrusion. Understanding causes helps you choose the right remedy and avoid repeated jams. Common culprits include filament moisture, contaminated filament (dust or color remnants), old or mismatched filament diameters, and debris from failed prints. When a clog forms, you may notice inconsistent extrusion, thin or broken lines, blobs, or sudden stops in filament flow. In some cases, filament can burn or discolor at the nozzle, signaling overheating or trapped residue. PLA tends to clog less aggressively than some blends, but all filaments can degrade over time if stored improperly. PETG and ABS produce different residue profiles; PETG residue can be tacky and sticky, while ABS may leave a gummy film. Visual inspection is your first diagnostic step; look for crusty buildup at the nozzle tip, charred filament fragments, or warped spool scrap that scratches the interior. If you catch signs early, you can often clear the jam using simple cleaning methods without disassembly.
Safety Precautions Before You Start
Working with a 3D pen involves hot components and sharp tools, so safety is essential. Always unplug the device and allow the hotend to cool to a safe touch temperature before you touch any interior parts. Work on a heat-resistant surface and keep a fire-safe extinguisher nearby in case of accidents. Wear eye protection and avoid loose clothing that could catch on gear. Use minimal force when probing the nozzle to prevent bending or breaking the heater block. Keep children and pets away while you work, and never immerse electronics in liquids. If you’re using solvents, ensure you have adequate ventilation and follow the product safety data sheets. When in doubt, consult the manufacturer’s guidelines for your specific model to avoid warranty issues or damage.
Tools and Materials You’ll Need
Before you begin, gather the essentials. The right tools reduce risk and speed up the process:
- Nozzle cleaning needle (rounded tip) — essential for dislodging crusty buildup without scratching the nozzle.
- Isopropyl alcohol (70-90%) — for cleaning filament residue and the exterior of the nozzle.
- Cotton swabs — for precision cleaning in tight spaces around the nozzle tip.
- Small pliers — to gently grab and remove jammed filament without bending internal parts.
- Tweezers — for pulling out stubborn fragments from the feed tube.
- Paper towels or lint-free cloth — to wipe residue and keep the workspace clean.
- Heat-safe gloves — to protect hands when handling hot parts after disassembly.
- Warm water — to soften and flush out loose debris.
- Optional: Cleaning filament — used for a controlled purge through the nozzle during tests.
Cleaning Methods by Filament Type
Different filaments leave different residues. PLA is usually easier to clean than PETG or ABS due to its lower melting point and cleaner burn characteristics. For PLA, a gentle cold pull with a fresh PLA filament can clear shallow jams. PETG residues may be stickier and require more aggressive cleaning, but avoid aggressive solvents that could heat-damage components. ABS can be trickier, as its fumes are stronger and residue may appear gummy; ensure good ventilation and use compatible solvents. In all cases, start with the simplest method—the cold pull and gentle extrusion tests—before moving to disassembly. If you must disassemble, keep track of small parts and reassemble in the reverse order.
Consider performing a brief test with a known-good filament to verify extrusion after each cleaning step to distinguish between a true jam and a temporary extrusion hiccup.
Quick Fixes for Minor Jams
For minor jams, a few quick tricks can resolve the issue without full disassembly. Unplug the pen, heat it to normal operation temperature, then push a fresh filament through while gently pulling the jammed filament back with pliers. A cold pull (cool the nozzle after heating) can also dislodge debris from the interior. Run several short extrusion bursts, pausing between attempts to monitor flow. If the jam clears, purge a small amount of filament to ensure consistent flow before resuming your project.
When Disassembly Is Necessary
If cleaning methods fail, disassembly is often unavoidable. Begin by unplugging the device and letting it cool completely. Remove the filament and detach the nozzle carefully, noting how parts fit together. Inspect the heater block and interior housing for melted residues or crusty deposits. Do not force components apart; if resistance is high, recheck alignment or consult the manufacturer’s guide for your model. Use a gentle touch and keep track of screws and small parts so nothing gets lost. After cleaning, reassemble and test with a fresh filament before continuing work.
Nozzle Cleaning Techniques: Best Practices
When cleaning the nozzle, use the cleaning needle with a light, steady motion to loosen crusty buildup. Do not pry aggressively, which can widen the nozzle or damage the heater block. Alcohol swabs can remove surface residue, while warm water helps flush away loosened debris. For stubborn deposits, a cold pull with the same filament type can be effective by allowing the filament to cool and then tugging it out with a firm, steady motion. After cleaning, reassemble and perform a test extrusion on a known-good filament to confirm clearance.
Maintenance and Prevention for Long-Term Performance
Prevention is better than remediation. Store filaments in a dry, sealed container to avoid moisture uptake which can cause hydrolytic degradation and logging in the nozzle. Purge a short amount of filament before starting a project to ensure clean flow. Regularly inspect the nozzle and feed tube for wear and replace components as needed. Use high-quality filaments and avoid mixing brands or colors that could introduce adhesive residues. Calibrate the extrusion multiplier in the printer settings if you notice irregular flow after cleaning.
Common Pitfalls and How to Avoid Them
Pitfalls include rushing through steps, using excessive force, or neglecting cooling times. Avoid using metal tools to scrape the inside of the nozzle, as this can nick or widen the orifice. Never attempt to clean a live hotend with water; always let it cool first. Keep a tidy workspace to prevent losing small screws. Finally, avoid applying harsh solvents not recommended for your printer’s materials, as they can degrade seals and plastics.
Tools & Materials
- Nozzle cleaning needle(Rounded tip to reduce scratching)
- Isopropyl alcohol (70-90%)(For cleaning filament residue)
- Cotton swabs(Precision cleaning in tight spaces)
- Small pliers(Gently grab jammed filament)
- Tweezers(Fine-tipped for filament removal)
- Paper towels or lint-free cloth(Keep workspace clean)
- Heat-safe gloves(Protect hands when handling hot parts)
- Warm water(Soften stubborn residue)
- Optional: Cleaning filament(Used for controlled purge through nozzle)
Steps
Estimated time: Estimated total time: 45-75 minutes
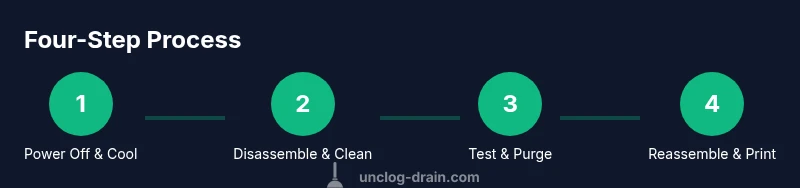
- 1
Power off and cool down the hotend
Unplug the pen and allow the hotend to cool to a safe handling temperature before touching any interior parts. This protects you from burns and prevents accidental damage to sensitive components.
Tip: Never touch the nozzle while it’s hot; use a heat-safe glove if you must handle nearby parts. - 2
Remove the filament
Gently pull out the filament from the feeder while the nozzle is cooled, avoiding twisting or pulling with force. If filament is stuck, use pliers to assist without bending the nozzle.
Tip: Keep a clean pull to prevent debris from entering the feed path. - 3
Access the nozzle assembly
Disassemble the nozzle housing according to your model’s manual. Keep screws in a labeled container so you can reassemble correctly.
Tip: Document the order of parts to simplify reassembly. - 4
Inspect nozzle and hotend
Look for crusty buildup, charred fragments, or melted residue around the nozzle tip and heater block. A visual check helps decide whether cleaning is enough or disassembly is required.
Tip: If residue is heavy, set aside time for thorough cleaning rather than rushing the process. - 5
Perform a cold pull or forced extrusion
After the hotend cools slightly, insert fresh filament and gently pull it out to remove lodged debris. Repeat a couple of times with fresh filament to improve clearance.
Tip: Alternate with a quick reheat to push debris out without melting new residue. - 6
Clean the nozzle with tools
Use the cleaning needle to loosen crust, then wipe with alcohol-soaked swabs. Avoid prying deeply that could enlarge the nozzle hole.
Tip: Work slowly and steadily; there’s no rush when near the nozzle opening. - 7
Reassemble and test extrusion
Reassemble in reverse order, load a fresh filament, and run a test extrusion at normal operating temperature. Watch for consistent flow and bead thickness.
Tip: If extrusion is inconsistent, pause and recheck the nozzle seating and filament path. - 8
Final purge and cleanup
Purged filament under controlled conditions to clear any residual debris before starting your project. Clean the exterior and ensure there are no loose parts.
Tip: Dispose of used filament fragments responsibly; keep your workstation neat for next use.
Common Questions
What causes 3D pen clogs?
Clogs usually arise from moisture in filament, dust or color remnants, degraded filament, or residue buildup at the nozzle. Improper storage and mixed filaments can also contribute. Regular checks help catch issues early.
Clogs come from moisture, dust, or residue buildup at the nozzle. Proper storage and using compatible filaments reduce risk.
Can I unclog a pen without disassembly?
Yes, for minor jams you can try a controlled push-purge with a fresh filament and a cold pull. If resistance persists, disassembly is often required to clear deeper debris.
For small jams, try a controlled purge with new filament and a mild cold pull. If it doesn’t clear, you may need to take it apart.
Is it safe to use metal tools on the nozzle?
Metal tools can damage the nozzle or heater block. Prefer plastic or nylon tools, and use cleaning needles carefully for crusty buildup.
Avoid metal tools on the nozzle; use plastic tools or a cleaning needle carefully to prevent damage.
Which filament types are easiest to unclog?
PLA is generally easiest to unclog due to its lower melting point and cleaner burn characteristics. PETG and ABS may require more persistent cleaning and ventilation.
PLA is typically the easiest to unclog; PETG and ABS can be more stubborn and require extra care.
How long does a typical unclogging take?
Most clogs can be resolved in 30 to 60 minutes with the right tools and steps. More stubborn jams may take longer or require replacement parts.
Most jams take about 30 to 60 minutes; complex cases may need more time or parts.
How can I prevent clogs in the future?
Store filaments dry, purge a small amount before printing, regularly clean the nozzle, and use high-quality filament. Calibrate extrusion settings if flow appears inconsistent.
Store filament dry, purge before printing, and clean the nozzle regularly to prevent future clogs.
Watch Video
Key Points
- Identify clog causes before disassembly.
- Use proper tools and safety precautions.
- Test extrusion after cleaning to confirm clearance.
- Prevent future clogs with routine maintenance.