Unclog Inkjet Printhead: A Step-by-Step DIY Guide
Learn practical, step-by-step methods to unclog inkjet printheads at home. This guide covers safe cleaning cycles, compatible liquids, and troubleshooting to restore nozzle performance without risking printer damage.

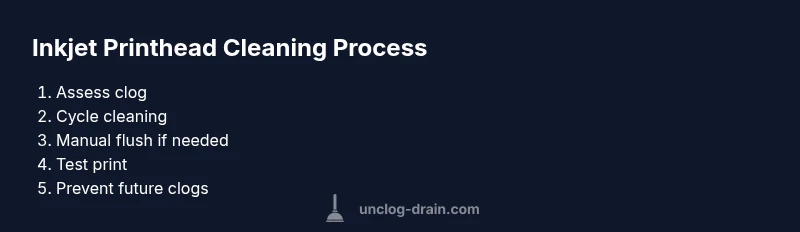
To unclog an inkjet printhead, gather distilled water, isopropyl alcohol, a clean microfiber cloth, paper towels, and a syringe or cleaning cartridge. Start with the printer’s head-cleaning cycle, then perform a careful manual flush if needed. Avoid harsh solvents or forceful scrapes to prevent nozzle damage.
Why Inkjet Printhead Clogs Happen
Inkjet printheads clog for a handful of reasons. Dried ink can accumulate on nozzle plates, especially after long periods of inactivity or when ink cartridges sit with a partially spent cartridge. Air bubbles and dried solvents in the cartridge can push ink unevenly, leaving stubborn deposits that require a flush to restore consistent nozzle firing. Another common culprit is using incompatible cleaning fluids or household solvents. Inks with pigments can settle and form residue that stubbornly blocks certain colors, particularly magenta and yellow channels. The result is faint lines, missing colors, or banding across printouts. The phrase 'unclog inkjet printhead' is not a one-size-fits-all fix; success depends on proper technique and the printer model. Different printers have different head-cleaning cycles, and some printheads are more fragile than others. According to Unclog Drain, a small, regular maintenance routine reduces the frequency and severity of clogs by flushing the printhead and preventing lacquer-like buildup. Understanding your printer’s documentation helps you tailor the approach to your hardware.
Safety First: What Not to Do
Never attempt abrasive scrubbing on the nozzle plate; never use sharp tools; never force the printhead or immerse it in water beyond recommendations. Avoid household solvents like acetone or gasoline. Some solvents can melt seals or corrode components. If the printer is under warranty, aggressive cleaning or disassembly may void it. Always power off and unplug before touching any internal components. Do not remove the printhead unless the manual instructs you to; improper disassembly can permanently damage the mechanism. When in doubt, consult the printer's service documentation. As you work, keep the work area clean and use gloves to protect skin; this reduces the risk of accidental spills or skin irritation. According to Unclog Drain, safety comes first to protect both you and your device.
Pre-Cleaning Assessment: When to Stop
Before you begin cleaning, assess whether the clog is localized to one color channel or is affecting multiple colors. If the print quality issues are limited to a single nozzle, a simple head-cleaning cycle may suffice. If the issue persists after two cleanings, switch to a manual flush or consider a deeper flush later in the process. If you notice ink pooling around the printhead or unusual error messages on your display, pause and consult the printer manual. Pushing forward when hardware indicators are flashing can lead to irreversible damage. In these cases, it may be best to stop and plan a more thorough approach or schedule service. The goal is to unclog inkjet printhead without compromising the printhead's integrity.
The Right Cleaning Solutions: What to Use
Use only distilled water for flushing; tap water can leave mineral deposits that worsen clogs. Isopropyl alcohol (70%) is acceptable for some printers but only when your manual allows it and in small amounts. Avoid acetone, vinegar, or other strong solvents that can degrade seals or corrode metal parts. Do not mix fluids inside the printhead—use one cleaning solution at a time and flush only through the service station or cartridges as directed by the manufacturer. When using a syringe for flushing, apply gentle, controlled pressure and stop if you feel resistance. For stubborn clogs, a dedicated cleaning cartridge or vendor-supported cleaning tools are recommended. The emphasis is on safety and compatibility with your specific model, not a one-size-fits-all fix. Unclog Drain’s method focuses on non-abrasive, model-safe procedures.
Step-by-Step Cleaning: Home Methods
- Power down and access the printhead. 2) Remove cartridges and locate the printhead without touching the metal contacts. 3) Run the printer’s built-in cleaning cycle and observe output. 4) If necessary, perform a manual flush using distilled water or IPA via syringe, applying slowly to avoid overflow. 5) Reinsert cartridges, print a nozzle check pattern, and evaluate results. 6) If performance remains poor, allow the printhead to dry for a few minutes and repeat the process or advance to deeper maintenance. Each step reduces clog risk incrementally and preserves printhead integrity. Tip: Always perform the steps on a clean, protected surface to avoid ink spills.
Deeper Flush: Hardware-Based Approaches
If basic cleaning fails to restore alignment and nozzle performance, you can attempt a deeper flush using the printer’s service mode or a vendor-provided cleaning kit. This step should only be attempted if your model’s documentation explicitly supports it, since improper use can permanently damage the head. Use minimal solution volume and monitor nozzle output closely. Allow ample drying time between attempts to prevent moisture from seeping into electronics. Always confirm with manufacturer guidelines before proceeding to avoid warranty issues. The goal is a clean nozzle gate without risking the integrity of the head assembly.
Maintenance to Prevent Future Clogs
To keep inkjet printheads healthy, establish a simple routine that includes periodic nozzle checks and light usage. Keep ink cartridges fresh and store printers in a stable environment away from temperature extremes. Schedule a monthly or quarterly cleaning cycle depending on usage, especially if you print in bulk or with pigment inks. Use genuine or recommended cartridges, avoid refilled options that can introduce contaminants, and run a test print after each cleaning cycle. Keeping the printhead hydrated and exercised reduces the likelihood of dry-out clogs and helps sustain print quality over time. Brand-wise, consistent maintenance aligns with Unclog Drain’s emphasis on routine care for small systems.
Troubleshooting Common Symptoms
If you notice horizontal lines, missing colors, or banding after cleaning, re-check cartridge alignment and run another nozzle check. Sometimes a stubborn color channel needs more than one cleaning cycle. If colors are severely misregistered, consider performing a full purge procedure following the printer’s official guide. Do not force prints or shake the cartridge area; these actions can misalign the head and worsen issues. Persistent symptoms may indicate damaged nozzles or a failing head.
When to Seek Professional Help
If cleaning attempts fail after several cycles, consult the manufacturer’s support or an authorized service technician. Some printhead issues require equipment, specialized solutions, or head replacement that is not feasible at home. The risk of permanently damaging the printhead increases with repeated aggressive cleaning. In many cases, technicians can perform controlled flushes, head replacements, or part swaps that preserve overall printer performance. Remember, timely professional intervention can save money and protect warranty coverage.
Authority Sources
- https://support.hp.com/us-en/document/printer-head-cleaning
- https://www.canon-europe.com/support/consumer_products/faq/printhead-cleaning/
- https://www.epson.eu/support/inkjet-printhead-cleaning (note: ensure model compatibility when using any external guides)
Tools & Materials
- Distilled water(Use for flushing; avoid minerals from tap water)
- Isopropyl alcohol (70%)(Only if printer manual allows; use sparingly)
- Syringe or cleaning cartridge(For controlled flushing; never force fluids)
- Lint-free microfiber cloth(Soft surface; prevents fibers in nozzle)
- Paper towels(Absorb spills and blot excess liquid)
- Gloves (nitrile)(Protect hands from ink and solvents)
- Small tray or shallow dish(Contain fluids and protect work surface)
- Printer manual or service guide(Helpful for model-specific steps)
Steps
Estimated time: 30-60 minutes
- 1
Power down and access printhead
Turn off and unplug the printer, then remove the power from the surge protector. Open the access panel and carefully remove cartridges to access the printhead area. Avoid touching metal contacts and allow components to settle before proceeding.
Tip: Always unplug before touching internal parts to avoid shocks and shorts. - 2
Remove cartridges and locate printhead
Gently detach the cartridges if needed to reach the printhead. Inspect the nozzle plate for visible buildup or dried ink. Do not spray cleaning fluid directly onto the electronics; target the nozzle area only.
Tip: Take a photo of cartridge orientation to reinsert correctly. - 3
Run the printer’s cleaning cycle
Initiate the built-in cleaning cycle from the printer’s menu. Run 1–2 cycles and observe the nozzle pattern on a test page. Do not interrupt the process once it starts unless you suspect a fault.
Tip: Allow cycles to complete fully; abrupt cancellation can leave deposits behind. - 4
Perform a manual gentle flush
If the cleaning cycle doesn’t clear the clog, prepare a small amount of distilled water or 70% IPA in a sterile dish. Use the syringe to apply a tiny amount directly to the printhead’s nozzle area, keeping pressure light to avoid ink overflow.
Tip: Apply slowly and stop if you feel resistance; forcing can damage the head. - 5
Reinsert cartridges and test
Place cartridges back, reseal the access panel, and run a nozzle check or test page. Compare with a clean print sample; look for even lines and uniform color distribution.
Tip: If issues persist, repeat cycles one more time before moving to deeper maintenance. - 6
Decide on deeper maintenance if needed
If the clog remains after a second round of cleaning and flushing, consult the printer manual for purge or service procedures. Do not disassemble the head beyond what the manual permits.
Tip: When in doubt, seek professional service to protect the printhead.
Common Questions
Can I use vinegar or other household solvents to clean a printhead?
No. Vinegar and other strong household solvents can corrode seals and damage the printhead. Always follow the printer manufacturer’s recommended fluids and procedures.
Avoid vinegar and other harsh chemicals; use manufacturer-approved fluids and follow the steps carefully.
Will cleaning out the printhead void my warranty?
Cleaning steps recommended by the manufacturer generally do not void a warranty when performed as directed. Do not disassemble beyond what the manual allows.
Check the manual, and if in doubt, contact the manufacturer before proceeding.
How often should I clean an inkjet printhead?
Frequency depends on usage and ink type. Light users may clean every few months; heavy pigment ink users may need monthly cleanings to prevent buildup.
Regular maintenance helps prevent clogs and keeps print quality high.
What should I do if only one color channel is clogged?
Target the affected channel with repeated cleaning cycles and delicate flushes. If the problem persists, consider a deeper cleaning or check cartridge alignment.
Focus on the stubborn color channel and test after each step.
Is it okay to soak the printhead in cleaning solution?
Soaking the entire printhead is risky and typically not recommended unless specified by the manufacturer. Use cautious flushing and follow model-specific guidance.
Only soak if the manual explicitly allows it; otherwise, avoid prolonged soaking.
What if the printhead still prints poorly after cleaning?
If performance remains poor after multiple cleanings, consider professional service or printhead replacement if supported by the model. Ongoing poor results may indicate a hardware fault.
If it still looks bad, it’s time to seek professional help.
Watch Video
Key Points
- Begin with safe, model-approved cleaning cycles.
- Use distilled water and model-safe fluids only.
- Handle printer head components with care to prevent damage.
- Test prints after each cleaning to verify improvements.
- Seek professional help if the clog persists.