How to Unclog an Aerosol Can: A DIY Guide
Learn safe, practical methods to unclog aerosol can nozzles. This guide covers tools, step-by-step techniques, safety tips, and maintenance to prevent future clogs.

If your aerosol can nozzle is clogged, this quick answer shows safe, practical steps to unclog it and restore spray performance. You'll learn where clogs come from, how to clear them without damaging the can, and when to replace the can. This approach minimizes waste and keeps cleanup manageable while reducing the risk of accidental discharge.
Understanding the Clog: Why the Aerosol Nozzle Gets Blocked
A clogged aerosol can nozzle is usually the result of dried product residue that crusts around the spray tip, trapping propellant and moisture. Over time, repeated use or improper storage can encourage crust formation, increasing resistance to spray. According to Unclog Drain, nozzle blockages typically form where the product meets the valve stem, creating a tiny passage that’s easy to seal shut. Recognizing this helps you choose the gentlest, most effective unclogging method without compromising the can's pressure seal. In many households, the goal is to restore consistent spray while avoiding costly replacements. Understanding the anatomy of the nozzle—tip, ball valve, stem, and gasket—helps you apply the right technique without forcing the wrong component.
Safety First: Avoid Pressure Hazards and Spills
Aerosol cans are pressurized containers, and improper handling can release contents unexpectedly. Always work in a well-ventilated area, wear eye protection and gloves, and avoid heat sources or open flames. Do not puncture, incinerate, or bend the can, and never try to pry the nozzle while the can is fully pressurized. If the can is hot to touch or bulging, stop and set it aside in a cool area. A careful, measured approach protects you and preserves the integrity of the remaining contents.
Tools and Cleaning Agents You Might Use (Plain-English Overview)
Common tools for clearing a clogged nozzle include a fine pin or needle, a soft brush or cloth, and a small amount of isopropyl alcohol or a compatible solvent recommended on the can label. Warm water can help loosen crusts around the tip, but you should never submerge the can fully. Keep a protected workspace with towels to catch drips. This section explains the purpose of each tool and when to use it, so you’re prepared before you start.
Cleaning Techniques: From Gentle to More Involved
Start with the gentlest method: use a fine pin to clear the tip, then wipe away residue. If spray remains inconsistent, rinse the nozzle with warm water and let it dry briefly before retesting. For stubborn crusts, a tiny amount of isopropyl alcohol can dissolve residue; apply with a cotton swab and avoid soaking. Finally, test the spray from a safe distance to ensure a consistent bead rather than a sputtering stream. If none of these steps restore spray, it may be safer to replace the can rather than risk a malfunction.
Maintenance to Prevent Future Clogs
Store cans upright in a cool, dry place away from direct sunlight. After use, wipe the nozzle to reduce product build-up and replace the cap to prevent debris intrusion. Periodically rotate stock to ensure older cans are used first, and consider using cans with a compatible propellant that leaves fewer crusts. Simple maintenance steps can dramatically reduce clog risk over time.
Troubleshooting and When to Seek Safer Alternatives
If you notice a crackling, uneven spray, or any hissing sounds, stop using the can and inspect for leakage. If you cannot clear the nozzle after multiple attempts or if the can shows signs of damage, discontinue use and dispose of it according to local hazardous waste guidelines. For ongoing issues with multiple cans, consult the product’s safety data sheet or contact the manufacturer for guidance. The goal is to prevent injury and avoid wasting materials.
Tools & Materials
- Fine pin or sewing needle(Gently insert to clear the nozzle opening; avoid bending the pin.)
- Safety glasses(Protect eyes from splashes or spray.)
- Nitrile gloves(Keep hands clean and protected from solvents.)
- Lint-free cloth or paper towels(Wipe residue and catch drips.)
- Isopropyl alcohol (70% or higher)(Use sparingly to dissolve crusts; ensure labeled chemistry is compatible with contents.)
- Warm water(For rinsing the nozzle; avoid submerging the can.)
- Small bowl or cup(Contain rinsing water and cleaning solution.)
- Optional: replacement nozzle or can(Have on hand if the current nozzle is severely clogged.)
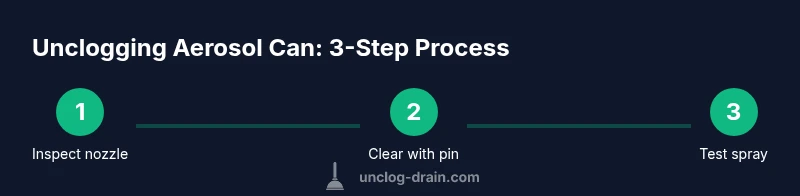
Steps
Estimated time: 20-40 minutes
- 1
Assess safety and prepare workspace
Move the can to a well-ventilated area, wear protective gear, and lay towels on the surface. Check that the can is not hot or bulging. This helps prevent accidental discharge during the unclogging process.
Tip: Set up a dedicated area away from ignition sources; never heat the can. - 2
Inspect the nozzle and identify blockage
Look closely at the spray tip for crust or dried product. A clear tip often indicates a minor crust around the opening, which is usually fixable with careful clearing.
Tip: Do not apply force that could bend or damage the valve stem. - 3
Clear the nozzle with a pin
Gently insert a fine pin into the nozzle opening and twist slightly to loosen crust. Remove any debris with the cloth and inspect for improved flow.
Tip: Work slowly; a little movement goes a long way to avoid valve damage. - 4
Rinse and dry the nozzle
Hold the can upright and rinse the tip with warm water, allowing crust to dissolve. Dry thoroughly with a cloth before testing the spray.
Tip: Do not submerge the entire can in water. - 5
Test spray and re-evaluate
Gently test the spray at a safe distance. If spray remains inconsistent, repeat the clearing and rinsing steps. If still blocked, proceed to the next option or replace the can.
Tip: Test in short bursts to monitor behavior without wasting product. - 6
Decide whether to replace
If clogging persists after multiple attempts or the can shows leakage, discard it safely and replace with a fresh can. Do not force use if the integrity of the can is compromised.
Tip: Always follow local disposal guidelines for aerosol cans.
Common Questions
Is it safe to unclog an aerosol can nozzle at home?
Yes, with proper precautions. Work in a ventilated area, use protective gear, and avoid puncturing or heating the can.
Yes. Do it in a well-ventilated area with protection, and never puncture or heat the can.
Can I use a regular pin to clear the nozzle?
A fine pin or needle can clear the nozzle if used gently. Do not apply force that could damage the valve stem.
A fine pin works if you use gentle movements and avoid bending the nozzle.
What should I do if the can becomes warm during testing?
If the can warms up, stop and move it away from sources of heat. Allow it to cool before continuing.
If it warms up, stop and cool it in a safe place before testing again.
Will cleaning affect the contents of the can?
Cleaning the nozzle typically does not affect the contents, but repeated handling can change spray performance. Follow the product label.
Cleaning the nozzle usually won’t change the contents, but it can affect spray if not done carefully.
When should I replace the aerosol can?
Replace if clogging persists after multiple attempts or if there are signs of leakage or damage on the can.
Replace the can if it still won’t spray after several tries or if you see leaks.
Watch Video
Key Points
- Identify whether crusting causes the clog and choose gentle methods first.
- Always prioritize safety; wear goggles and gloves, and work in ventilated space.
- Test spray after each step to avoid unnecessary can disposal.
- Replace the can if clog persists or the can shows signs of damage.