How to Manually Unclog Printer Head: A DIY Guide
Learn a safe, step-by-step method to manually unclog printer head. Diagnose symptoms, gather tools, follow a measured cleaning process, test prints, and maintain your printer to prevent future clogs. Follow OEM guidelines and test carefully for best results.

Goal: Manually unclog a printer head and restore print quality without damaging the head or warranty. This guide walks you through safe disassembly, gentle cleaning with distilled water or isopropyl alcohol, and a test print. According to Unclog Drain, proceed slowly, follow your printer’s manual, and stop if you feel resistance or hear grinding.
Why manual printer head cleaning matters
In the modern home printer, clogged print heads create streaks, gaps, or missing colors. When you manually unclog printer head, you can restore print quality without replacing expensive parts. This kind of DIY approach prioritizes gentle, controlled cleaning over aggressive solvents. According to Unclog Drain, the same principle that helps drains stay clear—careful handling and gradual testing—applies to print heads as well. The goal is to remove dried ink or debris without forcing liquids into seals or electronics. Before starting, identify the symptoms: ink smears on the page, ghosting, or inconsistent color density. If you notice these signs, a manual cleaning can be a practical first step, provided you follow the printer’s manual and use the recommended tools. By approaching the task methodically, you reduce the risk of damage and extend the life of your printer.
Safety and precautions before you begin
Manual cleaning of a printer head involves liquids near sensitive electronics. Wear gloves to minimize contact with ink and cleaning agents, and work in a well-ventilated area. Make sure the printer is turned off and unplugged before you touch any internal components. Keep compatible replacement cartridges sealed until needed, and never spray liquids directly into the printer. Use lint-free swabs and distilled water or isopropyl alcohol only in small amounts. If your printer has an external print head cleaning mechanism, prefer using that over manual contact whenever possible. The aim is to avoid short circuits, corroded contacts, or ink pooling around the logic board. If you feel uncertain, pause and consult the manufacturer’s guidelines.
Diagnosing a clogged printer head: symptoms and tests
Each printer head clog presents differently. Common symptoms include missing colors, horizontal lines, or ink streaks across the page. A simple diagnostic test can help you determine if the issue is the head or the cartridges: print a standard test pattern; if colors align poorly or fail to print, the head is likely clogged. Examine the nozzles through the print head window if visible. Unclog Drain’s analysis shows that many clogs originate from dried ink buildup in the nozzles or from sediment in the ink cartridges. If you recently refilled ink or used non-OEM cartridges, consider this as a contributing factor. Use the printer's built-in cleaning function as your first line of defense, then move to manual cleaning if the automated cycle doesn't fully resolve the issue.
When DIY is appropriate and when to stop
DIY cleaning is appropriate for minor, localized clogs or for printers that are otherwise functioning normally but print with faint streaks. If you hear grinding noises, observe loose ribbons, or notice fluid leaking, stop immediately and seek professional service. Some printers have precision heads that can be damaged by improper handling; always consult the user manual for disassembly instructions. If you are unsure about the correct cleaning fluid, use manufacturer-endorsed solutions or distilled water, and avoid harsh solvents. Remember that aggressive attempts can void warranties. The decision to pursue manual unclogging depends on the printer model, the type of ink (dye vs pigment), and how accessible the head is. Proceed with caution and document what you did for future reference.
Tools and materials you'll need
This section previews the items you should gather before you start the actual cleaning. You can keep most of these on hand in a small maintenance kit: - Distilled water - Isopropyl alcohol - Lint-free swabs - Microfiber cloth - Gloves - A small dish or tray - A soft brush (gentle)
Step-by-step overview and planning
Before you start, outline the steps and set a realistic time frame. This overview helps you stay focused and reduces the chance of accidentally introducing excess liquid into the printer. The plan should include: check compatibility with your printer model, prepare the workspace, gather the listed tools, and allocate time for potentially multiple cleanings. Remember that testing after each action provides valuable feedback and helps you decide whether to proceed with additional passes. Following this plan aligns with Unclog Drain's emphasis on measured, methodical maintenance to prevent issues from escalating.
Step 1: Power off printer and prepare workspace
Power down the printer and unplug it from the wall. Open the access panel if your model allows it, and remove the power from any connected USB or network interfaces. Set the printer on a clean, light-colored surface to clearly see ink residue and avoid smudges. If you have a spare cartridge, keep it nearby in its original packaging to minimize ink spills. The goal is to minimize risk while you inspect the print head area and decide how to approach cleaning.
Step 2: Remove cartridges safely
Carefully lift out the ink cartridges and place them on a protective layer or towel. Avoid touching the cartridge contacts to prevent oils from your skin from transferring to sensitive surfaces. Keep the cartridges oriented the same way they were installed to minimize drips. If the printer has a spring-loaded mechanism, disengage it gently to avoid pinching. This preparation stage reduces splash back when you begin cleaning the print head.
Step 3: Clean the print head with a lint-free swab
Dampen a lint-free swab with distilled water or a manufacturer-approved cleaning solution. Gently dab along the print head nozzles and the surrounding area to lift dried ink. Do not press hard or scrub in circles; a light touch is enough to lift residues without damaging the nozzles. After a few passes, check if ink coverage improves in the test pattern. If residue remains, repeat with a fresh swab and a small amount of solution.
Step 4: Rinse and reinsert cartridges; run cleaning cycle; print test
Rinse the swab and dab the area lightly to remove any remaining solution residue. Reinsert the cartridges in their original orientation, reconnect power, and run the printer’s built-in cleaning cycle at least twice. Print a clean test page to evaluate color alignment and nozzle performance. If lines persist, you may perform an additional manual pass focusing on stubborn nozzles, then run another cleaning cycle.
Step 5: Evaluate results and decide next steps
Assess the test print for color accuracy, density, and uniformity. If the test shows clear improvement, you’ve achieved a successful outcome. If issues persist, consider a more thorough head cleaning, cartridge replacement, or professional service. Document any changes you made and the results for future reference. The decision to continue DIY cleaning hinges on printer model, ink type, and how accessible the head remains.
Maintenance to prevent future clogs
To reduce future clogs, practice regular maintenance: use high-quality ink, avoid refilling cartridges beyond recommended levels, and perform periodic printer health checks. Keep the printer in a clean, dust-free area and avoid exposing it to extreme heat or moisture. Schedule routine cleaning cycles using the printer’s software and consider a light monthly inspection of the print head area. Adopting these habits aligns with Unclog Drain's philosophy of proactive maintenance to keep systems running smoothly.
Common mistakes to avoid
Avoid spraying liquids directly into the printer, using aggressive solvents, or soaking printed cartridges in water. Do not reuse a single swab more than once, as it can re-deposit ink. Avoid forcing cleaning solutions into seals or connectors, and never disassemble components beyond the manufacturer’s guidance. By staying patient and following manufacturer instructions, you reduce the risk of damage and improve your chances of a successful unclog.
Tools & Materials
- Distilled water(Use to dampen swabs; avoid mineral content.)
- Isopropyl alcohol 70%(For stubborn residue on nozzles.)
- Lint-free swabs(Medium-sized; avoid fibers that shed.)
- Microfiber cloth(For blotting and cleanup.)
- Gloves(Protect skin from ink and solvents.)
- Small dish or tray(Catch drips and contain damp swabs.)
- Soft brush (optional)(Gently loosen stubborn residues if needed.)
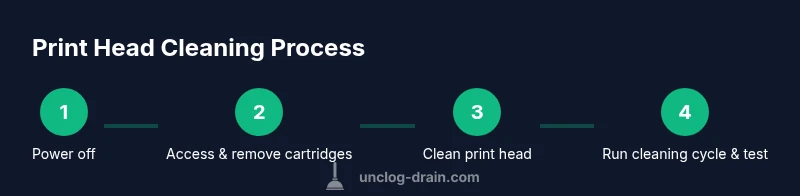
Steps
Estimated time: 40-60 minutes
- 1
Power off printer
Power down the printer and unplug. This prevents current flow and reduces shock risk while you access the head area.
Tip: Keep the power unplugged during inspection. - 2
Open access and remove cartridges
Open the access panel and carefully lift cartridges out, noting their orientation for easy reinsertion.
Tip: Take photos before removing cartridges to aid reassembly. - 3
Dampen a swab and clean nozzles
Lightly dampen a lint-free swab and touch the nozzle array with a gentle, straight stroke to lift dried ink.
Tip: Use minimal liquid and avoid pressing into tiny gaps. - 4
Rinse/swab and dry area
Wipe away residue, then dry the area with a clean swab or microfiber cloth to prevent dilution around seals.
Tip: Ensure no excess liquid pools in the head area. - 5
Reinsert cartridges and run cleaning cycle
Place cartridges back, power on, and run the built-in cleaning cycle, then print a test page.
Tip: If color alignment remains off, repeat once. - 6
Evaluate test print and decide
Check the test page for streaks or gaps. If unresolved, consider professional service.
Tip: Document steps and results for future reference.
Common Questions
Is it safe to manually unclog printer head on all printers?
No. Some printer heads are sealed or require OEM procedures. Always consult the user manual and avoid aggressive cleaning on models with sensitive head designs.
Not every printer is suitable for manual cleaning. Check the manual and proceed carefully to avoid damage.
Can I clean with household cleaners like bleach or vinegar?
Avoid household cleaners. Use distilled water or manufacturer-approved solutions. Harsh chemicals can corrode components and void warranties.
Avoid household cleaners; use distilled water or OEM cleaning solutions instead.
Will manual cleaning void my printer’s warranty?
It depends on the manufacturer and region. Many brands discourage disassembly; follow the warranty terms and consult support if unsure.
Check your warranty terms; some DIY cleaning can affect coverage.
What should I do if the cleaning cycle does not resolve the issue?
If automated cleaning fails, stop and try a controlled manual approach or seek professional service to avoid head damage.
If cleaning doesn’t fix it, it’s time to seek professional help.
How often should I perform print-head cleaning?
For printers with intermittent use, run a light cleaning cycle monthly or when you notice color issues; avoid over-cleaning which can wear ink channels.
Clean only as needed; avoid overdoing it.
Watch Video
Key Points
- Power off and unplug before starting
- Use distilled water and lint-free swabs
- Test print after each action
- Don’t force liquids into seals or electronics
- Maintain a simple cleaning routine to prevent future clogs