How to Use Unclogging Pin Tool: DIY Drain Guide
Learn how to use an unclogging pin tool safely to clear drains. This step-by-step guide covers safety, technique, maintenance, and troubleshooting for homeowners and DIY enthusiasts.

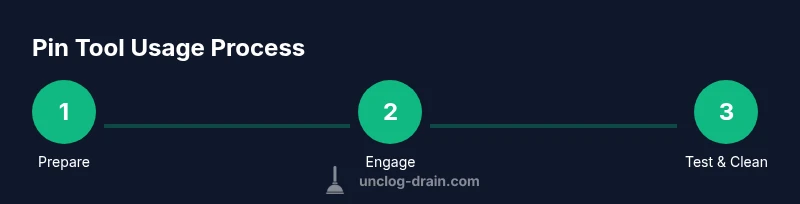
Goal: how to use unclogging pin tool to clear a clog safely. Start with PPE and gloves, then insert the pin tool into the drain, twist to engage the blockage, and pull back to reel in debris. Test with water after each pass and stop if resistance increases. Finish with a quick clean and full run of water.
What is the unclogging pin tool and how it works
An unclogging pin tool, also called a drain pin or auger needle, is a slender metal rod with a pointed tip designed to probe and snag clogs in accessible drains. Unlike chemical cleaners, it's a mechanical instrument that relies on direct contact to break up or pull out debris. When inserted into a trapped pipe line or trap, the sharp pin can pierce soft blockages or braid around hair and soap scum, allowing debris to be pulled out in the reverse direction. The basic mechanism is simple: you rotate the tool clockwise to engage and push forward, then twist and pull to extract material. In practice, this action must be controlled and steady, because applying too much force can damage the pipe or push the clog deeper. Choose a tool with a flexible shaft for bends, and a comfortable handle for extended use. For best results, partner the pin with a drain snake or plunger in case the clog resists. Always begin with low resistance and increase gradually as you test access. According to Unclog Drain, this tool is most effective for light to moderate clogs located in accessible sections of the drain.
Safety first: PPE and preparation
Safety sets the foundation for any unclogging effort. Wear sturdy gloves (nitrile or latex), safety glasses, and long sleeves to prevent splash exposure. Work in a well-ventilated area and avoid mixing mechanical tools with chemical drain cleaners. If you suspect a damaged pipe or uncertain sewer line, stop and call a licensed plumber. The Unclog Drain Team emphasizes that PPE is not optional; it protects hands, eyes, and clothing from sharp fragments and dirty water. Before you start, clear the area, lay down towels or a bucket, and unplug nearby electrical devices to avoid water contact. A flashlight helps you see inside the drain, especially in tight spaces. If your clog is near a trap or cleanout, keep a copy of the drain plan handy in case you need to access a different section.
When to choose a pin tool over other methods
Pin tools excel for immediate, manual intervention on accessible clogs where there is enough opening to insert the tool. They work well for hair, soap scum, and small solid deposits. They are less effective for deep, hardened, or tree-root blockages, or pipes with severe corrosion. If the clog doesn’t budge after several careful passes, or if you detect a strong odor or sewage backup, discontinue use and consult a pro. A common strategy is to compare results with a plunger or a flexible snake to determine the best approach. Unclog Drain analysis, 2026, indicates that homeowners resolve many clogs with a pin tool when used correctly and safely, minimizing chemical exposure and potential pipe damage.
Tools and materials you'll need (at a glance)
Before you begin, assemble tools to keep the workflow smooth: a clean bucket, disposable gloves, safety glasses, a flashlight or headlamp, a clutter-free work area, and the pin tool itself. A set of locking pliers can help you grip the tool if it slips, and a rag or towel catches debris. Having a trash container nearby makes disposal easier, and a second helper can assist in feeding the tool after resistance is met. These items are minimal yet essential for an effective session and help reduce the risk of injury or spillover.
Preparing the workspace and entrance
Prepare the drain area by removing visible covers and ensuring you have clear access. If you’re dealing with an under-sink or floor drain, place a bucket beneath and have towels ready. Wipe up any splashes immediately to prevent slips. If the drain is in a bathroom with a pedestal sink or vanity, ensure you aren’t standing on any wet surfaces. The pin tool should enter the drain coaxially—straighter is better than angled insertions. Pro tip: take a quick photo of the drain area before you begin so you can compare debris or improvements after each pass.
Basic technique overview
Insert the pin tool into the drain until you encounter resistance. Apply gentle pressure and rotate to engage the clog, then pull back slightly to hook debris. Pulling straight back often yields the most material; side-to-side wiggling helps dislodge stubborn bits. If you feel the tool bind, back off and re-approach with a slightly different angle. Always pause to test water flow after a successful pull to gauge progress. The goal is gradual clearance without forcing or breaking the pipe.
Step-by-step usage overview (high level)
Think of this section as a roadmap rather than a script. Start by clearing space and donning PPE. Then insert the tool, engage the blockage with controlled twists, and retrieve debris. Once you notice improved flow, flush the line with water and inspect for remaining resistance. Clean the tool thoroughly and store it in a dry place. Remember: patience matters; rushing can damage pipes or worsen the clog.
Post-use cleanup, maintenance, and storage
After finishing, rinse the tool with clean water to remove debris, then pat dry to prevent rust. Apply a light coat of mineral oil or a rust inhibitor if your tool is steel, and store it in a dry container away from moisture. Wipe down the workspace and dispose of any used towels. Inspect the tool for burrs or bent sections and replace if wear is evident. Regular maintenance extends tool life and keeps it ready for the next project.
Troubleshooting and what to do next
If the clog persists after several careful passes, reassess the access point—there may be a deeper blockage or a misalignment. Do not apply excessive force; this can crack pipes or push the clog further. In some cases, combining methods (pin tool with a plunger or a flexible snake) yields better results. If you hear unusual noises, smell sewer gas, or see water backing up, stop immediately and call a professional. The Unclog Drain Team recommends pausing when safety or pipe integrity is in doubt.
Tools & Materials
- unclogging pin tool(Choose a flexible shaft with a comfortable handle; ensure the tip is clean and sharp for better engagement)
- disposable gloves(Nitrile or latex; ensure a snug fit and good dexterity)
- safety glasses(Impact-resistant; protect eyes from splashes)
- flashlight/headlamp(Hands-free lighting helps with visibility in tight spaces)
- bucket and towels(Catch debris and drips; reduce clean-up after the job)
- locking pliers (optional)(Useful if you need a firmer grip or to reposition the tool)
- rag or debris bag(Containment for collected debris; easy disposal)
Steps
Estimated time: 25-40 minutes
- 1
Prepare workspace and safety gear
Put on PPE, clear the area, and place the bucket under the drain. Remove any drain cover and ensure you can access the opening. This reduces splash and keeps debris contained.
Tip: Double-check lighting; a bright, well-lit workspace reduces missteps. - 2
Inspect the drain access
Look into the drain with a flashlight to identify the location of the clog. Ensure there are no electrical hazards nearby and that you have stable footing.
Tip: If you see standing water, drain some water into the bucket first to improve visibility. - 3
Insert the pin tool
Gently insert the pin tool into the drain until you feel resistance. Maintain a straight alignment to avoid bending the shaft.
Tip: Start with a shallow insertion; deeper insertions risk pipe damage if misaligned. - 4
Engage the clog with controlled twists
Twist the tool slowly to engage and hook the blockage. Avoid excessive force; if the clog is not yielding, re-angle rather than pushing harder.
Tip: Small, deliberate movements beat brute force every time. - 5
Retract and pull debris
Gently retract the tool to pull out debris. If you feel resistance, rotate the tool slightly and re-engage to capture more material.
Tip: After each pull, wipe the tool tip to remove snagged particles. - 6
Flush and test the line
Run water through the drain to test flow. If water backs up, pause and try a few more gentle passes.
Tip: Testing after each cycle confirms progress without overdoing it. - 7
Repeat as needed
If the flow improves, repeat steps 4-6 until the drain clears. Avoid overdoing it; multiple aggressive passes can damage pipes.
Tip: Keep sessions short; repeated attempts risk overheating or scouring pipe walls. - 8
Clean and store the tool
Rinse the tool with clean water, dry it thoroughly, and apply a light oil if used in metal tools. Store in a dry place to prevent rust.
Tip: Label storage space to avoid cross-contamination with other tools. - 9
Document and reflect
Note what worked and what didn’t for future reference. If the clog recurs, consider professional diagnosis.
Tip: A quick reminder note helps you improve technique next time.
Common Questions
Is a pin tool suitable for all clogs?
Pin tools work best for light to moderate clogs in accessible sections of the drain. They may not help with deep, hardened blockages or tree roots. For stubborn clogs, consider additional methods or professional help.
Pin tools work well for ordinary clogs in accessible pipes, but for stubborn or deep blockages, you may need a different approach or a pro.
What if the clog is in a toilet?
Toilet clogs often require a toilet auger or professional service. Avoid forcing a pin tool into the toilet bowl, as it can damage fixtures. Use dedicated toilet-safe tools for best results.
For toilet clogs, use a toilet-safe auger or call a pro rather than a standard pin tool.
How do I clean the tool after use?
Rinse thoroughly with clean water, dry completely, and apply a light oil if the tool is steel. Store in a dry place to prevent rust.
Rinse, dry, and lightly oil the tool before storage to prevent rust.
Can I use chemical cleaners after using a pin tool?
Avoid using harsh chemical cleaners immediately after mechanical unclogging. Rinse the drain with water to clear debris, and consult a professional if you still see slow drainage.
Don't rush to chemical cleaners right after using a pin tool; flush with water first and assess flow.
How often should I replace the pin tool?
Inspect for wear, chipping, or bending after each use. Replace if any damage is visible; proper maintenance extends tool life.
Check for wear after every use and replace when damaged.
Watch Video
Key Points
- Understand when the pin tool is appropriate
- Prep with PPE and a clean workspace
- Use controlled, measured movements
- Test flow after each pass
- Maintain and store tools properly