How to Unclog a Vent Stack: A DIY Guide
Learn how to unclog a vent stack safely with practical steps, tools, and maintenance tips. This homeowner-friendly guide from Unclog Drain covers causes, risks, and when to call a pro for reliable results.

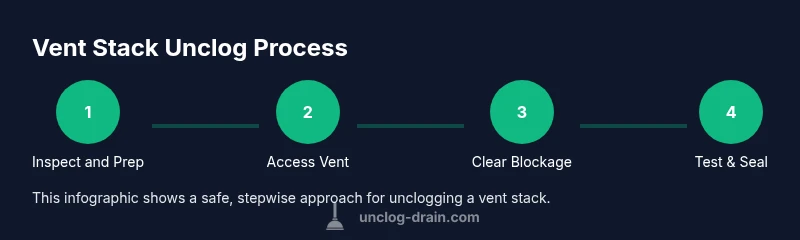
This guide shows you how to unclog vent stack safely, restoring proper venting and preventing sewer gas backups. You’ll learn where vents sit, how to access them from the roof or interior, and the right mechanical methods to clear blockages without damaging seals. Gather basic tools, protective gear, and a ladder, then follow the step-by-step process for a code-ready fix. Unclog Drain provides practical, safe guidance for homeowners.
Understanding vent stacks and why they clog
Vent stacks are vertical pipes that rise from your home's plumbing to the roof to vent sewer gases and balance air pressure in the drainage system. When these vents become blocked, you may notice slow draining, gurgling sounds, frequent toilet backups, or even sewer odors inside the home. According to Unclog Drain, vent stacks are a critical part of the plumbing system because they prevent negative pressure that can slow drainage and push foul gases back into living spaces. Clogs form from a variety of sources: animals nesting in roof vents, debris blown into the pipe during storms, frost constriction in cold climates, or modifications that seal openings. Understanding how a vent stack functions helps you choose the safest, most effective unclogging approach, because the wrong method can worsen the blockage or damage seals.
Common causes of vent-stack clogs
Vent-stack blockages don’t appear out of nowhere. Common culprits include bird or rodent nests that seal the vent, leaves and debris blown into the opening, frost or ice buildup in colder climates, and improper renovations that seal the vent cap or reduce venting capacity. In some homes, backdrafts occur when other plumbing alterations disrupt the venting balance. Unclog Drain analysis shows that many vent-clog scenarios stem from a combination of environmental factors and poor maintenance. Being aware of these causes helps you target the right area with mechanical clearing rather than applying force blindly.
Symptoms and what they mean
Slow drains, frequent backups, gurgling from toilets or sinks, and unusual odors are all red flags that a vent stack could be clogged. While a clogged vent can mimic a mainline blockage, the fix is specifically about restoring venting rather than clearing the drain pipes themselves. Recognizing symptoms early is crucial because addressing vent issues promptly reduces pressure on seals and minimizes the risk of sewer gas entering living spaces. If symptoms persist after a basic clearing attempt, a professional assessment is warranted to confirm vent integrity and sewer system health.
Safety first: what not to do
Before you climb or insert tools into a vent, prioritize safety. Do not attempt roof access in high winds or icy conditions, and never work alone on a sloped roof. Avoid chemical cleaners in vent stacks because harsh chemicals can backflow into living spaces or corrode seals. Do not force tools through blockages; excessive force can damage pipes and create a bigger problem. Always turn off nearby electrical equipment if you must work near electrical lines and wear protective gear. If you smell gas or suspect a dangerous condition, evacuate and call emergency services.
Tools and materials overview
You’ll want a compact, reliable set of tools ready before you start: a chimney/vent auger or plumber's snake (3/8 inch is common), an extension ladder or roof ladder, heavy-duty work gloves, safety goggles, a flashlight or headlamp, a bucket, rags or towels, and a backup rope or strap for stabilizing the ladder. Optional but helpful items include a second person to assist, a breathable mask if strong odors are expected, and a shop towel for quick cleanup. Having the right gear minimizes risk and improves your odds of a successful, safe unclog.
Step-by-step prep and setup
Start by choosing the safest access point. If you’re comfortable on a roof, set up your ladder on stable ground and secure it. If indoor access is available via a cleanout, use that entry point first to minimize roof work. Put on gloves and goggles, clear the area, and prepare a bucket and rags for any spills. Check weather conditions and avoid wind or rain. Confirm that all gas appliances are off and there’s no risk of electrical hazards nearby. Finally, lay out the tools in reach and confirm you have a partner if you’ll need one to stabilize the ladder.
Step-by-step: accessing vent stack from roof or interior
From the roof, locate the vent pipe termination and remove the cap carefully to avoid debris falling inside the stack. If you have an interior cleanout, access it with the appropriate tool to expose the vertical run. In either case, verify the path is clear and there are no obvious cracks or damage around the vent opening. Maintain three points of contact on the ladder if you climb, and halt the process if you feel unstable. If you’re uncomfortable at any point, stop and switch to professional help.
Step-by-step: clearing the vent stack safely
Insert the vent auger or snake into the vent opening and gently feed it downward while turning to break up any blockage. Avoid forcing it or bending the tool sharply, which risks pipe damage. When you feel resistance, rotate, withdraw slightly, and reinsert to dislodge the obstruction. Once the blockage loosens, pull the auger out slowly and wipe away any residue. If accessible, flush with a small amount of water or compressed air to verify clearance. Repeat as needed until air moves freely.
Post-cleaning inspection and maintenance
Reinstall any caps or coverings securely and test the system by running water from multiple fixtures. Listen for any gurgling or slow drainage that persists, which could indicate a deeper vent problem or a need for a professional sweep. Schedule routine inspections to catch emerging issues early, trim vegetation around rooftop vents, and ensure the vent cap remains unblocked by debris. Keeping a simple maintenance checklist helps prevent future clogs and protects your plumbing’s overall health.
When to call a professional and maintenance plan
If you encounter persistent backups, recurring odors, frost-blockage signs, or you’re unsure about roof work safety, contact a licensed plumber. Vent-stack issues can indicate broader drainage problems or structural compromises that require expert diagnosis and code-compliant repairs. The maintenance plan should include annual vent inspections, prompt cleaning after severe weather, and updating seals and caps as needed. The Unclog Drain team recommends pairing DIY checks with professional assessments when in doubt to ensure long-term reliability.
Tools & Materials
- Auger or plumber's snake (3/8 inch)(Choose a flexible snake long enough to reach the vent opening; ensure compatibility with your vent size.)
- Extension ladder or roof ladder(Stable, height-appropriate ladder with someone to assist if possible.)
- Safety gloves(Grip protection and shield hands from sharp edges.)
- Safety goggles(Protect eyes from debris and spray during clearing.)
- Flashlight/headlamp(Illumination for roof vent or interior cleanouts.)
- Bucket and rags(Contain and wipe spills; keep the work area clean.)
- Second person (optional but recommended)( assists with ladder stability and handling tools.)
- Breathable mask (optional)(Use if strong odors are expected; not a substitute for ventilation.)
- Trash bag or container for debris(Dispose of nests or debris properly after removal.)
Steps
Estimated time: 60-90 minutes
- 1
Gather safety gear and set up workspace
Put on gloves and goggles, secure the ladder, and clear the area. Confirm no electrical hazards nearby and that weather conditions are safe. Arrange tools within easy reach and ensure you have a partner if possible.
Tip: Never climb a wet or windy roof alone. - 2
Access vent stack opening
From the roof, locate the vent termination and carefully remove the cap. If using an interior cleanout, access it and expose the vertical pipe. Maintain three points of contact on the ladder and avoid leaning over the edge.
Tip: Keep debris from falling into the vent by using a cloth or cap during cap removal. - 3
Inspect for obvious blockages
Look for bird nests, leaves, or ice buildup. Remove loose debris with gloved hands or a long tool. Do not force the vent cap or any tool deeper than necessary.
Tip: Use a flashlight to illuminate the interior and avoid missed debris. - 4
Insert auger and break the blockage
Gently feed the auger into the vent, rotating as you go to break up the obstruction. Capture loosened debris as it comes free and pull back occasionally to verify progress.
Tip: Do not push aggressively; forcing can damage the vent or seals. - 5
Verify clearance and flush
Withdraw the auger and test by flushing a small amount of water or using compressed air if accessible. Reinsert if needed to ensure the path is clear and air moves freely.
Tip: If water backs up again, stop and reassess; deeper issues may exist. - 6
Re-seal, test the system, and clean up
Replace caps securely, run fixtures to confirm drainage improvement, and clean the area. Document any remaining concerns for future maintenance.
Tip: Keep a simple maintenance log to track vent health over time.
Common Questions
What is a vent stack and why is it important?
A vent stack is a vertical pipe that allows sewer gases to escape and helps balance air pressure in your drainage system. Proper venting prevents backups and reduces stress on traps. If the vent is blocked, you may see gurgling drains or odors.
A vent stack is the vertical pipe from your plumbing that vents sewer gases and balances pressure. If it's blocked you might notice gurgling or smells.
Can I unclog a vent stack from inside the house?
Sometimes you can access a vent via an interior cleanout or vertical chase, but many vent stacks require roof access. If interior access is not available or safe, stop and consult a professional.
Sometimes you can access from inside, but many times roof access is needed. If unsure, call a pro.
Is it safe to use chemical drain cleaners in vent stacks?
Chemical cleaners are not recommended for vent stacks because they can corrode seals, damage vents, and release harmful fumes into living spaces. Mechanical clearing is usually safer and more effective.
No—chemicals can damage vents and seals and may be unsafe to use in vents.
What are the safety risks when working on the roof?
Roof work carries fall and electrical hazards. Use a fall-arrest system if available, secure your ladder, work with a partner, and avoid slick surfaces or weather conditions that increase the risk of slips.
Roof work is risky—always use protection, stay balanced, and don’t work alone if possible.
How do I know if the clog is in the vent stack or elsewhere?
If multiple fixtures drain slowly or odors persist after clearing a specific stack, the issue may extend beyond the vent. A professional diagnosis can confirm vent integrity and identify deeper blockages.
If several fixtures are slow or foul smells persist, there may be a bigger blockage.
How often should I inspect vent stacks for maintenance?
Perform a basic inspection annually, especially after severe weather or freezing conditions. Trim nearby vegetation and ensure caps are intact. Schedule professional checks if you notice recurring issues.
Inspect vents yearly and after storms; keep caps clear and hire a pro if problems recur.
Watch Video
Key Points
- Identify vent stack purpose and common blockage sources
- Use mechanical methods over chemical cleaners in vents
- Follow safety steps and never work alone on roofs
- Test drainage after clearing and schedule routine maintenance
- Know when to call a professional for persistent issues