How to Unclog a Dryer Vent: A Complete DIY Guide
Learn how to safely unclog a dryer vent with practical tools, step-by-step techniques, safety tips, and preventive strategies to boost airflow and reduce fire risk.

By the end you will safely unclog a dryer vent, restore airflow, and reduce fire risk. This quick guide explains common blockage sources, why lint builds up, and a practical, tool-assisted method you can perform at home. You’ll know when DIY is appropriate and when to hire a professional for stubborn clogs.
Why clogged dryer vents are a safety and efficiency issue
According to Unclog Drain, a clogged dryer vent is more than just a nuisance—it raises fire risk, wastes energy, and lengthens drying times. Lint buildup inside the vent and duct restricts airflow, forcing the dryer to run longer and generate more heat. Over time this excess heat can ignite lint, leading to dangerous house fires. Regular vent cleaning improves drying performance, reduces utility bills, and extends the life of your appliance. Understanding the why behind the problem helps motivate consistent maintenance and smarter cleaning routines that protect your home and wallet.
How lint accumulates and other blockage sources
Lint is tiny, but in a long vent run it accumulates quickly. Each load deposits fibers that cling to the duct walls, especially near turns and joints. Exterior caps can trap debris, even small birds' nests, leaves, or dead insects, forming a secondary blockage. Older or crushed ducts reduce airflow and become graphs of resistance for the dryer’s exhaust. In some homes, rodents or pests nest inside ducts, aggravating clogs. Unclog Drain Analysis, 2026 notes that lint buildup is the primary cause of dryer vent obstructions, so tackling lint first yields the biggest improvements.
Assessing risk and preparing to clean
Before you start, assess the risk and prepare a clean workspace. Power off and unplug the dryer, then shut off the circuit breaker to avoid accidental startup. Wear safety gear—gloves, eye protection, and a mask if you’re sensitive to dust. Gather tools and a flashlight, and clear the area around the dryer and exterior vent. Inspect the exterior vent for obstructions and verify accessible ductwork. This stage is about planning, safety, and setting a clear goal for what a successful clean looks like.
Cleaning options: DIY vs professional services
For many homes, a thorough DIY vent clean is feasible with common tools. DIY cleaning can resolve moderate clogs, improve airflow, and save money. However, professional services are advised when the duct run is long, damaged, or difficult to access; experts can inspect hidden sections, test airflow with calibrated equipment, and replace damaged ductwork. Weigh the cost of labor against the risk of a fire when deciding between DIY and professional cleaning. Unclog Drain emphasizes safety and proper technique as the deciding factors.
DIY prep and inspection checklist
Preparation makes the job smoother and safer. Confirm power is off, gather all tools, and inspect for signs of damage along the duct run. Check the exterior cap for nests or blockages and note any missing or loose clamps. If you see crushed sections or corroded joints, plan to replace the affected duct portions. Create a simple plan: interior access, exterior access, debris containment, and reassembly. Keep a camera or notes to help with reassembly and future maintenance.
Deep cleaning methods for vent sections
A deep clean targets both the interior duct and the exterior vent. Start by using a flexible vent brush or bendable tool to break up lint along the duct walls, working in segments from the dryer toward the exterior. Vacuum the loosened debris with a shop vac or a vacuum with a hose attachment. If you discover stubborn buildup, repeat brushing and vacuuming, then inspect again. For metal ducts, avoid applying excessive force that could widen joints or loosen fasteners. A careful, methodical approach clears lint without damaging the system.
Maintenance and prevention strategies
Prevention is easier than remediation. Clean the lint trap after every load and check the exterior vent cap monthly for blockages. Schedule a full vent inspection every 12–24 months, depending on usage. Ensure duct runs are straight with minimal bends and confirm there are no crushed segments. Use metal ducts instead of plastic where possible, and avoid kinks that trap debris. Finally, store tools where you can access them quickly for the next maintenance cycle.
Troubleshooting and what to do if airflow remains low
If airflow remains weak after cleaning, recheck connections and ensure clamps are tight. Inspect the exterior vent to confirm it opens and closes properly and isn’t blocked by debris. If there’s still poor airflow, test for exhaust restrictions with a simple sheet of paper hung at the vent—if the paper barely moves, air is restricted. At this point, it’s prudent to contact a professional to avoid missed damage or unsafe conditions.
Tools & Materials
- Vacuum with hose attachment(Shop vac for lint collection around vent and connections)
- Flexible vent brush set(Extendable brushes designed for 4-6 inch ducts)
- Lint-free cloths(For wiping and inspecting connections)
- Screwdriver set(Flathead/Phillips for vent clamps)
- Foil tape or metal duct tape(Seal gaps in duct runs)
- Goggles, gloves, mask(Safety PPE)
- Ladder (optional)(Only if needed to reach exterior cap)
- Flashlight(Inspect dark areas inside ducts)
- Replacement vent duct (optional)(Metal duct if damage is found)
Steps
Estimated time: 60-90 minutes
- 1
Power off and unplug
Disable the dryer at the circuit and unplug the power cord. This prevents accidental starts while you work and protects you from electric shock.
Tip: Double-check the circuit with a non-contact tester before starting. - 2
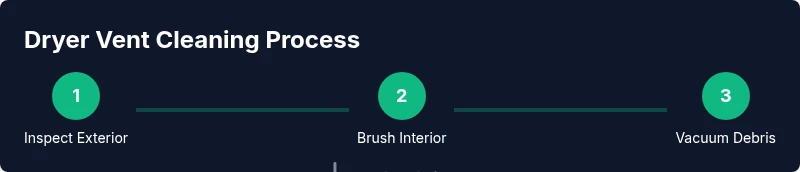
Inspect the exterior vent
Go outside and locate the vent cap. Look for obstructions, bird nests, or crushed ducts. Remove any visible debris carefully.
Tip: Use a flashlight to spot blockages behind the exterior grille. - 3
Disconnect the vent duct
Disconnect the vent line from the dryer or exterior cap following manufacturer guides. Have a container ready to catch any lint.
Tip: Take a photo of the connection for later reassembly. - 4
Brush interior sections
Insert a flexible vent brush and gently push through the duct, brushing away lint. Work from the dryer side toward the exterior to avoid pushing debris back in.
Tip: Do not force brushes through tight bends; back off and reposition. - 5
Vacuum lint from the duct
Use the vacuum with hose attachment to collect loosened lint along the duct and around the dryer outlet. Move slowly to maximize debris removal.
Tip: Vacuum both ends for a thorough clean. - 6
Inspect and reseal connections
Reattach the duct, reseal with foil tape where needed, and ensure clamps are secure. Check for kinks or crushed sections.
Tip: Avoid sharp bends that trap lint. - 7
Test airflow
Run the dryer on air-dry or low setting and feel for strong airflow at the exterior cap. If airflow remains weak, investigate further or call a pro.
Tip: If you hear whistling or see exhaust backdraft, stop and reassess. - 8
Final safety check
Wipe down the area, ensure nothing flammable is nearby, and store tools. Record date for next maintenance.
Tip: Keep a maintenance reminder schedule.
Common Questions
Can a clogged dryer vent cause a fire?
Yes. Lint buildup can overheat the vent and ignite. Regular cleaning reduces risk.
Yes, a clogged vent can overheat and ignite lint. Regular cleaning reduces risk.
How often should dryer vents be cleaned?
Most homes benefit from cleaning every 1-2 years, sooner if you notice long drying times.
Most homes should clean every one to two years, sooner if drying times are longer.
Is it safe to use chemical cleaners to unclog a vent?
Chemical cleaners are not recommended for dryer vents. Mechanical cleaning is safer and more effective.
Chemicals aren’t recommended; use mechanical cleaning instead.
What tools do I need for a DIY vent unclog?
A vacuum, flexible vent brush, tapes, clamps, and PPE are essential for a thorough DIY clean.
A vacuum, vent brushes, tape, clamps, and safety gear are essential.
Can maintenance prevent future clogs?
Yes. Regular inspections and cleanings, plus proper lint trap maintenance, reduce clog risk.
Regular checks and cleaner lint traps reduce risk.
When should I hire a professional?
If you encounter persistent clogs, damaged ducts, or poor airflow after DIY attempts, hire a professional.
If clogs persist or airflow stays weak, call a pro.
Watch Video
Key Points
- Turn off and unplug before starting any work.
- Lint buildup is the main cause of clogs and fires.
- Use mechanical cleaning tools rather than chemicals.
- Test airflow at the exterior vent after cleaning.
- Schedule regular maintenance to prevent recurrences.