How to Unclog a Vent Pipe: DIY Guide
A practical, step-by-step guide to unclog vent pipes safely, with tools, troubleshooting, and maintenance tips for homeowners. Learn to diagnose, clear blockages, and prevent future clogs.

To unclog a vent pipe, locate the vent opening and inspect for blockages near the top, then use a plumbing auger or snake to clear debris. Rotate the tool steadily, pushing debris back toward the stack while avoiding damage to the ductwork. Re-test your fixtures and reseal the vent cap; if roof access is required, use proper safety gear or call a pro.
Why vent pipes clog and why it matters
Vent pipes are the quiet backbone of a home drainage system, allowing air to enter the stack so water can flow freely. When you set out to unclog vent pipe, you’re restoring airflow that helps fixtures drain and prevents sewer gas from backing up. According to Unclog Drain, common culprits include bird nests, leaves, soap scum, and debris that accumulate over time. Understanding how a clog forms helps you act quickly and safely, reducing the risk of backups or gurgling sounds in toilets or sinks. This section explains what happens when a vent gets blocked, and why timely clearing matters for overall plumbing health and indoor air quality.
Safety first: when to call a pro
Working on a vent requires comfortable access to a roof or attic, plus proper fall protection. If you’re unsure about ladder stability, weather conditions, or roof pitch, treat it as a high-risk task. Do not attempt a roof-based unclogging if you lack safety gear or if the vent is under ice or snow. The Unclog Drain team recommends prioritizing safety and, when in doubt, hiring a licensed plumber to avoid injuries or further damage to your drain system.
Causes of vent pipe clogs
Blockages aren’t always obvious. Bird nests and leaves can accumulate in the vent cap, while kitchen grease or hair can travel up from drains and settle inside the stack. Pipe misalignment, crushed sections, and animal activity can also restrict airflow. Regular home use, aging materials, or DIY fixes that push debris into the vent can compound the problem. Knowing these causes helps you target the right approach rather than guess at the solution.
Diagnosing a vent pipe clog
Signs of a clogged vent include slow drainage, gurgling toilets when others drain, and strong sewer smells indoors. A simple diagnosis starts with checking exterior vent caps for visible blockages, then testing fixtures to see if drains improve after removing cap debris. If problems persist, listen for air flow in the attic or on the roof while running water in multiple fixtures. Persistent issues warrant a more thorough inspection of the entire vent stack.
Planning your approach: roof access vs attic access
Decide whether you’ll access the vent from the roof, attic, or both. Roof access requires a sturdy ladder, fall protection, and weather-appropriate gear. Attic access is safer for entry into the vent line but may limit visibility. In either case, plan a clear work area, have a helper, and prepare a tarp to catch debris. Safety-first planning saves time and reduces risk of injury or damage to the vent system.
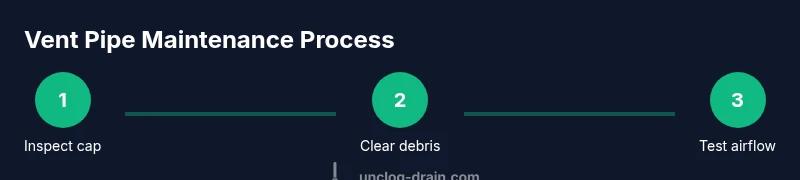
Step-by-step approach overview (high-level)
Before you start, gather the right tools and protective gear. Inspect the vent cap for obvious blockages, then use an auger to dislodge debris from the top of the stack. After clearing the vent, reassemble, test the system with water, and monitor for any lingering odors or backups. Finally, implement preventive measures to minimize future clogs.
Maintenance to prevent future clogs
To keep vents clear, install a birdscreen or cap on the vent, regularly inspect for animal nests, and avoid flushing large amounts of paper or debris down the drain. Periodic professional inspections can catch issues before they cause backups. Cleaning the exterior vent cap and surrounding area after heavy rainfall or storms reduces debris accumulation. A simple routine can save time and prevent expensive repairs.
Common mistakes and how to avoid them
Avoid forcing tools into the vent or using household items that can damage the pipe. Do not attempt to drill through a suspected blockage or remove more than the cap from the vent without a plan. Keep a clear line of sight to identify progress and stop if you encounter resistance. Always use PPE and never work alone on a roof or in an attic with poor footing.
Real-world scenarios and troubleshooting
Some homes experience intermittent clogs that clear after one rainstorm or after the first flush, while others require repeated augering over several days. In persistent cases, the blockage may be further down the stack or involve a broken vent segment. In such scenarios, engaging a licensed plumber ensures a safe and thorough resolution and minimizes the risk of leaks, foul odors, or sewer gas exposure.
Authority sources
For safety and best practices, consult trusted sources and plumbing guidelines. See EPA.gov for air quality considerations, OSHA.gov for safety standards, and NIST.gov for general structural guidance relevant to home maintenance and safe work practices.
Tools & Materials
- Gloves (rubber or nitrile)(Protect hands from debris and sharp edges)
- Safety goggles(Eye protection when working around debris or pressurized lines)
- Flashlight or headlamp(Inspect dark vent passages from attic or roof access)
- Plumber's auger / vent snake(Choose a tool sized for vent stack diameter; 3/8in to 1/2in auger is common)
- Bucket or tarp(Catch debris and keep work area clean)
- Roof access gear (ladder, harness, anchor)(Only if you plan roof-based access)
- Replacement vent cap or screen(If cap is damaged or corroded)
- Rags or towels(Clean up spills and wipe tools)
Steps
Estimated time: 90-150 minutes
- 1
Prepare safety gear and access the vent
Put on gloves and safety goggles. If you’ll access the roof, set up fall protection and a stable ladder, and identify the vent location. Ensure the weather is safe and never work on a wet or windy roof.
Tip: Have a helper hold the ladder for stability and never lean from the ladder to reach the vent. - 2
Inspect exterior vent cap for visible blockages
Clog detection starts at the cap. Remove any debris like leaves, nests, or buildup around the cap. Clear the area and verify the cap is intact before proceeding.
Tip: If you see signs of animal activity, treat the area as potentially hazardous and wear PPE. - 3
Remove cap and prepare to insert the auger
Gently unscrew or pry off the vent cap from the exterior. Confirm you can access the vent opening; keep the cap nearby for reinstallation.
Tip: Do not pry too hard—cap threads can strip easily. - 4
Insert vent auger into the vent stack
Carefully insert the auger into the vent pipe, pushing slowly until you reach the blockage. Do not force the tool; stop if you encounter resistance.
Tip: Keep the auger aligned with the pipe to avoid damage. - 5
Rotate and advance to break up the blockage
Turn the auger while applying gentle pressure to dislodge debris. Work it back and forth to separate compacted material and debris.
Tip: Short, controlled pushes beat hard jabs that can snap the pipe. - 6
Retract the auger and remove debris
Slowly pull the auger back while continuing to rotate to pull dislodged material out of the vent. Collect debris in your bucket.
Tip: Check the auger head for clogs and clean it before storing. - 7
Reassemble vent and test the system
Reinstall the vent cap securely. Run water down nearby drains to test airflow and confirm that the vent is clear.
Tip: Watch for gurgling or slow drainage as signs of remaining blockage. - 8
Evaluate the need for a second pass
If slow drainage persists, consider a second pass or further inspection down the vent stack. Do not overdo it; multiple passes can risk pipe damage.
Tip: Limit each pass to moderate pressure to prevent damage. - 9
Document maintenance and schedule prevention
Record the date, conditions, and any parts replaced. Schedule routine checks for vents and screens to prevent future clogs.
Tip: A short maintenance log saves time during future clogs.
Common Questions
What is a vent pipe and why does it get clogged?
A vent pipe allows air into the drainage system. Clogs can form from nests, leaves, soap scum, or debris. This can cause gurgling, slow drains, and sewer odors.
Vent pipes supply air to drains; blockages cause gurgling and slow drains. Clear debris from the cap and use a vent snake if needed.
Can I unclog a vent pipe from inside the attic?
Yes, you can access parts of some vent stacks from the attic. However, roof access is often necessary for complete clearance and safety checks. Proceed only if you have the right equipment and fall protection.
You can inspect from the attic if accessible, but roof access is usually required for a full clearance.
Do I need to hire a professional for vent pipe clogs?
Not always. Small, simple blockages can be cleared with a vent auger if you’re comfortable with safety precautions. Complex clogs, damage, or inaccessible roofs warrant a professional plumber.
For complex or risky clogs, hire a licensed plumber to avoid injuries or further damage.
What if there is a foul smell after unclogging?
Odors can linger if the blockage is extensive or if sewer gas is entering living spaces. Ventilate the area, recheck seals, and consider a professional inspection if scents persist.
If smells linger after clearing, ventilate and consider a pro visit to verify seals and vent integrity.
Is it safe to work on the roof for vent cleaning?
Roof work carries fall and weather risks. Use proper harnesses, secure ladders, and avoid windy or icy conditions. If unsure, hire a pro.
Roof work is risky; prioritize safety or call a pro if unsure.
What tools are essential for vent maintenance?
Commonly, a vent auger, gloves, goggles, flashlight, and a sturdy ladder. Have a bucket and rags for cleanup and a replacement vent cap if needed.
Keep the basics ready: auger, PPE, light, and safe access.
Watch Video
Key Points
- Inspect vent access points before tool use.
- Use the right vent auger and avoid forcing it.
- Test fixtures after clearing for proper airflow.
- Prevent future clogs with routine vent maintenance.
- Prioritize roof safety and call a pro if unsure.