Unclog Roof Vent Pipe: A DIY Guide for Homeowners Today
Step-by-step DIY guide to unclogging a roof vent pipe with safety, the right tools, and prevention tips from Unclog Drain. Learn practical methods to restore airflow and prevent future blockages.

Unclogging a roof vent pipe starts with safe access, clearing debris, and restoring airflow. Begin with a stable ladder and fall protection, then remove leaves or nests from the vent cap. Use a plumber’s snake from the roof or attic to break the clog, then test flow and re-seal. If needed, repeat cautiously.
Why roof vent pipe clogs happen
Roof vent pipes are part of your home's plumbing ventilation system. When they get blocked, you'll notice slower draining, gurgling fixtures, and in severe cases sewer gas entering the home. According to Unclog Drain, most clogs begin with organic debris that collects at the vent opening, especially in trees or windy areas. Leaves, pine needles, and bird nests can accumulate around the vent cap, sealing the opening and trapping moisture. Snow and ice can also create a freeze-thaw cycle that pushes debris deeper into the stack. In some cases, a poorly angled vent allows water to condense and back up. Hosing down the roof won't help if the clog is deeper in the stack, so plan a method that reaches past the cap and into the vertical pipe. Regular maintenance, such as clearing the vent cap and trimming nearby branches, reduces recurring clogs and preserves airflow.
Safety first when dealing with roof work
Working on a roof introduces real fall hazards and weather-related risks. Always assemble a stable ladder with non-slip feet, and use fall protection if you have access to steep pitches or high sections. Check the forecast for wind and rain; wet shingles are slippery and increase slip hazards. Don’t climb if you’re alone; have a spotter below and keep the area beneath clear of people and valuables. Electrical lines near the vent, gas meters, or gas appliances require extra caution. According to Unclog Drain, safety is the most important step—pause the project if conditions aren’t right and reassess your plan. After you finish, inspect your roof for loose shingles or nails that might need resetting.
Tools and materials you may need
The following tools help you access and clear the vent pipe safely. Start with a clean workspace on the ground or in the attic, and gather essential items before you climb. A sturdy ladder, fall protection, a flashlight, gloves, and eye protection are foundational. A plumber’s snake (manual or drill-powered) is the primary tool for breaking clogs in vertical vent pipes. A garden hose with a spray nozzle can help flush loosened debris from accessible sections, but avoid forcing water down the stack if you can’t reach the blockage. You may also need a vent cap tool to remove the cap and clear the opening. Keep a bucket or bag handy to collect debris as you work. Prioritize items that are easy to carry up and down a ladder and store away after use.
Step-by-step approach overview
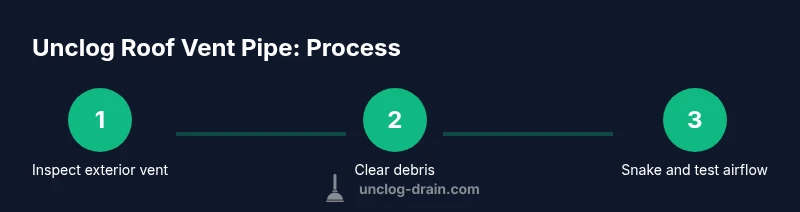
A well-planned approach prevents repeated work and keeps you safe. Start with exterior inspection of the vent cap and immediate surroundings to identify obvious blockages. Then create a path for access, either from the roof or attic, and prepare your cleaning tools. Run a snake carefully, advancing and rotating to break the clog, while watching for resistance. If the clog is stubborn, switch to flushing methods and recheck airflow. Finally, re-secure the vent cap, inspect for leaks, and clean up the work area. This approach is designed for homeowners doing DIY maintenance with guidance from Unclog Drain.
Cleaning techniques: mechanical removal vs airflow restoration
Mechanical removal via a plumber’s snake is the most reliable method for many roof vent clogs. It allows you to physically break apart tangled debris and dislodge nests or compacted material. If the blockage is near the opening, you can often clear it from the attic end by feeding the snake down the pipe. Airflow restoration is the end goal; you should be able to hear steady airflow at the vent when the clog is cleared. When choosing a method, consider vent length, accessibility, and your comfort with rooftop work. Avoid harsh chemicals in vent lines, as they can corrode metal components and create lingering odors. This section aligns with Unclog Drain's 2026 recommendations for safe, effective vent maintenance.
Prevention and maintenance strategies
Preventing a return clog is easier than clearing one. Install a vent cap with a mesh screen to deter birds and debris while allowing airflow. Trim branches near the vent to reduce leaf litter, and inspect the vent cap at least twice a year. If you notice slow drainage or recurring gurgling, address the issue promptly before it worsens. A simple seasonal check—inspect cap integrity, clean exterior debris, and verify attic access—can save you from more expensive repairs later. By adhering to these practices, you maintain consistent airflow and reduce the likelihood of blockages in the future.
When to call a professional
If you’re uncomfortable climbing onto the roof, lack attic access to the vent, or the clog refuses to yield to mechanical clearing, it’s time to call a professional. A licensed plumber can assess vent piping layout, determine if the stack is partially blocked at the main line, and provide a targeted solution. Professional assistance is also prudent if you smell sewer gas or notice recurring clogs after cleaning attempts. The Unclog Drain team recommends seeking help when safety or repeated failure becomes a concern.
Troubleshooting common issues
If you encounter a stubborn clog, verify you’re actually targeting the correct vent pipe and not a different building system vent. Some homes have multiple vents around the roofline; clearing the wrong one won’t improve airflow. Ensure the vent cap is properly reinstalled and sealed to prevent leaks. If moisture or mold appears around the vent area after clearing, reassess ventilation with the help of a professional. Regular upkeep reduces the odds of future problems, ensuring a more reliable plumbing vent system.
Tools & Materials
- ladder with stabilizer(Extendable, non-slip feet; set at ~75° angle from ground)
- fall protection gear(Harness or safety line; use with a spotter)
- flashlight(Bright, hands-free headlamp preferred)
- work gloves(Grip and protect hands on rough surfaces)
- safety glasses(Protect eyes from debris)
- plumber’s snake / auger(Manual or drill-powered; 3/8 inch recommended)
- attic/roof vent cap removal tool(Cap remover or screwdriver for cap screws)
- garden hose with spray nozzle(Optional for flushing reachable areas)
- bucket or bag(Catch debris as you remove it from the vent)
Steps
Estimated time: 60-90 minutes
- 1
Prepare and safety check
Set up the ladder on level ground and attach fall protection. Inspect weather and confirm no power lines or gas lines are in the workspace. Put on gloves and eye protection before handling debris.
Tip: Double-check ladder stability and use a spotter below the ladder. - 2
Access the vent
Climb carefully to the vent opening and remove the vent cap. If you can't reach the cap, access from the attic end and locate the vertical pipe. Keep the area below clear in case debris falls.
Tip: If the vent cap is damaged, replace it rather than forcing it back on. - 3
Clear exterior debris
Clear leaves, nests, and other debris from the vent opening. Use gloved hands or a plastic scraper to avoid pushing debris back into the pipe.
Tip: Do not use metal tools that could damage the vent or cap fittings. - 4
Insert the snake
Feed the plumber’s snake into the vent from the top or attic end, slowly rotating to break up the clog. Push gently to avoid denting the pipe.
Tip: Work at a steady pace; if you meet strong resistance, back up and reposition. - 5
Test clearing
Withdraw the snake and test airflow by running water or air through the vent. Observe for steady, non-gurgling flow in fixtures connected to the line.
Tip: If water backs up, pause and reassess the clog location. - 6
Flush and dry run
Flush the vent with a controlled blast of air or water to dislodge remaining debris. Repeat as needed until airflow returns to normal.
Tip: Don't over-flush; excessive water can flood the vent line. - 7
Reassemble vent
Replace the vent cap securely and confirm there are no leaks around the cap or flashing. Clean up the work area and store tools properly.
Tip: Take a photo of the cap and seal for future reference. - 8
Final check and monitoring
Run multiple drains to confirm consistent airflow and no slow drainage. Monitor for odor or backflow over the next 24–48 hours.
Tip: If odors persist, call a professional to inspect the main sewer line.
Common Questions
Can I unclog a roof vent pipe myself?
Yes, with proper safety and the right tools. Start with a visual inspection, clear debris, and use a plumber’s snake from the roof or attic. If you encounter stubborn blockages or roof hazards, hire a professional.
Yes, you can, but prioritize safety. If the blockage won’t clear, contact a professional.
What are common signs of a blocked roof vent?
Slow drains, gurgling sounds in plumbing, and sewer odors are typical signs. If more than one fixture is slow to drain, the vent may be blocked.
Look for slow drainage and unusual smells—these suggest a vent issue.
Is it safe to use a garden hose to clear a vent?
A garden hose can help flush accessible sections but avoid forcing water down a blockage you can't reach. Do not use high-pressure water that could damage the vent.
Flushing with a hose can help if you can reach the blockage safely.
What if I can’t access the vent from the attic or roof?
Limited access makes clearing difficult. In this case, a professional assessment is recommended to avoid roof damage or personal injury.
If you can't reach the vent safely, get professional help.
How can I prevent future roof vent clogs?
Install a vent cap with a proper screen, trim nearby branches, maintain the cap, and perform seasonal checks so debris doesn’t accumulate.
Regular cap checks and trimming nearby branches can prevent clogs.
Watch Video
Key Points
- Inspect exterior vent cap for obstruction before climbing.
- Use a plumber’s snake to mechanically clear vertical vents.
- Test airflow after each cleaning pass to confirm relief.
- Prioritize safety: stable ladder, fall protection, and weather awareness.
- Prevent future clogs with routine cap cleaning and branch trimming.