Unclog Roof Drain: A DIY Guide
Learn how to unclog a roof drain safely with practical steps, tools, and prevention tips from Unclog Drain. This DIY guide covers common causes, safety precautions, a detailed plan, and a maintenance checklist.

By following these steps you will unclog a roof drain safely and restore proper drainage. You’ll need a sturdy ladder, gloves, a drain auger or plumbing snake, a hose, and a partner for safety. The guide covers debris removal, mechanical clearing, testing flow, and prevention to reduce future clogs. This approach minimizes water damage exposure and keeps occupants safe.
What is a roof drain and why it clogs
A roof drain is a small but critical part of a building’s rainwater management system. It sits at the lowest point on the roof or near the edge and channels water into downspouts. When leaves, pine needles, roof grit, nesting material, or sediment accumulate, the drain’s opening can narrow or become entirely blocked. Clogs prevent water from draining efficiently, which can cause standing water on the roof, gutter overflow, damaged flashing, or even ice dams in cold climates. According to Unclog Drain analysis, debris buildup is a leading cause of roof drain clogs, especially during fall and after storms. Recognizing the signs—water backing up into gutters, damp spots around the drain, or visible debris around the grate—lets you act before damage occurs. Understanding how a roof drain works helps you plan a safer, more effective unclogging process and reduces recurring problems.
Safety and planning before you start
Safety is non-negotiable when you work on a roof. Before you touch a drain, inspect the weather, ensure the ladder is stable, and wear a harness if the pitch is steep. Keep the work area dry, wear non-slip footwear, gloves, and eye protection, and avoid working alone. Establish a clear plan: identify the drain location, assess access, gather tools, and set a feasible time window. If you encounter complex routing or structural damage, stop and call a professional. A cautious, well-planned approach minimizes injury and increases the odds of a successful unclog without creating new hazards.
Diagnosis: identifying the blockage and expected obstacles
Blockages can form from a mix of organic debris and sediment. Start by removing the drain cover or grate to inspect what’s immediately blocking the opening. Look for leaves, twigs, seed pods, or shingle grit that has find its way into the drain body. In some roof designs, water travels through a trap or elbow before reaching the downspout; these areas can trap gritty debris. If you see standing water on the roof or near the drain, or hear gurgling in the downspout, plan for a longer clearing effort. A careful diagnosis helps you choose the right tool and technique and reduces unnecessary disassembly.
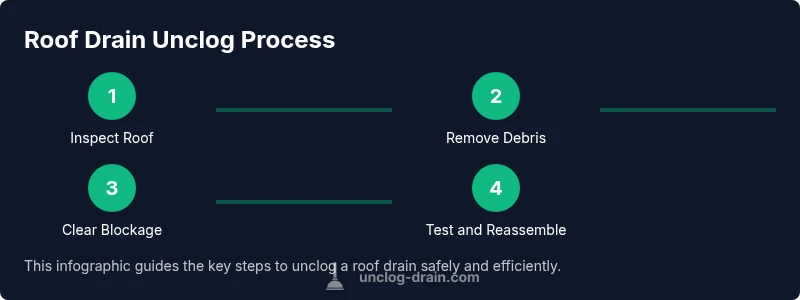
The unclog roof drain process: an overview
The general process combines debris removal, mechanical clearing, and a test flush to confirm the path is open. Start with the simplest step—removing obvious debris from the grate. If the clog persists, use an auger or snake to reach deeper into the elbow or trap. Flushing with water or a hose helps push debris toward the downspout. Finally, reassemble the cover, check for leaks, and confirm drainage under a controlled water flow. Adhering to a methodical sequence prevents missed obstructions and protects roofing materials.
Prevention tips to reduce future clogs
Prevention is easier than repeated unclogging. Install or clean a gutter guard and ensure leaves and twigs aren’t accumulating near the drain opening. Create a simple maintenance routine: inspect roofs seasonally, clear surrounding debris, and flush the system with a garden hose after heavy storms. If your roof drains are prone to clogging, consider adjusting the grate or adding a mesh insert to reduce debris entry. Regular checks save time, reduce water damage risk, and keep drainage functioning during peak rain periods.
Tools & Materials
- Sturdy ladder with stabilizer(Ensure footing is level and the ladder extends 3 feet above the edge)
- Safety harness and rope(Attach to a secure anchor before approaching the edge)
- Gloves(Durable work gloves to protect hands from sharp edges)
- Eye protection(Goggles or sunglasses to shield from debris)
- Drain cover removal tool or flat screwdriver(Used to lift or pry the grate safely)
- Plumber’s snake / auger (6-8 ft)(Flexible tip helps reach curved piping)
- Garden hose / water source(Low-pressure flow to flush debris)
- Bucket and rags(Catch water and wipe surfaces to prevent slips)
- Flashlight or headlamp(Inspect even in poor lighting; downspout path can be dark)
Steps
Estimated time: 60-90 minutes
- 1
Prepare safety gear and setup
Put on gloves and eye protection, secure your harness, and position the ladder on solid ground. Verify the roof is dry and weather conditions are safe. Communicate with a partner who can hold the ladder and call for help if needed.
Tip: Never work on wet or windy roofs; three points of contact with the ladder are essential. - 2
Access the roof drain and inspect
Climb carefully to the drain and remove any loose debris nearby to give you space to work. Visually inspect the grate and surrounding area for obvious blockages or structural damage. Take note of where the downspout leads and any nearby joints that could trap debris.
Tip: Use a flashlight to look into corners of the drain where debris tends to accumulate. - 3
Remove the grate and clear obvious debris
Lift the drain grate with the removal tool or a flat screwdriver. Remove leaves, sticks, and large clumps of debris by hand. Place debris in a bucket and wipe the area clean to improve visibility for the next step.
Tip: Grip the grate firmly to avoid twisting or bending; set it aside on a stable surface. - 4
Flush the drain and assess flow
Attach a garden hose and slowly flush the drain opening toward the downspout. Observe whether water drains freely or slows, indicating a partial clog. If water backs up, proceed with probing or using the auger.
Tip: Pour a little water first to see if there is immediate flow; a sudden surge confirms an open path. - 5
Use a plumber’s snake to clear deeper blockages
Insert the auger into the drain elbow carefully and rotate to break up the clog. Retract slowly while feeding more of the snake if needed. Continue until you feel resistance lessen and water starts to flow more freely.
Tip: Do not force the snake; back out if you meet strong resistance to avoid damaging piping. - 6
Reassemble, test drainage, and inspect for leaks
Reinstall the grate securely, then flush with water again to confirm clear flow. Check for leaks around joints and ensure the downspout line is unobstructed. If any leaks appear, tighten fasteners and re-test.
Tip: Run several gallons of water to ensure sustained drainage and monitor for slow return if blockage recurs. - 7
Clean up and plan prevention
Pack away tools, wipe surfaces, and remove any ladder anchors. Create a short maintenance routine: seasonally inspect the drain, clear nearby debris, and flush the system after heavy storms to prevent future clogs.
Tip: Document the date of the unclog and note any recurring issues to inform future maintenance.
Common Questions
What is a roof drain and how does it work?
A roof drain channels rainwater off the roof into a downspout. It works with a grate and sometimes an elbow trap. Debris can accumulate and block the flow, causing backups if not cleared.
A roof drain is a channel that carries rainwater from the roof to the downspout. Debris buildup can block it, causing backups if not cleared.
How can I tell if my roof drain is clogged?
Look for standing water on the roof, dripping or overflow near the drain, slow drainage after a rain, or visible debris around the grate. A backed-up downspout often indicates a blockage.
Signs of a clog include standing water near the drain and slow drainage after rain.
Can I unclog a roof drain myself?
Yes, with proper safety gear and the right tools, you can clear most clogs. Start with debris removal, then use a drain auger to break blockages and flush the line. If the obstruction is deep or you’re unsure about the pitch, contact a pro.
Yes, you can unclog a roof drain yourself if you’re careful and have the right tools. If the job seems risky, get a professional.
Is it safe to use chemical drain cleaners on a roof drain?
Chemicals are not recommended for roof drains due to runoff that can harm landscaping and the environment. Mechanical clearing with a snake and water flushing is safer and more effective.
No, avoid chemical cleaners on roof drains; use a snake and water flush instead.
How often should I inspect and maintain roof drains?
Inspect roof drains at least seasonally, especially after heavy storms or autumn leaf fall. Clear debris and flush the line to keep drainage functional and prevent repeated clogs.
Check the drains every season and after big storms to keep them clear.
What should I do if water backs up into my house?
Stop work, call a professional if backup occurs, and consider shutting off the water source to protect interiors. Backups often indicate a blockage downstream or structural damage that needs professional assessment.
If water backs up, stop and get help. A blockage downstream can require professional assessment.
Watch Video
Key Points
- Identify the blockage source before digging in.
- Prioritize safety with proper gear and dry conditions.
- Use mechanical clearing first, then test flow.
- Prevent future clogs with routine maintenance and guards.