How to Unclog a Plumbing Vent Without Getting on the Roof
Learn to unclog a plumbing vent without climbing on the roof. Inside-access methods, practical tools, a clear step-by-step guide, and safety tips for homeowners and DIYers from Unclog Drain.

You can unclog a plumbing vent without getting on the roof by accessing the vent from inside or at an attic or soffit location, removing the cap, and clearing the obstruction with a drain snake or flexible brush. Begin with safety checks, identify the vent line, and follow a step-by-step inside-out approach that avoids roof access.
How the vent system works and what can clog it
A plumbing vent is a vertical pipe that reaches above the bathroom or kitchen stack to equalize air pressure and let sewer gases escape safely. Most homes route the vent through the roof, but blockages can form anywhere along the run—inside walls, attic spaces, or near the stack. When a vent is partially or fully clogged, dramatic symptoms can appear: slow or gurgling drains, frequent backups in sinks or toilets, and even sewer smells circulating through living spaces. According to Unclog Drain Analysis, debris like leaves, bird nests, grease, and calcification are common culprits that reduce vent efficiency. Seasonal changes, such as ice buildup, can also impede airflow. Understanding these patterns helps you plan a safer, roof-free approach to clearing the obstruction while preserving the vent’s long-term function. This section lays the groundwork for a practical, inside-access method that avoids rooftop work while protecting your home’s plumbing system.
Tip from the Unclog Drain team: Start with a quick visual of accessible interior vent locations and note any exterior signs of trouble (gurgling, slow drainage) to target the most likely blockage points.
Locating a safe access point from inside the home
Inside access points for vent clearing are typically found in attics, near the main bathroom stack, or at accessible clean-out locations along the interior vent run. Begin by mapping visible plumbing lines and tracing the likely path of the vent from the fixtures to the roof. If you locate a vent cap or clean-out opening in the attic, closet, or utility space, you may be able to insert a snake from this vantage point rather than climbing onto the roof. Safety comes first: ensure the attic space is well lit, free of trip hazards, and that you have stable footing. In many homes, running a quick fixture test, such as flushing a toilet or running a sink, helps you confirm where air is entering and where the blockage is likely located. The more precise your interior access location, the easier the subsequent clearing will be.
Pro tip: If you cannot locate any interior access or the vent path is not reachable safely from inside, do not force access; instead, plan a rooftop inspection with proper equipment or contact a pro.
Understanding weather and roof considerations
Although the goal is to avoid roof work, outdoor conditions still matter. If you must briefly open an exterior roof vent area or assess the cap, check the forecast and avoid work during rain, snow, or high winds. Water intrusion around an opened cap can cause electrical hazards and damage to insulation or ceiling materials. In cold months, ice can make roof access dangerous or impossible, reinforcing the value of interior approaches whenever feasible. Always prioritize personal safety and the structural integrity of your home. If you notice damaged shingles near the vent or signs of roof instability, it’s best not to proceed from inside alone and seek professional guidance. The long-term reliability of the vent depends on careful handling and appropriate technique, not sheer force.
Note from Unclog Drain: Safety assessments before attempting any access are essential for preventing injuries and costly repairs.
Tools, materials, and safety gear you’ll need
Before you begin, assemble a practical toolkit tailored to inside-access vent work. Essential items include a manual drain snake (3-6 ft), a bright flashlight, rubber gloves, and safety goggles to protect eyes from debris. Have a small bucket and rags on hand to catch wastewater or loose material. Keep a screwdriver set and adjustable pliers handy to remove caps or fasteners without damaging surrounding materials. Optional tools include a brush attachment for the snake, a shop vacuum to clean up residue, and a protective mask if odors are strong. Laying down towels or drop cloths helps keep ceilings, floors, and vents clean. With the right tools, you’ll be able to reach and clear the blockage from inside the home, reducing the risk of falls or injuries associated with roof access.
Unclog Drain tip: Use the snake with a flexible, rigid segment near the tip to navigate bends without kinking.
Inside-out methods to clear a vent without roof access
Inside-access clearing relies on gentle mechanical clearing rather than aggressive pushing on roof lines. Begin by removing the vent cap from the interior access point if present, and gently insert the snake into the vent opening. Progressively feed the cable until you feel resistance, then rotate the handle to break up the clog. Retreat the snake slowly while pulling debris back into the interior space, then reinsert and repeat as needed. If the intake path includes a clean-out, you can insert the snake through this point for better leverage. Flush fixtures nearby with cold water to help carry loosened debris toward the sanitary sewer. Remember to clean the interior vent opening after you finish to prevent new debris from entering the system.
Best practice: Work patiently, avoid forcing the cable, and maintain a steady pace to minimize pipe damage and reduce the chance of a harder clog forming deeper in the stack.
Testing the vent after clearing and final checks
Testing ensures your interior-access clearing worked and that air flow is restored. Start by running water in the bathroom sink and flush a toilet to observe drainage behavior and any residual gurgling. If drains improve and no unusual sounds occur, you’ve likely cleared the vent obstruction. If slow drainage or gurgling persists, you may need to repeat the internal clearing steps or consider alternate interior access points. Check for a consistent air intake when fixtures are in use; if air seems restricted, there may be another blockage in a different segment of the vent, or the cap may need reinstallation. Finally, reinstall the vent cap securely and replace any insulation or attic coverings you may have displaced. A properly tested vent helps maintain efficient drainage and reduces the risk of sewer gas entering living spaces.
From Unclog Drain: Regular testing after a clog clearance prevents reoccurrence and confirms the repair remains effective.
Common mistakes and how to avoid them
Mistakes during interior vent work can undermine the repair. Avoid forcing a snake through tight bends or using excessive force, which can crack pipes or dislodge fittings. Do not ignore safety gear or skip PPE, especially in dusty or dark attic spaces where debris can fall. Never mix chemical drain cleaners with mechanical clearing attempts; chemicals can create dangerous fumes or corrode pipes when exposed to the snake. If you encounter persistent resistance, stop and reassess your access point; a second interior entry or a rooftop inspection may be required. Always reseal any opened caps and ensure the area is dry and well-ventilated to prevent mold growth. By staying patient and methodical, you can minimize hazards and achieve a reliable vent clearing from inside the home.
Practical reminder: If at any point you feel unsure about structural integrity or safety, pause and consult a professional.
Maintenance tips to prevent future clogs
Prevention starts with routine care and mindful usage. Install vent caps that protect against bird nests while still allowing airflow, and inspect attic vent areas seasonally for debris build-up. Keep nearby drains and traps clean by flushing with hot water and a splash of a mild, non-caustic cleaner; avoid chemical drain cleaners that can damage vent pipes. Consider installing screens on interior vent openings where accessible to minimize debris entry. If your home experiences frequent clogs, a yearly vent inspection by a professional can catch developing issues early, reducing the chance of a major blockage that requires rooftop access. Consistent maintenance keeps the vent system healthy and reduces the likelihood of disruptive backups.
Unclog Drain recommendation: Combine routine checks with proactive cleaning to extend the life of your vent system and maintain good sewer gas management.
When to call a professional
If interior access fails to clear the vent after several attempts, or if you notice persistent backups, a damaged vent stack, cracking in fittings, or signs of structural weakness around the vent area, it’s time to call a professional. Roof work, if needed, should be performed by trained technicians who follow safety protocols and local building codes. A professional can confirm whether the blockage is inside the interior run or located higher up the stack and can perform rooftop inspections safely. Timely intervention prevents further damage and ensures your plumbing system remains ventilated and odor-free. The Unclog Drain team recommends seeking expert help when you encounter uncertain access points, recurring clogs, or compromised vent components.
Tools & Materials
- manual drain snake (3-6 ft)(Length should be sufficient to reach the interior vent path from access point)
- flashlight(Bright handheld LED; hands-free preferred if possible)
- rubber gloves(Grip and hygiene; use protective gloves)
- safety goggles(Protect eyes from debris)
- bucket(Catch debris and wastewater)
- old towels or rags(Contain spills and keep area clean)
- screwdriver set(Remove vent caps or screws if needed)
- adjustable pliers(Loosen fittings or clamps if encountered)
- shop vacuum (optional)(Clean up fine debris after clearing)
Steps
Estimated time: 60-90 minutes
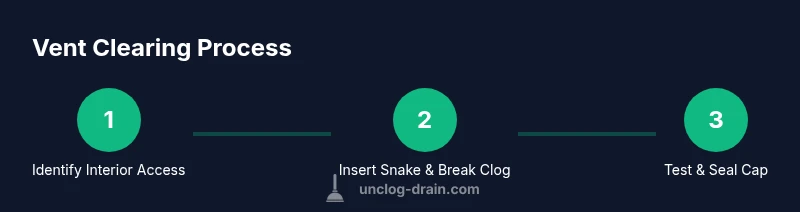
- 1
Identify interior vent access
Locate an attic vent access, clean-out, or other interior point that aligns with the vent path. Confirm there is a safe space to work and that you won’t need to access the roof. This minimizes risk and keeps the job manageable inside the home.
Tip: Plan your route before starting to minimize movement and keep debris contained. - 2
Gather and prep tools
Assemble a snake, flashlight, gloves, goggles, bucket, towels, and a screwdriver or pliers. Test the area to ensure you can reach the vent and that you won’t disturb other fixtures.
Tip: Lay towels to absorb spills and keep the space dry while you work. - 3
Remove interior cap or access cover
If there is an interior cap or cover at the access point, remove it carefully with a screwdriver or pliers. Examine for obvious blockages near the opening and clear loose debris to improve the snake’s entry.
Tip: Keep the cap in a safe place to reseal after clearing. - 4
Insert and feed the drain snake
Gently insert the snake into the vent opening and feed it toward the clog. Apply steady pressure while rotating the handle to help the tip navigate bends and engage the blockage.
Tip: Avoid forcing the cable; progress slowly to prevent pipe damage. - 5
Break up and pull out the clog
When you feel resistance, rotate and pull back to collect debris. Repeat insertion and withdrawal several times to fragment and extract the obstruction.
Tip: Retract slowly to minimize debris spreading inside the system. - 6
Flush and test the vent
After clearing, flush nearby fixtures with cold water to ride out residual debris. Reinstall the cap if you removed it, and test drainage to gauge improvement.
Tip: Test multiple fixtures to ensure consistent venting. - 7
Document the outcome and reseal
Securely reinstall any caps or covers, seal gaps, and tidy the workspace. If odors persist, consider a second pass or alternative access point.
Tip: Take photos for reference in case you need professional help later. - 8
Evaluate the need for further action
If the clog recurs soon or you suspect a higher blockage, schedule a rooftop inspection or call a professional to assess the vent stack integrity.
Tip: Address recurring issues early to prevent more serious problems.
Common Questions
Is it safe to unclog a vent from inside the house instead of going on the roof?
Yes, it can be safe if you can access the vent from an attic or other interior point without stepping on the roof. Take proper safety precautions, wear PPE, and avoid interior access that requires risky movements. If access is unsafe or limited, consult a professional.
Yes, it's safe from inside if you can access it properly. If not, consider professional help.
What tools are essential for this method?
The essentials are a manual drain snake, a flashlight, rubber gloves, safety goggles, and a bucket. Optional items include pliers, a screwdriver, towels, and a shop vac for cleanup.
You mainly need a snake, flashlight, gloves, and goggles.
What are common signs a vent is clogged?
Slow drains, frequent gurgling, backups in fixtures, and sewer-like odors are common signs of a clogged vent. If issues persist after interior clearing, there may be a deeper blockage.
Look for slow drains and gurgling; persistent issues may mean more work is needed.
What should I do if water backs up after clearing the vent?
Stop using affected fixtures, avoid flushing, and inspect traps. If the backup continues, you may need to repeat the clearing or seek professional help to avoid damage.
If water backs up, stop using the fixtures and reassess or call a pro.
When should I call a professional?
Call a professional if interior attempts fail, you detect vent damage, or you are unsure about safety. Roof work should be performed by trained technicians with appropriate safety protocols.
If interior attempts fail or you suspect damage, get a pro involved.
Watch Video
Key Points
- Identify a safe interior access point first.
- Use a manual drain snake carefully to clear the clog.
- Test drainage after clearing to confirm vent function.
- Seal and tidy the area to prevent future debris entry.
- Call a professional if interior access fails or you notice damage.