What Tools Do You Need to Unclog a Toilet: A DIY Guide
Discover the exact tools required to unclog a toilet and how to use them safely. From plungers to augers, this Unclog Drain guide covers steps, safety, and maintenance for quick DIY fixes.

Today, you’ll learn what tools do you need to unclog a toilet and how to use them safely. You’ll discover when a plunger is enough, when an auger helps, and which protective gear to wear. With the right tools, you can fix most clogs quickly and avoid unnecessary trips to a plumber.
What tools do you need to unclog a toilet and why tools matter
According to Unclog Drain, the tools you choose set the tone for a clean, safe, and efficient unclogging experience. The question what tools do you need to unclog a toilet is best answered by organizing the job into three phases: remove standing water, break up the clog, and test the flush. In most homes, a core toolkit covers the majority of clogs: a flange plunger, a toilet auger, protective gloves, eye protection, a bucket, towels, and a flashlight. The right tools help you apply the right amount of force without splashing or injuring yourself. Plastic or metal parts should be kept away from skin and flooring to prevent slips. Always work slowly and deliberately, especially with stubborn clogs. This article walks you through each tool, when to use it, and how to wield it correctly so you can resolve common toilet clogs without calling a plumber.
Core hand tools for quick clogs
For most toilets, three tools cover the bulk of typical clogs. First is the flange plunger, specifically designed for toilets; its rubber flange fits into the drain opening to create a seal. Second, a dedicated toilet auger (closet auger) with a curved steel cable can reach past the rim and break up deeper blockages. Third, sturdy rubber gloves and a bucket round out the setup. When choosing a plunger, ensure the seal is intact and the handle feels solid— a loose plunger is ineffective and messy. If you’re seeing more than one clogged flush or slow draining, keep a spare set of gloves and towels nearby. Finally, never use metal scrapers or sharp tools that could scratch the porcelain. With these tools ready, you’re prepared to attempt the clog safely.
The toilet auger: when to reach for it
A toilet auger is your ally for deeper blockages that won’t budge with plunging alone. Use it when the plunger has failed to clear the flow or when you feel resistance beyond the trap. Feed the auger gently into the toilet bowl, rotating the crank as you push so the cable curves around the bend. If you encounter a snag, back off slightly and reattempt with steady pressure. Avoid harsh twisting that could bend the cable or crack the porcelain. A well-used auger can dislodge hair, tissue, or small objects wedged in the drain, restoring flow without overpressure. Remember to clean the auger after use and store it in a dry place to prevent corrosion.
Protective gear and setup
Safety first: wear rubber gloves, eye protection, and closed-toe shoes. Lay down towels or an old sheet to protect the floor, and keep a bucket handy for water or debris. Good lighting helps you see inside the bowl and along the trap. If you have pets or small children, set up a temporary barrier so they don’t wander into the work area. Keep a waste bag for disposable items and a disinfectant spray ready for post-cleanup. Proper setup reduces splash risk and makes the job more efficient, especially if you’re dealing with a stubborn clog. A calm, organized workspace pays off in faster, cleaner results.
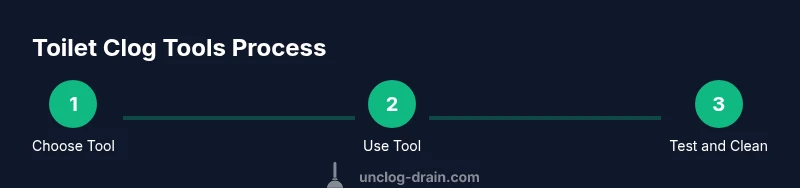
Step-by-step overview: tool-by-tool sequence
Start with gathering your tools, then move through a logical sequence: plunger first, then auger if needed, and finally test the toilet. Each tool has a specific role, and successful unclogging often depends on using the right tool at the right time. Begin by ensuring the area is dry and clear of obstructions. If water is high or rising, pause and prepare a bucket to catch splashes. As you progress, clean and sanitize tools between uses to prevent cross-contamination. This sequence minimizes mess and reduces the chance of re-clogging due to residual debris. Following a structured approach also makes it easier to explain the process to others troubleshooting together.
Techniques for different types of clogs
Clogs come in various forms—paper, tissue, hair, soap scum, or progressive buildup. For solid, compact blockages, a flange plunger with a strong seal is your first line of defense. If the plunger fails, the auger can reach deeper into the trap and dislodge the obstruction. For slimy, slippery materials, patience matters; rotate the auger slowly and avoid forcing it. In some cases, a combination method works best: plunge to loosen, then gradually augment to clear. If you see standing water with no movement, avoid over-sucking with the plunger as this can worsen splashing.
Safety considerations and common mistakes
Never mix chemical cleaners with other products or with bleach, as fumes can be hazardous. Do not use metal tools that can scratch the porcelain; always opt for plastic or rubber components designed for toilets. A common mistake is using excessive force; this can crack the bowl or dislodge the wax ring. Always test the water level after each attempt and stop if you notice unusual noises, smells, or leaks. If you feel overwhelmed or the clog repeats after several tries, take a break and reassess your approach. Patience and safe handling are your best allies.
Aftercare: cleaning up and maintenance
Once the toilet is flowing again, flush several times to ensure the clog is fully cleared and the water level stabilizes. Rinse the tools with clean water, sanitize with a mild disinfectant, and dry before storing. Wipe down the surrounding area and launder towels or protectant cloths. Consider inspecting the shut-off valve and supply line for any signs of wear. Regular maintenance—such as avoiding flushes of non-flushable items and using a toilet-safe cleaning routine—helps prevent future blockages and keep the system moving smoothly.
When to call a professional
If the clog recurs despite using the right tools, or if you notice warped or leaking components, it’s wise to consult a plumber. Persistent clogs can indicate more serious drainage problems such as tree roots or a partial main line obstruction. A licensed professional can diagnose hidden issues and perform preventive maintenance to avoid repeat incidents. In many cases, early intervention saves time and limits potential damage to flooring and fixtures.
Quick setup checklist for future clogs
- Keep a dedicated toilet toolkit: flange plunger, toilet auger, gloves, goggles, bucket, towels, flashlight.
- Check the water supply valve and have a plan to drain quickly.
- Place towels around the base and keep a trash bag nearby for debris.
- Maintain safe storage and cleaning routines to avoid cross-contamination.
- Practice a quick post-clog clean-up to normalize the area for future use.
Tools & Materials
- Flange plunger(Two-sided design; ensure a tight seal and sturdy handle.)
- Toilet auger (closet auger)(3-6 ft length; curved head to reach past the trap.)
- Rubber gloves(Nitrile preferred; choose a size that fits well.)
- Eye protection(Goggles or safety glasses recommended for splash protection.)
- Bucket(For water, debris, and temporary storage of clogs.)
- Towels or old rags(Protect floors and absorb spills.)
- Flashlight(Improves visibility under the rim and bowl edge.)
- Disposal bag(For disposing disposable wipes or debris.)
- Disinfectant and rags(Sanitize tools and surfaces after finishing.)
Steps
Estimated time: 25-45 minutes
- 1
Gather tools and prep the area
Collect all tools and lay towels; ensure the area is clean and well-lit. Check the toilet for overflow risk and place a bucket where needed. This setup reduces mess and speeds the process.
Tip: Arrange tools within easy reach and keep kids/pets away. - 2
Shut off water and drain excess water
Turn the supply valve clockwise to shut off water. Flush once to remove standing water, then use a sponge or towel to soak up remaining drips. Having dry surfaces helps you maintain control during plunging or snaking.
Tip: If the valve is stiff, use a wrench briefly, then recheck for leaks after turning off. - 3
Position flange plunger for a secure seal
Place the flange into the drain opening and press down firmly to create a tight seal around the rim. Keep the plunger vertical and cover as much of the drain as possible for maximum suction.
Tip: Angle slightly for best contact and avoid gaps that allow air to escape. - 4
Plunge with steady, controlled motions
Push straight down and pull back with even pressure for 15-20 cycles. If a sigh of resistance occurs, pause and reseat the plunger before continuing.
Tip: Keep pressure smooth; rapid, erratic plunging can splash and spread mess. - 5
Use the toilet auger for stubborn clogs
Insert the auger into the drain and crank slowly while guiding the cable through bends. If you feel resistance, rotate gently and push with a steady, controlled motion.
Tip: Crank in small, even turns to avoid kinking the cable. - 6
Test flush and clean up
Restore water supply and flush to test. If clear drainage returns, perform a couple more flushes to confirm. Sanitize tools and wipe down the area after the test.
Tip: Document any persistent issues and consider professional help if needed.
Common Questions
What is the best tool to unclog a toilet?
For most clogs, a flange plunger is the first choice because it creates a strong seal and suction. If plunging fails, switch to a toilet auger to reach deeper into the drain. Always assess safety and be prepared to call a professional if the clog persists.
For most clogs, start with a flange plunger and switch to a toilet auger if needed. If it still won’t budge, consider calling a professional.
Can I use chemical drain cleaners to unclog a toilet?
Chemical drain cleaners can be harsh and pose splash risks. They’re not always effective on toilet clogs and can damage pipes or sealants if misused. Use mechanical methods first and choose safe cleaners if you must.
Chemical cleaners can be risky and aren’t always effective for toilets. Try plungers or augers first.
Is it safe to use a plunger on a toilet?
Yes, a properly used flange plunger is safe for toilets. Ensure a good seal, use controlled pressure, and avoid pounding the bowl. Proper technique minimizes mess and damage.
Yes, with proper technique and a good seal, plunging is safe for toilets.
What should I do if the toilet overflows?
If overflow occurs, turn off the water supply, place towels, and use a bucket to remove excess water. Do not flush again until you’ve cleared the clog and restored flow safely.
If it overflows, shut the water off and soak up excess water before continuing.
When should I call a plumber?
Call a plumber if clogs recur after using the proper tools, if you notice leaks, or if there’s slow drainage across multiple fixtures. A professional can diagnose hidden problems and prevent future issues.
Call a plumber if clogs keep returning or you notice leaks or slow drainage in other fixtures.
How can I prevent toilet clogs in the future?
Prevent clogs by avoiding flushing non-flushables, using modest amounts of toilet paper, and regularly inspecting the trap and waste line for buildup. Routine maintenance and sensible use go a long way.
Prevent clogs by not flushing non-flushables and keeping up with routine maintenance.
Watch Video
Key Points
- Identify the clog type and tool readiness.
- Start with a flange plunger before using an auger.
- Protect yourself with PPE and a tidy workspace.
- Test the flush and repeat only if safe.
- Clean tools after use to prevent contamination.