How to Unclog Upstairs Toilet: DIY Guide
Learn how to unclog an upstairs toilet using safe, non-chemical methods. This guide covers plunging, auger use, safety tips, and prevention for homeowners dealing with upstairs toilet clogs.

By following this DIY guide, you will unclog an upstairs toilet using safe, non-chemical methods. Start by confirming the blockage isn’t a simple flush issue, then try a toilet plunger designed for high-water toilets. If that fails, use a toilet auger to reach the drain, and avoid caustic cleaners. With the right steps, you can restore flushing in under an hour.
Understanding Why Upstairs Toilets Clog
Upstairs toilets clog for the same reasons as any drain, but the path from an upper floor to the main stack adds gravity and distance that can compound slow draining. A partial clog in the vertical stack or horizontal waste line can trap waste and air, turning a simple flush into a back-up. According to Unclog Drain, many residential clogs originate from flushing non-flushable materials or excessive toilet paper, combined with hair and soap scum that cling to pipe walls over years. Before you attack the clog, map the likely path: the toilet flange, the trap, the horizontal waste line, and the vertical stack. This helps you choose the right tool and technique and reduces the risk of making a bigger mess. In practice, start with the simplest explanation: a partial blockage that is slowly building.
Tools and Materials You'll Need Before You Start
Before you dive in, assemble your tools so you don't interrupt the process mid-task. Essentials are a flange-style toilet plunger, a toilet auger, rubber gloves, towels or a bucket, and a flashlight. Optional items like safety glasses and disposable wipes make cleanup easier. Unclog Drain recommends keeping a dedicated set of plumbing tools to avoid cross-contamination between jobs. Lay out towels to protect flooring, and have a bucket handy to catch any spillover. If your toilet is near a sink, you may appreciate a small basin to minimize splash. Also include a small container of baking soda and white vinegar if you plan to flush with safe, non-chemical options after the clog is cleared.
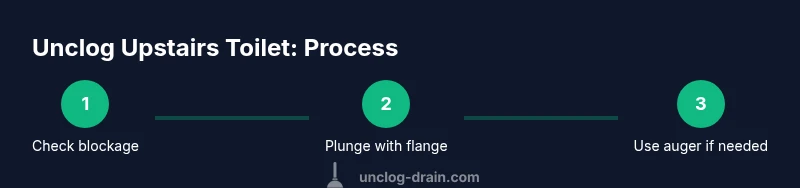
Step-By-Step Overview
This section outlines the high-level approach you’ll take, so you’re prepared for the detailed steps that follow. Start with a visual check, then try plunging with a proper flange plunger, escalate to an auger if needed, and finish with a test flush. Always sanitize tools after use. The goal is a clean, safe, fully functioning toilet. This overview helps you stay organized and reduces the chance of re-clogging from leftover debris. Remember, patience and a methodical approach yield the best results.
Safety First: Precautions to Avoid Injury
Wear gloves and eye protection. Do not mix chemical drain cleaners with plungers or augers, as dangerous fumes can form and plastics can degrade. Keep children and pets away during the process, and work in a well-ventilated area. If you feel unsure at any point, stop and reassess. For upstairs bathrooms, be mindful of water leaks that can damage floors or ceilings below; place a tray or towels to catch any overflow. If the water supply valve under the toilet is stiff or difficult to turn, pause and ask for help rather than forcing it.
Troubleshooting Common Issues You Might Encounter
If water backs up into the bowl, stop plunging immediately and check for any visible blockages in the trap or flange. If the water level remains high after plunging, there may be a partial clog farther down the line. If gurgling continues after several attempts, back away and consider professional help. These experiences are common in upstairs installations. If you have a venting issue, you may notice slow drainage in sinks and showers too; this is a sign that the main stack may be partially blocked. In that case, avoid over-using plungers and consider a professional assessment to prevent structural damage.
Preventing Future Clogs in Upstairs Toilets
To reduce future clogs, avoid flushing non-flushable items, limit the amount of toilet paper per flush, and consider a weekly quick-rinse to keep the drain moving. Periodically check the water level in the bowl to ensure the fill valve is functioning smoothly. A simple routine, combined with proper habits, can keep upstairs toilets flowing. For households with hard water, consider a monthly flush with a gentle non-chemical cleaner and a short rinse to prevent mineral buildup. Educate all family members about what should and should not go in the toilet, and consider installing a simple screen or flushable bag for trash items in bathroom areas to reduce accidental disposal of solids.
Authority Sources
The following sources provide established guidance on safe plumbing practices and drain maintenance. They help ground this guide in credible information from public health and engineering perspectives. Always cross-check recommendations with your local codes and the age of your home’s plumbing. EPA’s WaterSense program emphasizes water-efficient and safe plumbing practices. CDC provides general health considerations related to indoor water usage and sanitation. Mayo Clinic offers practical, everyday home-care guidance that aligns with safe household maintenance. These sources support the methods described in this article and give homeowners a solid baseline for safe DIY unclogging.
Tools & Materials
- Toilet plunger with flange(Use a dedicated toilet plunger; ensure good seal.)
- Toilet auger (plumbing snake)(Prefer 3-4 ft length; coil carefully to avoid pipe damage.)
- Rubber gloves(Protect hands from waste and chemicals.)
- Buckets or towels(Contain spills and protect flooring.)
- Flashlight(Inspect inside the drain and under the toilet rim.)
- Safety glasses(Protect eyes from splashes.)
- Mild dish soap (optional)(Lubricate seals to help plunging.)
- Disinfectant wipes/spray(Sanitize the area after the job.)
Steps
Estimated time: 30-45 minutes
- 1
Check the blockage and water level
Inspect the bowl for the depth of the water and look for visible obstructions. If the toilet is running, wait until the fill cycle completes and observe whether water levels stabilize. This first check helps decide whether you’re dealing with a partial clog or a full backup.
Tip: Take a photo of any debris to reference if you need a plumber later. - 2
Position the flange plunger
Place the flange of the plunger into the toilet hole to form a tight seal. Ensure the plunger cup is fully submerged with water covering it for effective suction. A proper seal is essential for transferring force into the drain.
Tip: If the cup isn’t fully covered, add a small amount of water to cover it. - 3
Plunge with steady, controlled thrusts
Push and pull the plunger with consistent pressure for 15–30 seconds, then pause to see if the water drains. Repeat in 3–5 cycles. If the water level drops, you’re loosening the clog. If there’s no change after several cycles, move to the auger.
Tip: Keep your wrists relaxed and use shoulder movement to avoid wrist strain. - 4
Use the toilet auger if plunging fails
Insert the auger into the toilet and crank slowly, guiding the snake through the bend toward the drain. Rotate to dislodge debris, then pull back and try flushing. Avoid forcing the snake, which can damage the porcelain.
Tip: Do not rush; slow, methodical advancement avoids pipe damage. - 5
Test the flush and observe
Remove the auger and flush the toilet. If the flush clears and the water drains without gurgling, the clog is gone. If issues persist, repeat plunging or escalate to a professional help option.
Tip: Run multiple small flushes to confirm stability. - 6
Clean up and sanitize
Disinfect tools and wipe down the area. Wash hands thoroughly and dry surfaces. Store tools in a dedicated kit to prevent cross-contamination for future use.
Tip: Sanitizing after use reduces odor and bacterial spread.
Common Questions
Can I use chemical drain cleaners to unclog an upstairs toilet?
No. Chemical cleaners can damage toilet seals and pipes and may create hazardous fumes. They often don’t reach the clog and can complicate future repairs. Use mechanical methods like plungers or augers first.
Avoid chemical cleaners; they can harm the toilet and plumbing and are not the recommended first option.
What’s the difference between a flange plunger and a standard cup plunger?
A flange plunger has a bell-shaped extension that fits the toilet drain more snugly, creating a better seal and more effective suction. A standard plunger is less effective for toilets.
Use a flange plunger for toilets; it seals better and clears clogs more reliably.
When should I call a plumber for an upstairs toilet clog?
Call a plumber if the clog recurs, if water backs up into sinks or the tub, if you smell sewage, or if you cannot access the clog safely. Persistent backups may indicate a larger issue in the main line.
If the issue returns or you smell sewage, it’s time to get a professional to prevent bigger problems.
Can I use a wet/dry vacuum to unclog a toilet?
Wet/dry vacuums are generally not recommended for toilets due to risk of backflow and pipe damage. They can create a messy and unsafe situation.
A wet/dry vacuum isn’t typically advised for toilets; it can cause backflow and harm.
How long does it usually take to unclog an upstairs toilet?
Most clogs can be addressed in 30-45 minutes with proper plunging and auger use. Complex blockages may take longer or require professional help.
Most fixes take about half an hour to forty-five minutes, depending on the clog.
Is it safe to plunge repeatedly?
Limit plunging to avoid damaging the flange or seals. If repeated plunging doesn’t work, stop and switch to an auger to prevent damage.
Don’t overdo the plunging; switch to the auger if needed to avoid damage.
Key Points
- Identify whether the clog is partial or full before acting
- Use the right tool: plunger first, auger if needed
- Follow safety precautions to prevent injury
- Test the flush after each step to confirm success