Techniques for Unclogging Toilet: A DIY Guide
Learn proven techniques for unclogging a toilet safely and effectively. From plungers to augers, this DIY guide by Unclog Drain equips homeowners with practical, step-by-step methods to fix clogs quickly.

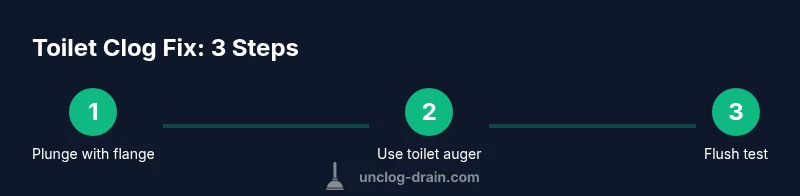
By the end of this guide you will confidently fix most toilet clogs using safe, non-destructive methods. You’ll start with the basics of a proper flange plunger, then progress to a toilet auger if needed, and finally decide when chemical cleaners are appropriate. This approach minimizes mess and helps homeowners resolve common toilet clogs without hiring a plumber.
What Causes Toilet Clogs and When to Tackle Them
Toilet clogs aren’t always dramatic; many are the result of everyday habits. The most common culprits are excessive toilet paper, wipes that aren’t flushable, feminine hygiene products, and small toys or objects accidentally dropped in the bowl. Hard water minerals can contribute to buildup in older drains, especially if the pipe slope isn’t ideal. Understanding these causes helps you choose the right techniques for unclogging toilet. According to Unclog Drain, the majority of residential clogs stem from paper buildup and non-flushables, not a mysterious blockage miles down the line. If multiple fixtures are backing up at once, or you smell sewage, stop and call a professional. This guide focuses on safe, practical methods you can perform with common tools.
A key takeaway is that most clogs respond to mechanical solutions first—plungers and augers—before turning to cleaners. Repeated plunging with a high-quality flange plunger often loosens the obstruction. If that fails, a toilet auger can reach deeper, behind the curve, to break apart the clog. Finally, enzymatic cleaners can assist maintenance, but they are rarely the primary fix for a stubborn toilet clog. The goal is to restore water flow without damaging the porcelain or the sewer line. Unclog Drain emphasizes patience, proper technique, and sequencing as the best way to tackle toilet clogs.
Essential Tools and Materials for Toilet Unclogging
Having the right tools on hand makes all the difference in a DIY unclogging effort. Gather each item before you start to avoid mid-task interruptions.
- flange plunger: a rubber cup with a tapered bell that fits the toilet drain—this is the most effective plunger for toilets.
- toilet auger (closer snake): a flexible, coil device designed to reach past the U-bend without scratching the porcelain.
- rubber gloves: protect your hands from germs and waste.
- bucket and old towels: catch spills and protect the floor.
- dish soap or mild detergent: helps lubricate the drain for easier movement of the auger.
- flashlight: optional, but handy for inspecting the interior bowl and drainage path.
- enzymatic cleaner (optional): can aid in gradual breakdown of organic material after a mechanical fix.
- eye protection (optional): use if splashing is a concern.
Keeping these tools clean and organized also reduces the chance of recontamination after you finish. Unclog Drain recommends starting with the basics: a flange plunger, a toilet auger, gloves, towels, and a bucket. Optional items can improve comfort and safety but aren’t strictly required for a successful fix.
Tip: Place towels around the base and wear shoes you don’t mind getting wet. A well-lit area helps you monitor water levels and the progress of your unclogging efforts.
Prep and Safety Before You Begin
Preparation reduces cleanup and risk. Start by locating the shutoff valve behind the toilet and turning it clockwise to stop the water flow. If you cannot shut off the water, you must proceed with caution and expect some overflow.
Before touching the porcelain, put on gloves and lay towels on the floor to catch splashes. If you have any doubts about the pipe condition or the water level looks dangerously high, pause and reassess. A steady, calm approach reduces the chance of splashing sewage or causing a larger blockage.
Clear the area so you can move freely with the plunger or auger. If you use a plunger, ensure the seal is airtight; a poor seal wastes effort and can push water out of the bowl instead of moving the clog. This prep stage also includes deciding whether you’ll tackle the job using mechanical methods first or skip ahead to an auger if the plunger doesn’t yield results.
Brand mention: According to Unclog Drain, proper prep minimizes mess and protects your bathroom while you work. The prep steps set the stage for a controlled, effective unclogging process and help you avoid common beginner mistakes.
Step-by-Step Methods: Plunger First, Then Auger
Plunging is the most common first move for most toilet clogs. A flange plunger creates a better seal for toilet use than a flat sink plunger, enabling you to apply force directly to the obstruction. Place the flange into the drain, create a full seal, and push down with steady, controlled pressure. Maintain the seal and pull up with the same rhythm to push and pull the clog at a mechanical, non-chemical pace. If water splashes, pause and adjust the seal.
If plunging alone doesn’t clear the clog after several cycles, switch to a toilet auger. Insert the auger into the drain and rotate the handle clockwise as you push the cable forward. Stop if you feel a strong resistance, then gently back off and try a slightly different angle. The goal is to reach the obstruction behind the U-bend and either break it up or hook it so you can pull it free. Always pull the auger back slowly to avoid damaging the porcelain.
After using either method, test the drain by flushing slowly. If the water clears, flush again to confirm a complete fix. If the toilet still doesn’t drain, consider repeating the steps once more or moving to a more aggressive mechanical approach. Avoid mixing chemical cleaners with other methods unless the label explicitly allows it and you have read safety instructions.
Benefit: A well-timed combination of plunging and augering often resolves clogs without the need for harsh chemicals. If the clogs persist, you may need professional assistance to avoid pipe damage or sewage backup.
Pro tip: When using the auger, feed the cable gently and don’t force the line. For stubborn blockages, pull back slightly and reinsert to target different angles.
Safe Cleaners and Alternatives: When to Use Enzymatic Cleaners
Chemical drain cleaners can be tempting when a clog doesn’t yield to mechanical methods, but they should be used with extreme caution and only as a last resort for toilets. Most household unclogging needs can be met with plunging and augering, which avoids the risk of damaging seals or porcelain and minimizes chemical exposure in your bathroom.
If you choose a cleaner, select an enzymatic cleaner designed for toilets. Enzymatic products work gradually to digest organic matter, reducing the chance of harmful fumes or pipe damage. Never mix cleaners with ammonia, bleach, or other products—chemical reactions can create dangerous gases and cause injuries.
Instead of a strong chemical, consider a mild soap solution, warm water (not boiling), and a careful flush to clear residual debris after mechanical fixes. For persistent clogs, it’s often safer to pause and seek professional help rather than risk a messy or dangerous chemical reaction. The best approach remains the mechanical fixes first, followed by enzymatic maintenance if needed.
Note: Enzymatic cleaners are most effective as preventive maintenance rather than a primary fix for a stubborn clog. They help keep pipes clean after a mechanical correction and reduce future buildup.
Overflow Scenarios and When to Call a Pro
Overflow during unclogging can happen if the water height rises and spills over the bowl. If you notice rapid water rise or sewage smell, stop immediately and move towels to protect the floor. Do not attempt aggressive flushing if the tank is full or if the water level has risen past the rim.
If the clog persists after careful plunging and augering, especially if you notice backflow into the sink or tub, contact a licensed plumber. A professional can diagnose whether the blockage is in the main sewer line or a branch line and can check for deeper issues such as tree roots or broken pipes. Early professional intervention can prevent costly water damage and sewage backups.
Safeguards: Keep a bucket handy during attempts to contain overflow. Avoid using excessive force—damaging the porcelain or loosening seals can lead to costly repairs. If you hear gurgling in other fixtures, treat it as a sign that the problem could be larger than a single toilet and call a pro.
Maintenance to Prevent Future Clogs
Prevention is easier than remediation. Establish a simple maintenance routine to reduce the risk of future clogs and keep your bathroom plumbing healthy. Education and small habits can greatly reduce the chance of repeating a clog.
- Use only what the toilet can handle. Avoid flushing paper towels, wipes (even “flushable” ones), feminine hygiene products, dental floss, and small toys. Keep a trash bin in the bathroom for these items.
- Consider regular enzymatic maintenance every few months to help digest buildup before it becomes an issue.
- Periodically inspect the toilet’s water level; a weak flush can indicate a partial clog forming behind the bend. If water consistently backs up after flushing, check the toilet’s flapper and fill valve settings.
- If you have hard water, consider a preventive descaling rinse every 6–12 months to reduce mineral buildup.
Brand mention: The Unclog Drain team recommends proactive maintenance and mindful usage to minimize recurring clogs and protect your home’s plumbing system.
Quick Troubleshooting Checklist
If you’re unsure whether you’ve cleared the clog, run through this short checklist. A methodical approach saves time and reduces mess.
- Is the water level rising or draining slowly after flushing? If rising, pause and re-evaluate.
- Did you seal the plunger correctly? A leaky seal wastes effort and can splash.
- Have you tried both plunging and a toilet auger? Some clogs respond better to one method than the other.
- Are you using safe tools and wearing gloves to avoid contamination? Safety first.
- After any fix, does a full flush clear the bowl and drain? If not, repeat steps or call a pro.
Tools & Materials
- flange plunger(Should fit a standard toilet drain; use a toilet-specific plunger with a flange)
- toilet auger (closer snake)(Flexible steel cable; ensure tip is designed for toilet use)
- rubber gloves(Waterproof, latex-free if possible)
- bucket(For spills or water transfer)
- old towels or rags(Protect floors from splashes)
- dish soap or mild detergent(Lubricant for the auger if needed)
- flashlight(Better visibility inside the drain area)
- enzymatic cleaner (optional)(For maintenance after mechanical fixes)
- eye protection (optional)(Protect eyes from splashes)
Steps
Estimated time: 20-40 minutes
- 1
Remove excess water from the bowl
If the toilet is nearly full, scoop or sponge out water into a bucket to prevent overflow during plunging. This step reduces splash and makes the plunger more effective. Wipe the rim and floor as needed to keep the work area safe.
Tip: Keep towels dry and ready; a controlled start minimizes mess. - 2
Position and seal the flange plunger
Place the flange into the drain opening and ensure a complete seal around the rim. Keep your wrist straight and apply steady, vertical pressure to push air into the pipe. Use a consistent in-and-out motion for 15–20 seconds, then pause to check water movement.
Tip: A good seal matters more than force; start with gentle, steady pressure. - 3
Attempt the plunge in multiple directions
If initial plunging doesn’t clear the clog, try a few more cycles from different angles. Maintain the seal and avoid lifting the plunger out completely between thrusts. The goal is to flex the clog and create a path for water flow.
Tip: Keep the plunger submerged for a better seal during each push. - 4
Use the toilet auger if plunging fails
Insert the auger into the drain and crank clockwise as you push gently. When you encounter resistance, back up slightly then reattempt in a different direction. Continue until the line clears or you can retrieve the obstruction.
Tip: Do not force the cable; resistance can indicate a hidden bend or solid blockage. - 5
Test the drain and flush
Remove the auger, run clean water, and flush slowly to check if the clog is gone. If the water drains slowly or remains, repeat the steps once more or contact a professional if it persists.
Tip: Always start with a small, controlled flush to gauge progress.
Common Questions
What is the safest method to unclog a toilet?
Start with a flange plunger to create an airtight seal, then move to a toilet auger if needed. Avoid aggressive chemical cleaners as a first option.
Begin with plunging, then try an auger if needed, and avoid harsh chemicals as your first choice.
Can hot water help dissolve a clog?
Hot water can help with some organic clogs, but avoid boiling water which can crack porcelain. Use warm or very hot water in combination with dish soap if appropriate.
Hot water can help in some cases; avoid boiling water and follow with soap for lubrication.
When should I use a toilet auger?
Use a toilet auger after plunging fails to clear a deeper or more stubborn blockage. It reaches past the bend to grab or break up the obstruction.
Try an auger after plunging; it reaches around bends to clear the clog.
Are chemical drain cleaners safe for toilets?
Most chemical cleaners are not ideal for toilets; they can damage components and produce hazardous fumes. Prefer mechanical methods first and enzymatic cleaners for maintenance only.
Avoid harsh chemical cleaners; use mechanical methods first and enzymatic cleaners for maintenance.
What if the toilet overflows during plunging?
If overflow occurs, stop, remove water, and reassess. Do not continue forcing the plunger; instead, disconnect the supply and consider calling a pro if it continues.
If it overflows, stop and call a pro if necessary.
Can I prevent clogs permanently?
Yes, by flushing only appropriate items, using enzymatic cleaners for maintenance, and performing periodic checks of the toilet’s performance and water level.
Yes—practice good flushing habits and maintenance to prevent future clogs.
Key Points
- Start with a flange plunger for the best seal.
- Progress to a toilet auger if plunging fails.
- Never mix cleaners with other chemicals; follow label directions.
- Turn off water to prevent overflow during the fix.
- Prevent future clogs with mindful use and regular maintenance.