How to Unclog a Camper Toilet
Learn step-by-step methods to unclog a camper toilet safely, using RV-friendly tools and maintenance tips to keep your mobile bathroom flowing.

Goal: unclog a camper toilet safely and restore normal function. Start by turning off the water supply, removing the holding tank cover, and inspecting for a visible blockage. Use a plunger designed for RV toilets or a dedicated RV toilet auger; avoid harsh chemical drain cleaners. If that fails, empty the tank, rinse the bowl, and attempt again with caution.
Understanding RV toilets and common clogs
Camper toilets are compact, gravity-assisted devices that rely on a limited amount of water per flush and a direct path to the black tank. Because of this design, simple paper choices and routine use can create clogs more easily than in a residential system. According to Unclog Drain, most camper toilet clogs arise from toilet paper that doesn’t dissolve quickly, wipes that aren’t RV-safe, or mineral buildup in the trap. In many cases, the clog sits near the trap or within the vented line, which can slow draining or stop it entirely. Before you act, observe the bowl: is the water level normal, is there a visible blockage, or is the liquid level unusually high? Understanding where the blockage sits will guide whether you should attempt plunging, snaking, or a chemical-free rinse. Remember that the goal is to restore flow without damaging seals or increasing odor.
Safety and prep: protect yourself and your RV
Safety comes first when dealing with a clogged camper toilet. Begin by turning off the water supply and removing the bowl lid to prevent splashback. Wear waterproof gloves and eye protection; RV chemicals can irritate skin and eyes. If your unit uses a black tank rinse, keep the area ventilated to avoid fumes. Work in a well-lit area and have a bucket and towels handy for spills. Never mix chemical cleaners with each other or with ammonia, as fumes can be dangerous in a small trailer. If you’re on a tight schedule or unsure of the tank’s condition, consider seeking professional help rather than forcing an improper repair. Following these safety steps reduces the risk of damage and keeps your living space comfortable during the fix.
Tools and materials you’ll need (RV-friendly and safe)
Having the right tools keeps the job efficient and reduces the chance of damage. Essential items include an RV-friendly plunger with a flange suited to camper bowls, and an RV toilet auger designed for chemical-sensitive seals. Wear disposable gloves and keep a bucket nearby for removed waste. Have a supply of RV-safe toilet paper that dissolves quickly, plus towels or rags for cleanups. Optional gear includes a small flashlight, a vent-cap cover if you’ll access the roof vent, and a safety mask if you’re sensitive to fumes. Avoid regular household products not intended for mobile systems, and never pour strong chemical drain cleaners into an RV toilet; they can damage rubber seals in compact plumbing and contaminate the holding tank if flushed.
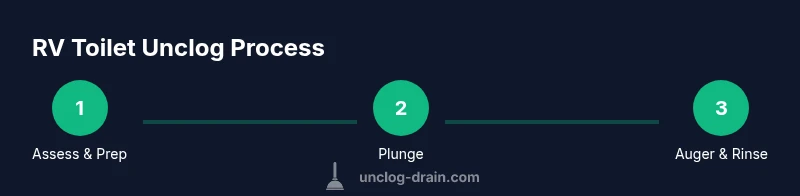
Step-by-step unclogging methods for RV toilets (overview)
The following methods are commonly used and effective when applied in the correct order. Start with the least invasive option and progress to mechanical clearing only if necessary. Each method is described in more detail in the STEP-BY-STEP section below. For stubborn clogs, repeat methods with a short pause between attempts to avoid stress on seals. Always verify the system after each method by flushing and observing the water flow and bowl cleanliness. If you smell sewage or water backs up toward the toilet, stop immediately and reassess.
Enzymatic cleaners vs. chemical drain cleaners
Enzymatic products use bacteria to gradually digest waste, which can be gentler on RV seals and plumbing. They are slower but safer for the holding tank environment. Harsh chemical cleaners can damage rubber gaskets and degrade seals over time; in addition, many RV manuals advise avoiding them in direct RV toilet use. If you choose cleaners, use a small amount and flush with plenty of water, never mix with other cleaners, and allow sufficient dilution time. The best practice is to focus on mechanical clearing first and reserve enzyme-based products for maintenance and odor control rather than rapid unclogging.
Preventing future clogs on the road
Prevention is easier than clearing a stubborn clog. Use RV-safe toilet paper and avoid products not designed for mobile plumbing. Limit the amount of toilet paper per flush; if necessary, rinse the line with a wand or brush after each full flush. Rinse with a dedicated black tank flush, and keep the vent clean to prevent suction or backflow. Also monitor holding tanks and water usage; overflow occurs when the tank is full and the system cannot drain promptly. Regularly check gaskets and seals around the toilet, and reseal as needed to prevent leaks and odors.
When to call a pro and long-term maintenance tips
If the blockage persists after attempting plunger and auger methods, it is sensible to stop and seek professional help. A professional plumber or RV service technician can inspect for more serious issues such as a misaligned trap or damaged seals, or underlying vent problems. In this case, have the model and tank size ready, as well as any chemical cleaners previously used. For long-term maintenance, schedule periodic inspections of the black tank and vent, and implement a simple weekly cleaning routine to prevent buildup. The aim is to keep your camping bathroom reliable and odor-free during trips.
Cleaning after a clog and re-checking system
After clearing the blockage, flush several times with clean water to ensure the bowl drains smoothly. Re-check the seals around the base and the tank connection, and inspect the toilet flange if visible. If odors linger, use an enzyme-based deodorizer and a light cleaning routine that does not involve bleach. Finally, re-check the vent on the roof to ensure it remains unobstructed, as clogged vents can lead to slow draining or re-clogs. Store tools in a dedicated kit so you are ready for the next trip.
Final quick check and routine maintenance
Take a final look at the entire system: water supply, flush mechanism, and waste lines. Confirm there are no leaks and that the toilet returns to a normal flush rate. Keep a small spare supply of RV-safe paper, gloves, and a bottle of enzyme cleaner for ongoing maintenance. Regular practice reduces surprises on the road and helps you maintain hygiene and comfort during adventures in your camper.
Tools & Materials
- RV-friendly plunger with flange(Sized for camper toilet bowls; ensure a good seal)
- RV toilet auger(Hand-crank, flexible tip designed for RV traps)
- Disposable nitrile gloves(Keep hands clean and protected)
- Bucket or container(For removing water or waste during clearing)
- RV-safe toilet paper(Plies should dissolve easily in RV systems)
- Towels or rags(Contain spills and clean up after steps)
- Flashlight(Improve visibility in tight spaces)
- Vent-cap cover (optional)(If accessing roof vent during procedure)
- Enzymatic toilet cleaner (optional)(For maintenance and odor control after clearing)
Steps
Estimated time: 25-40 minutes
- 1
Shut off water and prep area
Turn off the RV’s fresh water supply and close the toilet valve if accessible. Remove the bowl lid carefully to minimize splashback, and place towels around the area. This reduces the risk of water spurts and keeps waste contained.
Tip: Have a bucket ready and work slowly to avoid spraying water. - 2
Try the RV-friendly plunger
Place the flange of the plunger into the toilet bowl and use a firm, vertical motion to build pressure. Create several strong, short pumps without lifting the plunger out of the water. If the water level drops, attempt a few more cycles.
Tip: Keep the seal intact; poor seal reduces suction and effectiveness. - 3
Attempt the RV toilet auger
Insert the auger’s flexible tip into the trap, and gently push while turning the handle to feel for resistance. When you meet a blockage, rotate and pull back slightly to dislodge it. Remove debris carefully and wipe the auger clean after use.
Tip: Do not force the auger; resistance can indicate a need for alternate technique. - 4
Rinse and assess
After mechanical clearing, flush with clean water to test flow. Check if the bowl drains normally and if the odor improves. If the clog returns or is partial, repeat the plunger or auger method once more.
Tip: Flush in short bursts to avoid overwhelming the system. - 5
Enzymatic cleaner and final flush
If needed, apply a small amount of enzymatic cleaner and flush with a generous amount of water. Allow the cleaner to work overnight if possible, then run a thorough final flush to verify clearance.
Tip: Avoid mixing cleaners and always use RV-safe products. - 6
Inspect seals and venting
Check the toilet base seals and inspect the vent on the roof for blockages. A poor seal or vent can cause leaks or slow drainage. If leaks are detected, repair or replace seals before your next trip.
Tip: Vent cleaning helps prevent future backflow and odors.
Common Questions
Can I use household drain cleaners in an RV toilet?
No. Harsh household drain cleaners can damage RV seals and fittings, contaminate the holding tank, and create dangerous fumes in a small trailer. Use RV-safe products or mechanical methods first.
Avoid household drain cleaners in an RV toilet; they can damage seals and pose safety risks. Start with mechanical methods and RV-safe cleaners.
What is the best tool for an RV toilet clog?
An RV-friendly plunger and an RV toilet auger are the most effective first-line tools. They are designed for the compact space and the specific trap geometry of camper toilets.
Use an RV-friendly plunger or RV toilet auger as your first tools.
Why do RV toilets clog so easily?
RV toilets rely on limited water per flush and direct lines to the black tank, so paper and waste buildup happens faster. Poor venting or overuse of non-dissolving products worsen clogs.
RVs clog because of limited water per flush and smaller lines; venting and paper choice matter.
How often should I use enzymatic cleaners for maintenance?
enzymatic cleaners are best used for odor control and maintenance rather than urgent unclogging. Follow product instructions and avoid overuse.
Enzymatic cleaners are for maintenance, not quick unclogging; use as directed.
Is it safe to flush wipes or feminine products in an RV toilet?
No. Wipes and some feminine products do not dissolve easily and can cause clogs in the RV’s black tank and pipes.
Avoid flushing wipes and certain feminine products.
When should I seek professional help?
If the clog persists after plunger and auger attempts, or if you notice recurring leaks or vent issues, a professional RV technician can diagnose underlying problems.
Call a pro if the clog remains after basic methods or you notice leaks.
Watch Video
Key Points
- Shut off water and prep area before starting
- Use RV-specific plungers and augers to avoid damage
- Avoid harsh chemical cleaners in RV toilets
- Vent and seal checks prevent future problems
- Maintenance reduces roadside clogs