RV Toilet Won’t Drain: Essential Troubleshooting Guide
Facing a rv toilet won t drain? This step-by-step guide from Unclog Drain covers common causes, diagnostic flow, and safe fixes to get your RV toilet draining again quickly.

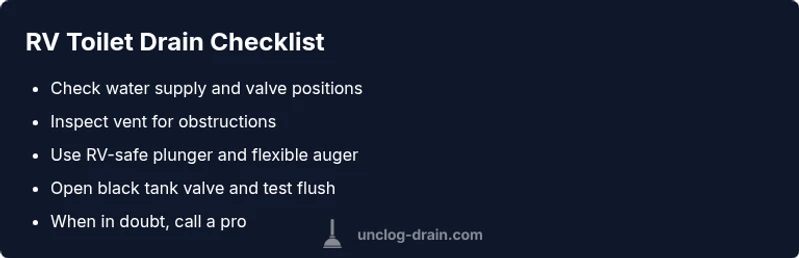
Most RV toilets won’t drain because of a local clog or a venting problem in the waste line. Quick fixes: first plunge the bowl with an RV-specific plunger, then use a flexible toilet snake or auger to clear the trap. If drainage still lags or backs up, stop and call a plumber or RV service for a proper diagnosis.
Common Causes of RV Toilet Drainage Problems
When an RV toilet won’t drain, the culprit is usually a local obstruction or a venting issue rather than a full-blown plumbing crisis. In mobile sanitation systems, waste moves through narrow pipes that can clog easily, especially if you flush incompatible materials or overfill the black tank. A slow drain can also indicate a partially blocked vent on the roof that limits airflow, causing slow evacuation of waste and wastewater. Additionally, a closed or partially closed black tank valve, or a sewer hose that isn’t fully open, can create backpressure that makes the toilet struggle to drain. Finally, hard mineral buildup in traps or the toilet rim can form a stubborn barrier that resists normal flushing.
If you see signs like gurgling sounds, drops in flush power, or backflow into the bowl after flushing, plan to inspect the most likely culprits first. In many cases, a simple sequence of checks and mild maintenance resolves the issue without specialized tools. For reference, this guide uses the exact phrasing rv toilet won t drain to describe the symptom and aligns with common DIY troubleshooting terminology used by Unclog Drain.
Quick Checks Before You Grab Tools
Before you reach for a plunger or auger, perform a few simple checks to rule out easy fixes. Ensure the RV’s freshwater valve is open and the water hose is supplying water to the tank flush. Confirm that the black tank valve is open when you evacuate waste and that the sewer hose is properly seated and not blocked. If you’re using a macerating toilet, verify the macerator switch is on and listening for the motor. Check that nothing has been flushed that doesn’t belong in the black tank, such as wipes or feminine hygiene products, which can quickly form stubborn clogs.
Next, inspect the vent pathway. A roof vent or vent elbow can be blocked by debris, wasp nests, or a kink in the vent line. If access is safe, inspect the vent screen on the roof and clear any obvious obstructions. Finally, perform a controlled, thorough flush with hot water (not boiling) and a small amount of RV-safe toilet cleaner designed for plastic bowls. These steps set up your diagnostic path without jumping into heavy tools.
How RV Systems Differ from Residential Plumbing
RV plumbing is designed for mobile use and space constraints, which changes how clogs form and how they’re cleared. The black tank is a sealed, mobile reservoir rather than a fixed sewer line, so flush volumes and tank ventilation play larger roles in drainage efficiency. In a home system, a clogged trap often responds to a plunger or a standard auger; in an RV, the narrow passages and the trap configuration can require specialized RV plungers and flexible snakes designed for plastic piping. The wastewater flow is slower by design to accommodate chemical treatments and chemical compatibility in portable sanitation, so aggressive home-plumbing methods may not apply. Understanding these differences helps you pick the right tools and avoid damage to RV fixtures.
When rv toilet won t drain, start with per-item checks (valves, vent, and hose) before attempting aggressive tools. This approach minimizes the chance of leaks and keeps your mobile sanitation system safe for camping.
Preventive Habits for Campers
Prevention beats troubleshooting in an RV setting. Start with the basics: flush only toilet-safe materials, use RV-appropriate toilet chemicals to maintain liquid balance, and keep a regular schedule for dumping and rinsing the black tank. Install a vent-cap cover or screen to reduce debris ingress, and routinely inspect seals around the toilet and hoses for wear. Keep extra toilet-safe cleaners and a compact snake on board for emergencies. Finally, maintain good water management by ensuring your freshwater supply remains clean and free of debris that could pass through into the waste system. These habits reduce the risk of clogs forming in the trap and drain line and simplify future maintenance.
Safety and Precautions When Working on RV Plumbing
Working on RV plumbing requires basic safety practices to protect yourself and the vehicle. Wear protective gloves and eye protection when dealing with waste materials. Don’t mix chemical cleaners unless they’re labeled as RV-safe and compatible with your system; some combinations can create toxic fumes or damage seals. When using a snake or auger, feed it slowly and avoid forcing it through sharp bends to prevent pipe damage. If you suspect a gas or vent issue or encounter a persistent leak, evacuate the area and contact a professional RV technician. Never attempt repairs beyond your comfort level; call in professional help when the system shows signs of a serious blockage or if the black tank is compromised.
Choosing the Right Tools for RV Toilet Clogs
Tool choice makes a big difference in success. Start with an RV-rated plunger designed for narrow bowls, then move to a flexible toilet auger or snake that can bend through curved plastic piping. For stubborn clogs, use a biocide-safe enzyme cleaner overnight to loosen buildup before attempting another flush. Always choose tools that are rated for RV use and plastic materials to prevent scratches or cracks in the porcelain or fittings. If you’re not sure about the right tool, refer to your RV manufacturer’s guidelines or consult Unclog Drain for recommended equipment.
Core Takeaway: Start Simple, Then Tackle with the Right Tools
The most effective approach to rv toilet won t drain is to start with simple checks and a non-destructive toolset. Confirm water supply, vent status, and valve position. If the issue persists, apply a flexible auger or plunger, and avoid forcing the line. If you’re still stuck after a measured, stepwise approach, a professional RV service technician can diagnose venting problems or more complex internal blockages. With the right sequence, most drainage issues can be resolved without costly interventions.
Steps
Estimated time: 30-45 minutes
- 1
Safety prep and prep work
Put on gloves and eye protection. Empty and secure the travel area, then close all inside fixtures to prevent splashing. Gather RV-safe plungers, a flexible auger, and a bottle of RV-safe cleaner. Check that the area around the toilet is clear for tools and movement.
Tip: Always start with a dry run to plan the tool path and avoid spills. - 2
Confirm water supply and flush pattern
Open the freshwater valve and flush once to ensure the system is receiving water. If the flush feels weak, check the water pump and ensure the supply line isn’t kinked. A healthy, steady flush is a good baseline before tools.
Tip: A weak flush can mimic a clog—get a baseline first. - 3
Plunge the bowl
Use an RV-rated plunger designed for narrow bowls. Create a tight seal and apply strong, steady pressure several times. Stop if you see water rising but not moving; reassess the seal and positioning before continuing.
Tip: Never use excessive force that could crack the bowl. - 4
Use a flexible auger/snakes
Insert the flexible auger into the toilet trap and gently rotate while pushing forward. If you meet resistance, pull back slightly and re-angle the tool. Work slowly to avoid damaging piping.
Tip: Keep the auger aligned with the trap to prevent snags. - 5
Flush and test
Run a controlled flush after removing the auger to clear debris. Observe the water level and listen for a clear, continuous drain. If it still backs up, proceed to the vent check.
Tip: Flush in short bursts rather than a long continuous stream. - 6
Vent check and seal inspection
Inspect the roof vent for debris, nests, or blockages; clear if it’s safe to do so. Verify all seals around the toilet, hoses, and fittings are intact and not leaking. Re-test drain after vent clearance.
Tip: Only perform roof access if you’re comfortable working at height. - 7
Professional help and wrap-up
If drainage remains unsolved, contact a professional RV service with mobile sanitation experience. Document the symptom (rv toilet won t drain), what you’ve tried, and the outcome to expedite service.
Tip: Professional assessment saves time and protects your system.
Diagnosis: RV toilet won't drain or empties slowly
Possible Causes
- highLocal clog in the toilet trap or drain line
- mediumVent or vented line blocked
- lowSewer hose or valve not fully open / clogged
- lowBlack tank valve partially closed or valve not fully open
Fixes
- easyUse an RV toilet plunger and/or auger to clear the trap; re-test drainage
- mediumInspect and clear the roof vent if accessible (with caution); ensure it's not blocked by debris
- easyCheck black tank valve status and ensure valve is fully open; dump valve if needed
- easyIf slow drainage persists, call a professional RV service or plumber experienced with mobile sanitation systems
Common Questions
What should I do first when my RV toilet won’t drain?
Begin with basic checks: verify water supply, confirm the black tank valve is open, and inspect the sewer hose connection. If the drain remains blocked, proceed with gentle plunging and then use a flexible auger to clear the trap.
Start with water supply and valve checks, then try gentle plunging and a flexible auger to clear the trap.
Can a blocked vent cause slow drainage in an RV toilet?
Yes. A blocked roof vent reduces air flow, which can slow drainage or cause gurgling. Inspect the vent screen and clear obstructions if safe to access.
A blocked vent can slow drainage—check the roof vent for obstructions.
Is it safe to use chemical drain cleaners in an RV toilet?
Only use cleaners labeled safe for RV toilets and plastics. Some products can harm seals or the black tank. Always follow manufacturer directions and avoid mixing chemicals.
Use RV-safe cleaners and follow manufacturer directions; avoid mixing products.
How do I know if the black tank valve is open?
Inspect the valve and listen for flow when you trigger the dump. If the tank won’t drain while the valve is open, there may be a clog further down the line or a valve issue.
Check the valve and listen for flow; if it’s off or blocked, there may be a deeper issue.
When should I call a professional?
If basic plunging and snaking fail, or if you suspect vent or valve hardware damage, contact an RV service with mobile sanitation experience. Persistent backups may indicate bigger systemic problems.
Call a professional if simple fixes don’t work or you suspect hardware damage.
How can I prevent future RV toilet clogs?
Flush only appropriate materials, use RV-safe cleaners, and perform regular black tank maintenance. Periodically inspect seals and hoses for wear, and empty the tank as recommended by your RV manufacturer.
Flush only appropriate materials and maintain the tank regularly to prevent clogs.
Watch Video
Key Points
- Start with simple checks before tools.
- Use RV-specific tools for safety and effectiveness.
- Vent and valve checks are often the missing step.
- When in doubt, call a professional RV service.
- Practice preventive maintenance to avoid future clogs.