Rid X Unclog Toilet: A Practical DIY Guide
Learn how to rid x unclog toilet quickly with practical, safe DIY steps from Unclog Drain. This educational guide covers tools, step-by-step methods, safety tips, and when to call a pro for persistent clogs.

To rid x unclog toilet, you can tackle most common blockages with a calm, mechanical approach. Start with a quality plunger, protective gloves, and a toilet auger, then follow a structured, step-by-step process to clear the blockage while avoiding overflow. This guide offers safe methods, practical tips, and clear decision points for when professional help is needed.
Understanding the Clog Landscape and Safety First
To rid x unclog toilet, you’re dealing with a mix of physical blockages and pressure dynamics. Blockages can arise from toilet paper buildup, foreign objects, or mineral deposits that create a seal at the trap. The goal is to restore a clear path from the bowl to the sewer line without triggering an overflow. Safety comes first: wear gloves, keep children and pets away, and if sewage backs up, evacuate and call a professional immediately. According to Unclog Drain, mechanical methods—plungers and closet augers—are the safest, most controllable DIY options for most households. Avoid mixing chemical drain cleaners with toilet water; these products can release fumes, damage seals, and are often ineffective against solid obstructions. Before you begin, identify the nature of the clog: is it a simple paper buildup, a foreign object, or a deeper sewer-line issue? This awareness informs your approach and helps you decide when to escalate to professional help. The steps that follow emphasize controlled action, proper technique, and careful clean-up to minimize disruption to your home.
Tools and Materials You’ll Need
Having the right tools ready before you start saves time and reduces mess. Gather a sturdy plunger with a wide rubber cup, a closet toilet auger, a pair of thick rubber gloves, a bucket, old towels or rags, a flashlight, and optional dish soap for lubrication. If you don’t have a closet auger, a thick wire coat hanger carefully straightened can serve in a pinch, but use caution to avoid scratching the porcelain. Keep a splash mat or towels at the floor to catch spills, and plan for a small waste bag for disposal of any debris. Always wear eye protection if you anticipate splashing, especially when clearing stubborn clogs.
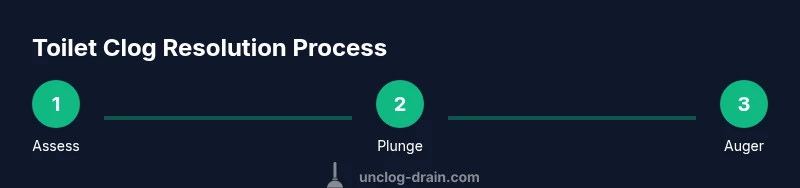
Step-By-Step Approach: From Plunging to Augering
A logical sequence helps you maximize your odds of success without creating a bigger mess. Start with the simplest, least invasive method and move toward more involved tools only if necessary. Each step includes a clear action and a reason why it’s done, plus a quick tip to improve success. Visual references such as diagrams or a quick camera check can help you ensure your technique is correct before applying force. The intent is to restore normal drainage while minimizing water waste and protecting the toilet’s seals.
Step 1: Prepare the Area and Protect Against Overflow
- Clear the floor, place towels around the base, and keep a bucket nearby. Turn off the toilet’s fill valve if possible to reduce water flow and avoid overflow. This setup minimizes the risk of a sudden flood when you begin plunging.
- Why: Reducing water flow lowers spill risk and makes plunging more effective.
- Tip: Have a towel ready to quickly wipe any splashes and prevent slippery floors.
Step 2: Put on Safety Gear and Check the Situation
- Put on rubber gloves; ensure good grip on the plunger. If you see sewage or a strong odor, ventilate the room and consider wearing eye protection.
- Why: PPE protects you from contaminants and improves grip with wet surfaces.
- Tip: Inspect the plunger for wear; a loose or hard cup won’t seal well.
Step 3: Plunge with Proper Technique
- Submerge the plunger in the bowl, create a tight seal over the drain, and pump vigorously without breaking the seal. Use steady, controlled thrusts for 15-30 seconds, then pause to check for movement in the water level.
- Why: Proper seal and rhythm maximize suction to loosen the clog.
- Tip: If water rises, pause and remove excess water with a sponge or cup before continuing.
Step 4: Assess Progress and Re-try if Needed
- If the water level subsides and the bowl begins to drain, repeat plunging a few more cycles. Do not rush the process; repeated, deliberate attempts can dislodge the blockage without splashing.
- Why: Clogs often require a few effective cycles to break up.
- Tip: If you notice air bubbles or noise, that can indicate the blockage is loosening.
Step 5: Use a Toilet Auger for Deeper Obstructions
- If plunging fails, insert the closet auger into the toilet bowl following manufacturer instructions. Rotate gently and push forward; retract slowly to avoid scratching the porcelain.
- Why: An auger reaches past the trap to dislodge or pull out the obstruction.
- Tip: Avoid forcing the auger; resistance can indicate you’ve hit a bend or seal that needs a different approach.
Step 6: Test the Toilet by Flushing
- After the blockage clears, slowly lift and flush the toilet to verify drainage. Observe for any continuing backup or sluggish flow. If water still remains high, repeat the auger or plunging steps.
- Why: A test flush confirms restoration of normal drainage and helps catch residual issues early.
- Tip: Stand back slightly to avoid splashes during the first flush.
Step 7: Clean Up and Sanitize
- Remove towels, rinse tools with clean water, and sanitize the bowl and surrounding area. Dispose of used wipes and gloves in a sealed bag. If you used soap, rinse to prevent slippery residues.
- Why: Proper cleaning reduces odors and prevents secondary contamination.
- Tip: Run a small amount of water through the bowl after cleaning to keep the system fresh.
Step 8: When to Call a Pro
- If the clog persists after using a plunger and auger, or if you notice sewage backup, foul odors, or repeated blockages, contact a licensed plumber. There may be a deeper sewer line problem or a damaged trap that requires professional evaluation.
- Why: Persistent issues can indicate a bigger systemic problem.
- Tip: Document the steps you’ve taken and any observations to help the plumber diagnose quickly.
Maintenance and Prevention: Keeping Toilets Flowing
Prevention is easier than repeat rescue missions. Regularly inspect your toilet and avoid flushing non-flushable items (teminute wipes, hygiene products, or food waste). Use a moderate amount of toilet paper and consider a yearly drain check if you have a history of clogs. For homes with septic systems, be mindful of what goes into the system and schedule routine septic maintenance. By following the steps above and practicing prevention, you reduce the likelihood of future emergencies and protect your plumbing.
Authoritative Sources
- https://www.epa.gov
- https://www.cdc.gov
- https://www.osha.gov
FAQ: Quick Answers for Common Scenarios
To keep this article practical, we’ve included a concise FAQ section covering common questions about rid x unclog toilet, safe chemical use, and when to call a professional. These questions address real homeowner concerns and reinforce best practices for safe DIY unclogging.
Tools & Materials
- Plunger (cup-type, wide opening)(Ensure a snug seal around the bowl opening; replace if worn.)
- Closet auger / toilet snake(Follow manufacturer instructions; avoid forcing past resistance.)
- Heavy-duty rubber gloves(Non-latex if you have allergies; ensure a secure, clean fit.)
- Bucket(Catch water to reduce overflow risk during processing.)
- Old towels or rags(Protect floor and absorb spills; have extras on hand.)
- Flashlight(Helpful for inspecting inside the bowl and trap area.)
- Dish soap (optional)(Use sparingly for lubrication of the auger tip if needed.)
Steps
Estimated time: 30-60 minutes
- 1
Prepare area and protect against overflow
Clear the floor, place towels, and turn off the fill valve if accessible. This setup reduces spill risk as you begin working. Keep a bucket handy to catch any unexpected water from the bowl.
Tip: A dry, stabilized area prevents slips and helps you work efficiently. - 2
Put on safety gear and inspect
Put on rubber gloves; check for any signs of severe blockage or backups. If you smell sewage or feel uneasy, pause and ventilate the room. Confirm you have all tools within reach before proceeding.
Tip: Always wear PPE when dealing with toilet clogs to minimize exposure. - 3
Plunge with proper technique
Submerge the plunger in the bowl, seal the rim, and pump with short, firm thrusts. Avoid lifting the plunger until the seal breaks to prevent splashing. Check water movement after a cycle.
Tip: Keep the seal intact; small variations can reduce suction effectiveness. - 4
Evaluate and retry if needed
If water level drops or begins to drain, repeat plunging 2–4 more times. Do not rush; persistence with correct technique often clears the clog.
Tip: If you hear air bursts or feel resistance, pause and adjust angle or seal quality. - 5
Use a toilet auger if plunging fails
Insert the auger, rotate slowly, and feed toward the obstruction. Gently pull back any obstruction; avoid forcing through sharp bends or the trap.
Tip: Lubricate the tip with a small amount of dish soap if needed for smoother operation. - 6
Test flush and verify
Slowly lift the fill valve and flush to confirm drainage. If the bowl empties, you’ve likely cleared the blockage. If not, repeat the auger or plunging steps.
Tip: Always stand back during the first post-clean flush to prevent splashes. - 7
Cleanup and sanitization
Disease control is essential: rinse tools, sanitize the bowl area, and bag used gloves and towels securely. Dry surfaces and store tools properly for next use.
Tip: Dispose of debris and wash hands thoroughly after cleanup. - 8
Decide if professional help is needed
If clogs persist after the above methods or there is recurring backup, a licensed plumber should assess the system for deeper issues or sewer line problems.
Tip: Document steps taken to help the plumber diagnose quickly.
Common Questions
Can I use chemical drain cleaners on a toilet?
Most toilet clogs are best tackled with mechanical methods. Chemical cleaners can damage seals, harm septic systems, and may not reach solid blockages. If you attempt chemicals, use them with caution and follow the label exactly, but avoid regular use in toilets.
Chemical cleaners are usually not the best solution for toilets and can cause damage. Consider mechanical methods first.
What if the toilet overflows during plunging?
If overflow occurs, stop immediately, remove excess water with towels or a sponge, and bring the water level down before continuing. Turn off the fill valve if available to reduce the risk of further overflow.
If it overflows, stop and mop up, then wait a moment before trying again.
When should I call a plumber?
Call a plumber if the clog persists after multiple attempts with a plunger and auger, if you notice sewage backup, or if you suspect a deeper sewer-line problem.
Call a plumber if the blockage won’t clear after several attempts or if you see persistent backup.
Is a toilet auger safe for porcelain?
Yes, when used gently and with a proper technique, a toilet auger can reach past the trap without scratching porcelain. Lubrication helps reduce friction.
A toilet auger is safe for porcelain if used with care and gentle rotations.
Why do toilets clog in the first place?
Clogs typically arise from excessive toilet paper, non-flushable items, or mineral buildup in the drain line. Regular maintenance and mindful flushing reduce recurrence.
Most clogs come from paper buildup or non-flushables; proper flushing helps prevent them.
Can I use a DIY approach on a septic system?
DIY unclogging is okay for minor clogs in septic systems, but avoid harsh chemicals that can disrupt beneficial bacteria. Always dispose of wastewater responsibly and consult a pro if you’re unsure.
Be cautious with septic systems—avoid harsh chemicals and consider mechanical methods first.
What tools are most essential for DIY unclogging?
The core tools are a sturdy plunger and a closet auger. Gloves and towels help with hygiene, and a flashlight improves visibility when inspecting inside the bowl.
Key tools are a plunger, an auger, gloves, and towels.
How long does a typical DIY unclog take?
A typical DIY unclog for a standard blockage takes about 30 to 60 minutes, depending on the blockage type and your familiarity with the tools.
Most DIY unclogs take around half an hour to an hour.
Key Points
- Identify the clog type before acting.
- Start with mechanical methods—plunger, then auger.
- Avoid hazardous chemical cleaners in toilets.
- Call a plumber if the clog remains after DIY attempts.