Plunging a Toilet: Step-by-Step DIY Guide
Learn how to plunge a toilet safely and effectively with Unclog Drain. Our expert guide covers tools, technique, troubleshooting, and prevention—empowering homeowners to fix clogs quickly and avoid costly calls.

According to Unclog Drain, plunging a toilet is a reliable first step for most clogs. This guide shows how to plunge safely and effectively, including tool selection, preparation, and a controlled plunging technique to minimize mess and damage. When done correctly, plunging a toilet often clears the blockage without needing a plumber.
Understanding Toilet Clogs and Why Plunging Works
Toilets clog for a variety of reasons—from too much toilet paper to solid waste that jams the trap. The primary goal when plunging a toilet is to restore a seal and push the blockage through the bend using a combination of suction and pressure. The action relies on creating a tight seal with a proper plunger and applying controlled force, which dislodges the blockage without damaging the porcelain or flooring. According to Unclog Drain, most common residential clogs respond to careful plunging when the right tool and technique are used. When done correctly, plunging a toilet can resolve most residential clogs without calling a plumber. Throughout this guide you’ll see practical steps for managing common clogs and preserving your toilet’s health. Plunging a toilet is a classic DIY task, and with care you can avoid messy overflow and a costly service call.
Safety First: Before You Plunge
Before you reach for a plunger, put on gloves and eye protection if you’re prone to splashes. Clear the area, protect the floor with towels, and keep children and pets away. If the toilet is already close to overflowing, turn off the water supply at the valve behind the toilet, then flush once to lower the water level. This reduces the chance of an uncontrolled overflow while you work. Remember, the goal of plunging a toilet is to create a temporary seal and generate enough suction to move the obstruction, not to power through it with brute force.
Choosing the Right Plunger and Setup
A flange plunger (toilet plunger) is designed to seal the drain opening and create effective suction. Avoid using a flat cup plunger on a toilet, as it won’t generate a reliable seal. Inspect the plunger for flexibility and a clean rubber edge. Place towels around the base, and if you have a small bathroom, consider a compact setup to minimize splash. If needed, a small amount of dish soap can help create a better seal, but don’t rely on it as a primary lubricant. The goal is a firm, leak-free seal so you can plunge with confidence.
Step-by-Step Plunging Technique
Position the plunger to cover the drain opening and create a tight seal. Push down slowly to push air out and then pull back to draw pressure toward the clog. Use firm, vertical strokes rather than rapid jerks, and maintain the seal throughout. A good rhythm typically lasts 30–60 seconds per round, and you may need several rounds to break the blockage. If water starts to rise, stop and adjust your seal or add more water to improve suction. The key is consistent, controlled pressure, not brute force.
Common Mistakes and How to Avoid Them
Avoid using metal tools or creating a jagged seal that leaks. Don’t plunge with a broken plunger or a worn-out rubber edge. Overfilling the bowl or forcing the rinse into the trap can cause overflow and damage. Always maintain a clean, dry area around the toilet so you can monitor the water level and seal integrity. If you smell horrid odors or the water level won’t drop after multiple attempts, step back and reconsider your approach.
Aftercare and Prevention: Keeping Future Clogs at Bay
Once the clog clears, flush several times to ensure the line is moving freely. Clean the bowl and the plunger with disinfectant before storing. To prevent future clogs, avoid flushing non-flushable items, use less toilet paper at once, and consider a weekly drain-maintenance routine. If your home has older pipes or frequent clogs, you may want to review faucet and trap configurations or consult a professional about a drain snake as a preventive measure. Regular maintenance is simpler than emergency fixes.
Authority and Safety Notes
For safety information related to home plumbing and sanitation, refer to trusted sources such as the CDC and OSHA. Plunging a toilet, when done correctly, is a routine maintenance task that doesn’t require special tools or professional help. Always prioritize safety and cleanliness to prevent injuries and water damage.
Tools & Materials
- Toilet plunger with flange(Choose a flange-style for a better seal.)
- Rubber gloves(Protect hands from dirty water.)
- Old towels or rags(Place around base to absorb spills.)
- Bucket(Optional for water removal.)
- Flashlight(Use if bathroom lighting is poor.)
- Dish soap (optional)(A small amount can help wet the seal.)
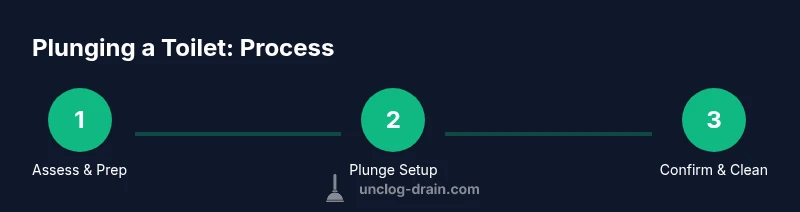
Steps
Estimated time: 30-45 minutes
- 1
Assess clog and prep area
Survey the situation and clear the surrounding space. Put on gloves, lay towels on the floor, and turn off the water supply if the bowl is near overflowing. This preparation reduces splash and helps you work safely.
Tip: Wear gloves and keep a towel handy to control spills. - 2
Choose and position the plunger
Select a toilet flange plunger and ensure the bell-shaped rubber edge is intact. Position it to cover the drain opening with a good seal before applying pressure.
Tip: A proper seal is essential for effective plunging. - 3
Create a watertight seal
Push down slowly to push air out, then pull back to draw pressure toward the clog. Maintain the seal as you generate suction.
Tip: Keep the seal intact; any air leaks reduce effectiveness. - 4
Plunge with controlled strokes
Use steady, vertical strokes for 30–60 seconds per round. Avoid brute force and jerky motions that can splash or crack the porcelain.
Tip: Rhythm matters; consistent pressure beats sporadic force. - 5
Check drainage and repeat if needed
Lift the plunger occasionally to test drainage. If water level rises or remains high, re-seat and try another round.
Tip: Don’t overfill; test before going for a final plunge. - 6
Finish, flush, and sanitize
Flush to confirm clearance. If still blocked, repeat a gentle plunge. Clean the bowl and plunger with disinfectant after use.
Tip: Sanitize tools to prevent the spread of germs. - 7
Clean area and store tools
Wipe down surfaces and allow the bathroom to dry. Store the plunger upright and away from children.
Tip: Keep the area dry to prevent slips. - 8
Assess prevention options
Review what caused the clog and consider minor maintenance routines to prevent future blockages.
Tip: Adopt a small, regular drain-check routine.
Common Questions
What is the best plunger for a toilet?
A toilet flange plunger provides the best seal and suction for toilets. Avoid using a flat cup plunger alone on a toilet.
Use a flange plunger for the best seal and suction.
Will plunging damage the toilet?
When done with the right technique and proper seal, plunging does not damage the toilet. Avoid excessive force and inspect the plunger edge for wear.
If you use the right technique and seal, plunging won’t damage the toilet.
What if plunging doesn’t work?
If multiple plunging attempts fail, stop and try an alternative like a toilet auger or call a plumber to assess possible more serious blockages.
If it doesn’t work after several tries, consider a toilet auger or a pro.
Is it safe to plunge a toilet on a septic system?
Plunging is generally safe for septic systems, but avoid chemical cleaners that can disrupt beneficial bacteria. Use mechanical methods first.
It’s usually safe for septic systems as a mechanical method.
Can I plunge with a full bowl?
Yes, but avoid overflow. Turn off the fill valve if needed and remove excess water to reduce spill risk.
Yes, but don’t let it overflow; control the water level first.
How can I prevent future clogs?
Flush smaller amounts of toilet paper, avoid flushing non-flushables, and consider a weekly drain-check routine or a professional inspection for older systems.
Flush gently and watch what goes down the drain to prevent clogs.
Watch Video
Key Points
- Use a flange plunger for best results.
- Maintain a tight seal and steady rhythm.
- Avoid chemical cleaners as a primary fix.
- Finish with proper sanitation to prevent germs.
- Prevent future clogs with mindful flushing and maintenance.