How to Unclog a Shower Drain That Can t Be Removed
Learn safe, step-by-step methods to unclog a shower drain that can t be removed, with reusable tools, non-destructive techniques, and maintenance tips from Unclog Drain.

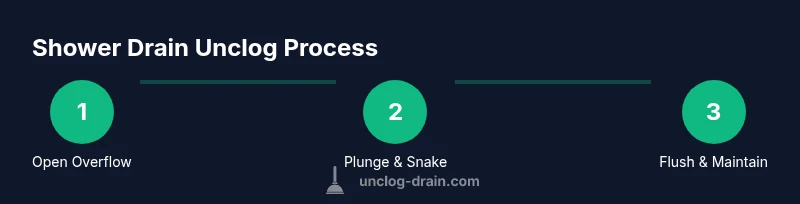
You can unclog a shower drain that can t be removed by using safe, non-destructive methods first. Begin by accessing the overflow or trap, then try a plunger, followed by a flexible drain snake if needed. Finish with a hot-water flush and a baking-soda-and-vinegar treatment. If the clog remains, escalate to professional help.
Why this clog happens when the drain can t be removed
Clogs in showers with non-removable drains are typically hair and soap-scum build-up that accumulates in the trap, piping, or the overflow path. Over time, fibers from towels, grooming products, and mineral deposits can compact into a dense mass that resists simple rinsing. Because the main drain cover isn’t easily removed, many homeowners default to flushing water or using a basic plunger without addressing the root cause. Understanding where the blockage resides helps you tailor a safe, effective plan and prevents unnecessary disassembly that could damage seals or warranty terms. According to Unclog Drain analysis, most non-removable-drain clogs respond to a staged approach that preserves the overflow and trap while clearing the path ahead. This plan minimizes mess and reduces the chance of additional leaks.
Common symptoms and quick checks
Slow drainage, water pooling around the drain, and occasional gurgling noises are red flags that hair, soap scum, or mineral buildup are forming a barrier. If you can see an overflow plate, inspect it for visible hair and debris; if you remove the overflow cover, note any seals and gaskets so you can reseal properly. Before you start, run hot water for a few minutes to loosen gunk, then check the drain’s response after each method. If the drain improves only briefly or remains sluggish, the clog may extend deeper into the pipe, where larger tools or a professional assist would be safer and more effective. The Unclog Drain team emphasizes using non-destructive methods first to gauge the severity.
Tools and safety prep before you start
Before diving in, gather gloves, a flashlight, a bucket, a plunger designed for flat surfaces, a flexible drain snake or auger, baking soda, vinegar, and access to hot water. Use a microfiber cloth to wipe up spills and prevent slips. If you need to access the overflow, have a screwdriver handy and ensure you turn off water flow to the shower temporarily to avoid sudden surges. Protective eyewear isn’t mandatory but recommended when flushing with hot water and chemicals. This phase is about safe preparation, not aggressive probing.
Non-destructive methods to try first
Start with hot water flushes: pour near the overflow and into the drain to push out soap scum. Follow with a baking-soda-and-vinegar treatment: pour 1/2 cup baking soda, then 1 cup vinegar, wait 15 minutes, and rinse with hot water. Plunging can work if you have a good seal; use a cup-style plunger to cover the overflow or the shower drain if possible. Mechanical methods should be gentle—avoid aggressive force that could loosen seals or crack tiles. Enzyme-based cleaners formulated for hair and soap scum are another option, but they work slowly and require several hours. Consistency and patience often beat brute force.
Accessing the clog via overflow and trap basics
If the overflow path is accessible, you can reach the trap indirectly and work the clog through a narrower channel. Remove the overflow plate carefully if needed and feasible, ensuring you don’t damage the gasket. Hair and fibrous debris often collect near the overflow junction, so clearing this area can dramatically improve flow without disturbing the main drain. After clearing, test the flow by running water and listening for changes in sound and speed. Document any persistent issues so you know when to escalate to more advanced tools or a professional.
Using a drain snake or auger from the overflow
A flexible drain snake can be inserted through the overflow to reach hair clusters and compacted gunk. Gently feed the serpentine cable into the opening, then rotate and push forward to break up the blockage. Withdraw slowly to trap pulled material in the bucket and inspect for hair and soap pieces. If you notice resistance, pause and reassess to avoid pipe damage. Repeat as needed, keeping the snake clean and dry between attempts.
Maintenance and prevention to avoid future clogs
Install a fine-mesh drain screen to catch hair before it enters the pipe. Clean the screen weekly and flush with hot water to prevent buildup. Periodically pour a baking soda and hot water mixture down the drain, followed by vinegar, to maintain a clear path. Be mindful of what goes down the overflow and avoid pouring oils or heavy scraping residues. Regular inspection and gentle maintenance reduce the frequency and intensity of clogs, keeping your shower draining smoothly and avoiding unnecessary disassembly.
Tools & Materials
- rubber gloves(Grip hair and debris; choose medium to large size for dexterity)
- flashlight(Better visibility around overflow and trap)
- bucket(Catch water and debris; prevents mess)
- cup plunger(Creates a solid seal on non-flat surfaces)
- flexible drain snake / auger(Hair and blockages beyond reach)
- baking soda(Mild base for gentle cleaning)
- white vinegar(Reactive cleaner with baking soda)
- hot water kettle or boil-safe container(Flush residue and reset flow)
- microfiber cloth(Clean spills and wipe surfaces)
- screwdriver set(If you need to remove an overflow plate)
Steps
Estimated time: 60-90 minutes
- 1
Open the overflow access
If possible, remove or loosen the overflow plate to access the drain path behind it. This creates an entry point for clearing hair and debris without removing the entire drain cover. Keep a bucket and towels handy for any residual water.
Tip: Have a flashlight ready to spot hair buildup at the overflow junction. - 2
Position the plunger
Place the cup plunger over the overflow or shower drain to form a tight seal. Ensure there is enough water to cover the plunger cup for effective suction. Gentle, repeated plunges are more effective than forceful, single pushes.
Tip: A good seal is essential—wipe the rim if surfaces are slick before starting. - 3
Plunge to break up the clog
Use several quick, firm plunges to loosen hair and soap scum. Pause to observe whether water starts to drain; if it recovers, continue. If you hear air gaps or the water barely moves, reassess the seal and reset.
Tip: Avoid over-plunging; it can push debris deeper or damage seals. - 4
Insert a drain snake from the overflow
Carefully feed the snake through the overflow opening toward the trap, rotating as you advance to break up the clog. Withdraw slowly to pull out debris. Clean the snake after use to prevent re-depositing hair elsewhere.
Tip: Go slowly and avoid forcing the snake into bends that could kink or damage the pipe. - 5
Flush with hot water and baking soda
Pour boiling or very hot water down the overflow path, then add a baking-soda-and-vinegar treatment. Let it fizz, then flush again with hot water to flush residue. This helps lift remaining particles without harsh chemicals.
Tip: Never boil water directly into a cold metal drain to avoid thermal shock. - 6
Test drainage and reassemble
Run warm water to confirm clearance. If drains smoothly, reattach the overflow cover securely, ensuring seals are intact. Watch for leaks or unusual noises during the first use after reassembly.
Tip: Keep a log of maintenance steps and time since last cleaning.
Common Questions
Can I unclog a non-removable shower drain without removing the overflow?
Yes. Start with the overflow path by clearing visible hair, using a plunger, and attempting a snake through the overflow channel if accessible. If the clog persists, proceed to deeper methods or seek professional help.
Yes, you can. Start with the overflow path and plunger, then a snake if possible, and escalate if needed.
What if plunging doesn’t work?
If plunging fails, avoid forcing it. Move to a flexible drain snake and access through the overflow. Reassess after each step and consider enzyme cleaners as a slower, gentler option.
If plunging fails, try a snake through the overflow and reassess. Enzymes are a gentler option if you’re patient.
Is a snake safe for plastic pipes?
A flexible snake is generally safe when used correctly, but avoid forcing it through sharp bends. For older or plastic piping, go slowly and stop if you feel resistance. If uncertain, a professional auger may be safer.
Be gentle with plastic pipes; don’t force the snake. If in doubt, call a pro.
Should I use chemical drain cleaners for non-removable drains?
Chemical cleaners should be a last resort for non-removable drains, especially in homes with metal pipes or septic systems. They can damage seals and cause fumes. Always follow label directions and ventilate the space.
Chemicals should be a last resort; they can damage pipes and release fumes. Follow the label carefully.
When is it time to call a plumber?
Call a plumber if the clog persists after multiple non-destructive methods or if you notice recurring backups, leaks, or water backing into other fixtures. A professional can assess pipe health and use advanced tools safely.
If it stays clogged after several methods or you see leaks, call a plumber.
Watch Video
Key Points
- Identify access points (overflow) before disassembly.
- Start with non-destructive methods and progress gradually.
- Use a plunger, then a snake if needed, with careful technique.
- Flush with hot water and baking soda-vinegar to finish.
- Document maintenance and consider professional help if unresolved.