Bathtub Drain Won t Close: Quick Troubleshooting Guide
Urgent step-by-step troubleshooting for a bathtub drain won t close. Learn common causes, safe checks, and practical fixes from Unclog Drain to restore a reliable seal fast.

A bathtub drain won t close usually stems from a misaligned stopper, debris in the drain, or a worn gasket. Start by inspecting the overflow stopper, cleaning hair and buildup, and realigning the pop-up rod. If it still won’t seal, inspect the gasket or replace the stopper assembly.
Why the bathtub drain won t close happens
A bathtub drain that won’t close can be frustrating and waterlogged floors are a real risk. In many homes the root cause is a simple mechanical issue in the stopper assembly, debris buildup, or a worn seal. The Unclog Drain team often sees this problem in older fixtures where hardware has degraded or hair and soap scum have accumulated. By approaching the issue methodically, you can diagnose the most likely culprit and implement a safe fix without calling a plumber. Remember: a proper seal is essential to prevent leaks and wasted water, and addressing it quickly protects your bathroom from water damage and higher bills. This guide uses plain-language steps so you can fix the problem in a few careful moves.
Keyword note: if you’re seeing water pooling and the drain won t close, start with the stopper and work back toward the plumbing connections.
Common culprits behind a stuck tub stopper
Many tub-drain closures fail because of one of a few repeat offenders. Hair and soap scum can clog the stopper housing, hair becomes tangled in the pop-up linkage, or a worn O-ring/gasket prevents a tight seal. Misalignment of the stopper rod or a bent lift rod is another frequent cause, causing the stopper to sit high or off-center and not seat fully. In some cases, a plastic or rubber stopper can swell over time, reducing its ability to close. Taking a quick inventory of these parts will help you decide the right fix rather than replacing components you don’t need to touch.
- Debris and hair buildup in the drain or stopper housing.
- Misaligned or damaged stopper linkage or lift rod.
- Worn gasket or O-ring around the stopper.
- Damaged stopper itself or a swollen rubber component.
- Overflow plate or tub flange misalignment contributing to poor closure.
Safety and initial checks you can perform
Before you touch any plumbing, take a moment to ensure safety and minimize mess. Wear gloves and eye protection. Remove the overflow cover carefully and inspect the stopper mechanism from the tub. Look for obvious loose screws, bent rods, or obvious debris. Clear visible hair with a gloved hand or a small utility tool. If you must loosen parts, use the correct screwdriver size and avoid forcing anything. After clearing hair and grime, test the stopper movement while the drain cover is off. If the stopper still won’t close, you’ll likely need to remove the stopper housing for a deeper cleaning or replacement. If you notice water leaking around the gasket after reassembly, don’t delay—addressing gasket wear now prevents bigger leaks later.
Diagnostic steps you can run at home
This flow helps you isolate the issue without guessing. Start with the simplest checks and move toward more involved tasks only as needed.
- Observe whether the stopper closes completely when the overflow cover is removed. If yes, the issue is likely with the linkage or stopper alignment. If no, the problem may be in the seal or in the drain opening itself.
- Manually move the stopper up and down. If it sticks or binds before reaching the closed position, clear the path or replace the stopper assembly.
- Inspect the gasket/O-ring around the stopper. A worn gasket will still leak and may prevent a full seal. Replace if cracked or deformed.
- Check for any corrosion or rust on metal parts that can seize movement. If corrosion is present, replacement is typically more reliable than repair.
- Reassemble and test in steps, watching for smooth operation and complete closure. If the tub still won’t seal, it’s time to consider replacement of the stopper assembly or professional service.
If this doesn’t work, try replacing the stopper or the linkage as a next step before you call a pro.
Step-by-step: Fix the most common cause (pop-up stopper misalignment)
This section provides a practical, actionable sequence to fix the most frequent cause: misalignment of the pop-up stopper.
- Remove the overflow plate and access the stopper linkage. Loosen the mounting screws and set them aside.
- Detach the lift rod from the horizontal pivot rod. Take a photo before removing to guide reassembly.
- Unscrew and lift out the stopper assembly from the drain opening. Inspect for hair, buildup, or a bent component.
- Clean all parts thoroughly with warm water and a small brush. Remove any grime from the bore and the underside of the stopper.
- Reinstall the stopper assembly, making sure the stopper seats evenly in the drain. Reconnect the lift rod to the pivot rod and adjust for full closure.
- Test by filling the tub and cutting off the water; watch that the stopper closes completely with a firm seal. If it doesn’t, adjust the linkage length or replace worn parts.
Tip: Keep a spare pair of hardware: a small set of wrenches, replacement O-rings, and a basic stopper kit helps you handle most common failures without a full remodel.
Prevention and maintenance tips
Preventive maintenance reduces the likelihood of a recurring tub drain problem. Periodic cleaning of the stopper and the drain, especially after episodes of heavy use or high hair volume, helps maintain good closure. Inspect the gasket or O-ring every 6–12 months and replace as needed. If your home has hard water, consider flushing the drain assembly with a mild descaling solution to prevent mineral buildup that can impede movement. Avoid chemical drain cleaners near a tub stopper, as they can degrade rubber components and seals. Finally, keep a small repair kit handy for quick fixes that arise between routine maintenance.
When to call a professional
If you’ve performed the basic checks and the drain still won’t close, or if you notice ongoing leaks after reassembly, it’s wise to consult a professional. A licensed plumber can diagnose a hidden issue—such as a damaged drain flange, a warped tub lip, or a failing pop-up assembly—that may require replacement parts or more advanced tools. In many cases, a pro can complete the fix quickly, preventing water damage and future headaches.
Steps
Estimated time: 20-45 minutes
- 1
Remove overflow cover and inspect
Carefully pry off the overflow cover to access the stopper linkage. Look for loose screws, corrosion, or obvious wear. A quick visual check guides the next steps without tearing the drain apart.
Tip: Keep screws in a labeled tray to avoid losing small parts. - 2
Disconnect the lift rod from the stopper
Unfasten the lift rod from the pivot rod and note how it’s connected. A photo helps with reassembly and ensures correct rod length.
Tip: Do not bend the rod; if it’s bent, replace it rather than trying to straighten it. - 3
Remove and inspect the stopper
Gently pull the stopper out of the drain, inspecting for cracks, swelling, or hair buildup. If debris is present, clean it thoroughly.
Tip: If the stopper is difficult to remove, apply a little lubricant to the threads—do not overdo it. - 4
Clean and inspect components
Scrub the stopper, linkage, and housing with warm water and a soft brush. Rinse away all residue to restore smooth operation.
Tip: Check the gasket for cracks or deformation; replace if needed. - 5
Reinstall and adjust alignment
Reinstall the stopper and reconnect the lift rod to the pivot rod. Adjust so the stopper seats fully in the drain when closed.
Tip: Take small adjustment steps and test closure frequently. - 6
Test the closure and finalize
Fill the tub briefly and then close the drain to confirm a complete seal. If leakage or poor closure persists, replace the stopper assembly.
Tip: If in doubt, replace the entire assembly to ensure reliability.
Diagnosis: Bathtub drain won t close
Possible Causes
- highMisaligned or damaged stopper linkage or lift rod
- highDebris or hair buildup in the drain or stopper housing
- mediumWorn gasket/O-ring around stopper
- lowDamaged stopper assembly or swollen stopper
Fixes
- easyRealign and secure the stopper linkage; adjust rod length as needed
- easyClean hair and debris from the drain and stopper housing
- mediumReplace worn gasket/O-ring in the stopper assembly
- hardReplace the entire stopper assembly if damaged or swollen
Common Questions
What is the most common cause of a bathtub drain that won t close?
The most common cause is a misaligned or damaged stopper linkage or lift rod, often accompanied by hair buildup. Cleaning and realigning usually solves the issue.
The most common cause is a misaligned stopper or hair buildup. Cleaning and realigning often fixes it.
Do I need special tools to fix a tub drain stopper?
Most fixes only require basic hand tools, a screwdriver, pliers, and a replacement stopper kit if the assembly is worn. Always work with the water off and the tub dry.
Mostly you only need basic tools and a replacement stopper kit if the assembly is worn.
Can a stuck drain cause water damage?
Yes. If the drain won t close and water overflows, it can lead to water damage, mold, and higher utility bills. Fix it promptly to prevent escalation.
Yes, a drain that won t close can cause water damage if it overflows.
When should I replace the stopper assembly instead of repairing it?
If the stopper is swollen, cracked, or repeatedly fails after adjustment, replacement is typically more reliable than repair. A new assembly often restores full closure.
If the stopper is swollen or keeps failing, replace the assembly for reliability.
Is it safe to DIY if I have no plumbing experience?
Basic DIY fixes are doable with care, gloves, and clear safety steps. If you encounter corroded parts, leaks, or if the drain is integrated with complex plumbing, call a licensed plumber.
Yes, DIY is doable for simple fixes, but call a pro for complex problems or leaks.
Watch Video
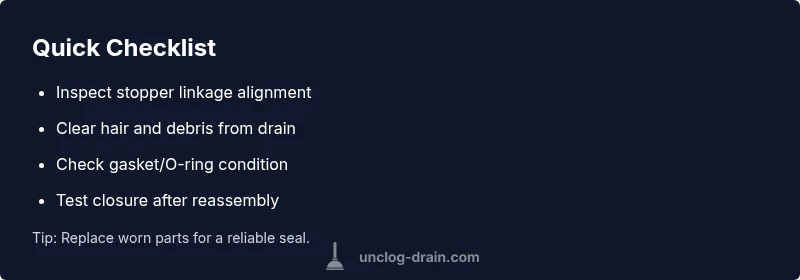
Key Points
- Inspect stopper linkage first.
- Clear hair and debris from the drain.
- Replace worn gaskets promptly.
- Test closure after each adjustment.
- Call a pro if leaks persist after fixes.