Drain Clean Out Pipe: Quick Fixes and Maintenance for DIY Homeowners
Learn how to locate, access, and clean a drain clean-out pipe safely. This practical DIY guide covers tools, steps, safety, maintenance, and when to call a pro for clogged drains.

With this guide, you will learn to locate, access, and safely clean out a drain clean-out pipe and restore drainage in a few practical steps. You'll identify when to DIY versus call a plumber, assemble essential tools, and follow a clean-out procedure that minimizes mess and reduces future clogs. By the end, you’ll feel confident handling common residential clean-out tasks.
What is a drain clean-out pipe and why it matters
A drain clean-out pipe is a dedicated access point that provides a direct path to the main drain line so you can clear clogs without removing fixtures. In many homes, it’s a capped elbow or a short vertical pipe located near the sewer line, under sinks, in basements, or outside near the foundation. Having a clean-out simplifies maintenance, reduces the risk of overflows, and speeds up diagnostics when multiple fixtures drain slowly. According to Unclog Drain, knowing the location and function of this access point is the first step toward a fast, effective DIY unclogging strategy. Use it as a diagnostic portal to test drainage on a single line before you tackle more complex blockages. This guide explains when you should DIY, what tools to gather, and how to safely work with a clean-out so you can keep water moving through your home.
Signs you need to access the clean-out and when to DIY vs call a pro
Most clogs in one line start at the clean-out, especially if several fixtures share a common drain. Slow draining, gurgling sounds, sewage odors, or water backing up in a sink or tub with the clean-out nearby are clear indicators. If you own an older home with galvanized piping, or if the clean-out is located behind a wall or in a tight crawl space, consider professional help. The Unclog Drain analysis shows many homeowners can resolve simple blockages with a hand auger and basic tools, but more complex or pressurized backups require licensed equipment and training. If you’re unsure, start with basic access and testing, then decide whether to proceed or call a plumber.
Common clean-out configurations and how to identify your access point
Clean-outs come in several shapes, but they all share a simple purpose: provide a removable cap to reach the inside of the pipe. The most common residential configuration is a 2-inch or 3-inch PVC or cast-iron elbow with a square or hex-cap visible in a utility area, basement, or exterior footing. In some cases, the plug is inside a cabinet or under a basement stairs landing. Look for a short length of pipe with a threaded cap or a small corrosion-resistant square bolt head. If you can’t find an obvious cap within a foot of the main line, you may have a less accessible clean-out behind a wall or under a floor tile—this is a good cue to call a pro.
Methods for clearing a drain clean-out pipe
There are two broad approaches: mechanical clearing with a hand auger or plumber’s snake, and forced methods such as hydro-jetting done by a pro. For DIYers, a manual auger can usually break up hair, soap scum, and small food clogs within a short run. Insert the auger into the open clean-out and rotate while applying steady pressure, then pull back to extract debris. If water remains stubborn, you may run the auger a second time or switch to a larger-diameter snake. Chemical drain cleaners are risky near a clean-out and should be avoided or used sparingly only following manufacturer instructions, as they can damage pipes and create hazardous fumes.
Safety and best practices for DIY clean-out work
Always wear eye protection, gloves, and long sleeves. Never mix chemicals with other cleaners, and keep children and pets away from the work area. Ventilate the space and use a bucket or towels to manage spills. If you must open a live drain that’s backed up, be prepared for splashing and have rags ready. Work slowly and never force a plug—if resistance is strong, back off and reassess. The Unclog Drain team emphasizes treating a clean-out as a controlled task rather than a one-step fix; pipe material, water pressure, and trap configuration all influence risk. When in doubt, pause, document what you did, and seek professional guidance.
Maintenance and prevention to keep drains flowing
Regular inspections of accessible clean-outs can prevent minor blockages from turning into emergencies. Use sink strainers, avoid pouring grease down the drain, and flush with hot water to dissolve soap scum. Seasonal checks, especially before heavy use holidays, help identify slow drains before they become clogs. If you notice recurring slow drains in multiple fixtures, there may be a larger issue such as a tree root intrusion or a main sewer line problem; in that case, a professional evaluation is warranted. The final takeaway from Unclog Drain is to build a simple maintenance routine: test each clean-out every few months, keep a basic toolkit handy, and document any changes in drainage behavior so you can intervene early if needed. This proactive approach reduces the likelihood of major clogs and costly repairs.
Tools & Materials
- Plumber's snake / hand auger(Choose a 3- to 6-foot flexible snake for residential clean-outs)
- Adjustable wrench(Used to loosen caps and fittings)
- Pipe wrench(Useful for larger fittings and stubborn caps)
- Safety gloves (nitrile or latex)(Protect hands from debris and chemicals)
- Safety goggles(Shield eyes from splashes)
- Flashlight or headlamp(Improve visibility in dark spaces)
- Bucket and rags(Catch spills and keep area clean)
- Snake lubrication (optional)(Lubricant can help the auger slide)
- Penetrating oil (optional)(Loosen corroded caps)
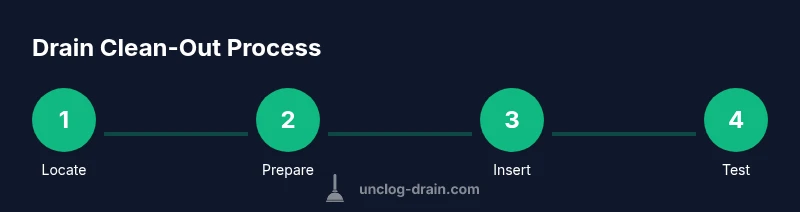
Steps
Estimated time: 45-75 minutes
- 1
Locate the clean-out access
Scan the area for the clean-out cap near the main line. Common spots include basement walls, crawl spaces, exterior foundations, or under sinks. If you have trouble finding it, refer to your home’s schematic or exterior physical search with a flashlight.
Tip: Use a bright light to spot a small capped pipe; look for a squared-off plug. - 2
Prepare the work area and PPE
Put on gloves and eye protection. Clear the area of valuables and lay towels or a drop cloth. Ventilate if indoors and ensure children and pets are away from the workspace.
Tip: Have a bucket ready to catch any initial spills and a flashlight for tight spaces. - 3
Remove the clean-out cap safely
Use the adjustable wrench to loosen the cap while turning counterclockwise. Do not pry with excessive force—caps can be stiff from corrosion. Inspect the threads and set the cap aside on a clean rag.
Tip: If the cap resistance is high, apply a small amount of penetrating oil and wait 5–10 minutes. - 4
Prepare the auger
Extend the snake to the length you expect to clear and lubricate the tip if available. Clamp the auger handle steady and keep the line aligned with the pipe so you don’t bend it.
Tip: Never push the auger too hard; let it do the work while you rotate slowly. - 5
Insert and rotate the auger
Gently insert the auger into the pipe and rotate clockwise while applying steady pressure. When you feel resistance, pull back slightly to engage debris and then push forward again.
Tip: Pause if you hear unusual grinding; recheck alignment to avoid pipe damage. - 6
Clear debris and withdraw the snake
Retract the auger slowly, pulling out debris as you go. Wipe the snake clean and inspect for any remaining buildup. If the run is short, reinsert and repeat once or twice.
Tip: Keep the area dry and ready to receive debris in the bucket. - 7
Test the drain and reseal
Replace the cap hand-tight, then run water from the farthest fixture to test flow. If water drains slowly, you may need to repeat steps or call a professional. Clean up the area and store tools properly.
Tip: Take notes of flow quality and any recurring issues for future maintenance.
Common Questions
Do I need to open the clean-out if only one drain is slow?
If a single fixture drains slowly and you can access the clean-out safely, trying a cautious auger test is reasonable. If there’s no improvement, stop and consult a professional to avoid damage.
If one drain is slow and you can reach the clean-out safely, try a careful auger test; if it doesn’t clear, call a professional.
Can I use chemical drain cleaners in a clean-out?
Chemical cleaners are generally discouraged for clean-outs because they can damage pipes and create hazardous fumes. Mechanical methods are safer for most residential lines.
Chemicals can damage pipes; use mechanical methods first and only follow product instructions if you choose chemicals.
What safety gear should I wear?
Wear gloves, safety goggles, and long sleeves. Ensure proper ventilation and keep children away from the work area.
Put on gloves and goggles, keep the area ventilated, and keep kids away.
What if water backs up after opening the clean-out?
Stop attempting to clear the line, shut nearby valves if possible, and call a plumber if backflow continues. Do not force the auger further.
If water backs up, stop and call a professional if it keeps coming back.
Is a clean-out required by code?
Most residential codes require at least one accessible clean-out near the main sewer line, but exact rules vary by location. Check local codes or with a licensed plumber.
Codes vary; check your local rules or ask a plumber.
How often should I inspect my clean-out?
Do a quick visual check during regular maintenance, and inspect after heavy usage periods. Look for rust, leaks, or signs of slow drainage.
Check the clean-out once a year, and after heavy use.
Watch Video
Key Points
- Identify the clean-out point early to save time
- Use proper PPE and a steady technique to avoid injury
- Test drainage after resealing to confirm success
- Address recurring clogs with maintenance to prevent emergencies