Clogging of Drainage: A DIY Unclog Guide for Homes Today
Learn a practical, step-by-step approach to diagnosing and clearing clogged drainage at home. This guide covers safe tools, common causes, preventive tips, and when to call a pro for persistent clogs.

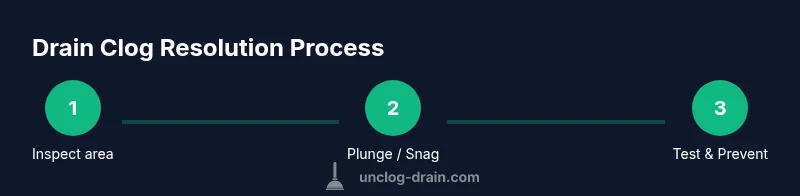
Goal: clear a clogged drain safely with a home DIY approach. You’ll diagnose the blockage, choose the right method, and complete a step-by-step fix. Gather basic tools, follow safety tips, and work from the fixture closest to the blockage outward. This guide covers preventive steps to reduce future clogging of drainage.
Understanding the clogging of drainage
The clogging of drainage is one of the most common home maintenance challenges homeowners face. It happens when materials that shouldn't accumulate in pipes start to collect, narrowing the flow or stopping it entirely. Quick wins come from addressing the simplest causes first, but a systematic approach is essential to avoid recurring problems. According to Unclog Drain, recognizing the early signs—slow draining, gurgling sounds, and foul smells—helps you intervene before a complete backup occurs. This guide uses plain-language steps to help you identify, diagnose, and clear blockages while keeping your pipes healthy for years to come. By understanding the mechanics of your drains, you can choose the right method and reduce the risk of damage. The goal is practical, repeatable fixes you can perform with common tools, not risky hacks.
Common causes of drainage clogs
Clogs rarely appear from a single event. In most homes, drain blockages develop from routine activities and household materials that should not enter the drainage system. Hair, soap scum, and mineral buildup are frequent culprits in bathroom drains. Kitchen sinks accumulate grease, food particles, and starches that bind to fats. Toilet drains suffer from wipes, feminine hygiene products, and paper products that do not dissolve as expected. Flushing small objects or letting standing water sit with these materials accelerates the clogging process. By understanding these causes, you can tailor your approach—focusing on prevention for what tends to trap material in your fixtures. Unclog Drain’s analysis emphasizes that addressing the top offenders first yields the best long-term results.
Safety and prep before you begin
Safety always comes first when working with drains. Wear gloves and eye protection, tie back long hair, and keep a bucket handy to catch splashes. Before you start any physical work, turn off the water supply to the affected fixture or area to avoid a sudden overflow. If you’re dealing with a working sink or shower, place towels around the area to protect floors. Keep children and pets away while you work. Use proper ventilation if you’re using cleaners in enclosed spaces, and never mix drain cleaners with other chemicals. The Unclog Drain team emphasizes clear safety boundaries as the first step to a successful, non-destructive fix.
Diagnostic checklist: where is the blockage?
Start by inspecting the fixture and removing the trap if accessible. The P-trap (the curved pipe under sinks) can trap debris that causes slow drainage. Place a bucket beneath the trap, loosen the slip nuts, and remove it to check for a clog. If the blockage is beyond the trap, access via the drain cleanout (if present) or use a flashlight to observe the pipe behind the wall if possible. A quick run of water can help confirm which section is slow. Mark the location so you know where to target your efforts. This targeted approach saves time and reduces mess.
First-line techniques you can try
For most minor clogs, start with a plunger designed for the fixture: a standard cup plunger for sinks and a flange plunger for toilets. Create a tight seal, plunge with controlled, vertical strokes, and time the effort for 15-30 seconds before checking for movement. If the water resettles and drains slowly again, repeat once or twice. Don’t use excessive force, which can push the clog further into the pipes. In many homes, a simple, methodical plunge restores flow without any tools besides gloves and a bucket.
Using a drain snake or auger safely
If plunging doesn’t clear the blockage, a manual drain snake (auger) can reach deeper into the pipe. Feed the snake slowly, rotate the handle, and keep pressure steady to avoid kinking the line. When you feel resistance, back off slightly and twist to break through the obstruction. Continue advancing and retracting gradually, flushing with water to check progress. Clean the drain and trap area afterward to remove any loosened material. If the blockage lifts, you’ll hear a clear splash as water flows.
Enzymatic cleaners vs chemical cleaners: pros and cons
Enzymatic cleaners use bacteria to digest organic matter and are gentler on pipes, making them a good preventative option for slow drains. They work gradually, so you won’t see instant results like with mechanical methods. Chemical cleaners can be effective for hair and organic material but can damage metal or PVC pipes, degrade seals, and pose safety hazards if used incorrectly. Never mix cleaners with other chemicals, and avoid combining with standing water from a backed-up sewer. For most homeowners, relying on mechanical methods first and reserving cleaners for maintenance is a safer approach.
Preventing future clogs: maintenance and habits
Establish a simple maintenance routine to keep drains flowing smoothly. Run hot water down kitchen sinks for 15-30 seconds after meals to wash away fats. Use a hair catcher in bathroom sinks and showers to reduce hair entry. Periodically flush drains with a baking soda and hot water combination, followed by vinegar, then flush with hot water. Keep chemical cleaners as a last resort and only as directed by product instructions. Quick habits, like avoiding putting coffee grounds, grease, or fibrous foods down disposals or drains, can dramatically reduce clog risk.
Fixture-specific tips: kitchen sink, bathroom sink, shower, and toilet
Kitchen sinks: use a strainer and avoid putting large food particles down the disposal; weekly flushing helps. Bathroom sinks: remove hair from the strainer daily; avoid shaving products clogging the trap. Showers: use a screen to catch hair; clear membranes in the drain and remove visible hair weekly. Toilets: never flush wipes or sanitary products; if a blockage occurs, avoid repeated plunging and consider a toilet auger if you can access the drain. Each fixture has unique pathways; tailing your approach to the fixture improves outcomes.
Next steps if the clog persists or recurs
If you’ve walked through the above steps and the drain remains slow or blocked, it’s time to consider professional help. A persistent clog may indicate a more serious issue, such as a blocked main line or a broken pipe. The Unclog Drain team recommends contacting a licensed plumber if you can’t restore full flow after multiple attempts. In cases of sewage odor, gurgling signals a likely sewer line or drain vent issue—seek urgent help. Regular maintenance after a successful fix reduces future risk; document your steps so you can repeat the process if needed.
Tools & Materials
- Cup plunger(Flat-bottom rubber plunger with a flange for sinks)
- Flange plunger(Specially designed for toilets to create a tight seal)
- Drain snake / auger(Manual hand-crank or cordless drill-attached; choose 1/4-1/2 inch snake depending on pipe size)
- Bucket(To catch water and debris under the trap)
- Gloves(Rubber or latex; avoid bare hands)
- Towels/rags(Contain drips and protect the floor)
- Flashlight(Illumination for dark pipes)
- Pipe wrench(If you must loosen slip-nuts from traps)
- Enzymatic cleaner (optional)(For maintenance and preventive cleaning)
- Safety glasses(Eye protection when dealing with splashes)
Steps
Estimated time: 40-70 minutes
- 1
Inspect and prep area
Gather all tools and clear the area. Put on gloves and eye protection, and place a bucket beneath the area to catch any water. Identify the fixture with slow drainage and plan your approach based on the trap location and accessibility.
Tip: Having a plan before you touch the pipes reduces mess and wasted work. - 2
Turn off water and protect area
If you’re working under a sink or on a shower drain, shut off the water supply to prevent overflow. Place towels around the work zone and keep children/pets away. Ventilate the space if you’re using cleaners.
Tip: Water control prevents accidental flooding during the fix. - 3
Disassemble trap
Place a bucket under the trap, loosen the slip nuts with a wrench or pliers, and carefully remove the trap. Inspect for hair, soap scum, or grease buildup. Clean the trap strictly with water and a brush; reassemble only when clear.
Tip: Keep track of the trap orientation to avoid leaks after reassembly. - 4
Plunge the drain
Seal the drain opening and use steady, vertical strokes with a cup plunger (or flange plunger for toilets). Do several 15- to 30-second plunges and check flow between attempts. If there’s any movement, re-test with water to confirm clearance.
Tip: A tight seal and vertical motion maximize pressure transfer to the clog. - 5
Use a drain snake if needed
Feed the snake slowly into the drain while turning the handle. When you encounter resistance, back off slightly and twist to break through the obstruction. Retrieve the snake gradually and flush with water to test.
Tip: Avoid forcing the snake; forcing can damage pipes or push clog deeper. - 6
Rinse and test
Run hot water to flush out loosened debris. Observe for any remaining slow drainage or backups. If FLOW returns, reassemble any parts you removed and run water for a longer test period.
Tip: Hot water can help dissolve fats and push debris through the line. - 7
Optional cleaners and maintenance
If you choose cleaners, use enzymatic products or follow the product label exactly. Do not mix cleaners with other chemicals or bleach. Enzyme-based products work gradually and are better for regular maintenance than for quick fixes.
Tip: Keep enzymatic cleaners for maintenance rather than relying on rapid-action chemical products. - 8
Finalize and clean up
Reinstall any traps, ensure all connections are tight, and wipe down the area. Sanitize tools used during the job and dispose of debris properly. Monitor the drain over the next few days for any signs of reoccurrence.
Tip: A quick post-fix check helps confirm long-term success.
Common Questions
What is the most common cause of clogging of drainage?
Hair, soap scum, and grease buildup are frequent culprits across many homes. Identifying the primary offender helps tailor the fix and prevent recurrence. If you’re unsure, start with cleaning the trap and using mechanical methods before cleaners.
Hair and soap buildup are the usual culprits; start with the trap and mechanical methods first.
Do chemical drain cleaners work for clogs?
Chemical cleaners can be effective for minor, organic clogs but pose risks to pipes and seals. They should be used with caution and according to label directions, and they’re not a substitute for mechanical clearing in many cases.
They can help for small clogs, but be careful and follow the label.
When should I call a plumber?
Call a plumber if the clog returns after multiple attempts, if you notice sewage odors, or if water backs up across multiple fixtures. A persistent problem may indicate a larger issue in the main line or vent system.
Call a plumber if the clog keeps returning or you smell sewage.
Can plunging damage pipes?
Plunging done correctly is low risk, but using excessive force or an incompatible plunger can push the clog deeper or damage seals. Always maintain control and use the appropriate plunger for the fixture.
If done right, plunging is safe; don’t force it or misuse the tool.
How long should I wait after enzymatic cleaners?
Follow the product instructions; enzymatic cleaners typically require several hours to work, and for best results you may need to leave them in place overnight before flushing.
Follow the product timing; enzymes take time to work.
Are enzymatic cleaners septic-safe?
Most enzymatic cleaners are designed to be septic-safe, but always check the label and avoid combining with other products that could disrupt septic activity.
Most are safe for septic systems, but read the label first.
Watch Video
Key Points
- Identify the blockage early to prevent backups.
- Start with mechanical methods (plunger, then snake) before cleaners.
- Protect yourself with PPE and follow safety precautions.
- Prevent future clogs with routine maintenance and smart habits.