Steps to Unclog a Sink: A Practical DIY Guide
Learn safe, practical steps to unclog a sink at home using a plunger, snake, and natural cleaners. This DIY guide from Unclog Drain covers tools, step-by-step actions, safety tips, and prevention for 2026.

Goal: clear a clogged sink safely using common tools. Start with non-destructive methods—plunger, pliers, and a plumber’s snake—before moving to natural cleaners. Essential gear includes a bucket, towels, gloves, a wrench, and a flashlight. Follow these steps in sequence to restore drainage, reduce mess, and minimize the risk of pipe damage.
Why sinks clog and how to think about it
Sinks clog for a variety of reasons, but kitchen sinks are especially prone to grease, oil, and food debris that cling to the walls of pipes. Over time, soap scum and small particulates combine with hair or vegetable matter and form a stubborn blockage that slows water flow. Understanding where clogs form helps you choose the right approach—whether at the trap, along the drain, or further down the line. According to Unclog Drain analysis, many kitchen-sink issues originate from fats and solids that accumulate in the trap or elbow and then press against the drain’s path. In 2026, practical, mechanical methods often beat chemical solutions for safety and long-term results. The goal is to restore a clear path with minimal disruption and without harming your plumbing system.
Tools and techniques that actually work
A mix of mechanical methods and safe, natural cleaners typically resolves most clogs. Start with a plunger to generate suction and a plumber’s snake (drain auger) to dislodge materials beyond the trap. For milder blockages, hot water plus a controlled dose of baking soda can help loosen grease and soap scum. Avoid rushing to chemical drain cleaners, which can damage seals and pipes over time. The Unclog Drain team emphasizes starting with non-chemical methods to protect fittings and reduce health risks. Always have a bucket, towels, gloves, and a flashlight handy to keep the workspace clean and visible. In 2026, many households find success by combining mechanical methods with natural flushing.
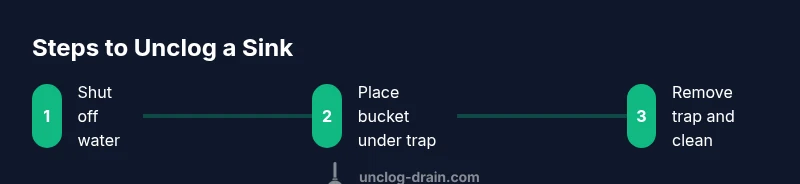
Step-by-step approach to unclog a sink
A logical sequence reduces mess and increases your odds of success. Begin with safety and preparation, then address the trap, attempt a mechanical clearing, flush with water, and finally test drainage. This approach minimizes wasted effort and preserves pipe integrity. Remember, the real value lies in following a methodical progression rather than jumping straight to aggressive cleaners. The Unclog Drain methodology stresses starting gentle and escalating only as needed.
How to use a plunger and a drain snake
A sink plunger works best when the water level just covers the plunger cup, creating a strong seal. Place the plunger over the drain and push/pull with steady force to dislodge the clog. If a plunger alone doesn’t do the job, insert a drain snake and rotate the handle to break up the blockage and pull it out in small sections. Keep the snake within the drain path to avoid scratching pipes. After clearing, flush with hot water to wash debris away and restore flow. The Unclog Drain guidance favors this stepwise approach over harsh chemicals.
Safety, warnings, and when to stop
If you encounter sewage odor, one or more drains in multiple fixtures, or repeated clogs, stop and reassess. Do not mix chemical cleaners with hot water or with mechanical tools, and ventilate the area. Always wear gloves and eye protection, and disconnect electrical appliances near the sink before starting any work. If you are unsure about pipe integrity or local codes, consult a licensed plumber. Unclog Drain’s team notes that persistent or recurrent clogs may indicate deeper issues that require professional assessment in 2026.
Preventative maintenance to reduce future clogs
Preventing clogs is easier than treating them. Use a mesh strainer to catch solids, avoid pouring grease down the drain, and flush with hot water regularly. Periodically inspect the P-trap for buildup and clean it as needed. A quick quarterly check-up can save time and money. The Unclog Drain advice in 2026 emphasizes proactive maintenance, routine cleanouts, and mindful disposal practices as the best defense against recurring blockages.
Tools & Materials
- Plunger (cup-type)(Sink-specific with a flange for best seal)
- Plumber's snake / drain auger(3-6 ft for typical sinks; extend as needed)
- Bucket(To catch water from the trap)
- Old towels or rags(Protect surfaces and mop spills)
- Adjustable wrench(Useful if the trap nuts are tight)
- Gloves(Rubber or latex, for grip and protection)
- Flashlight(Helps see inside the drain and trap)
- Dish soap(Optional lubricant for trap removal)
- Heat source (hot water)(For flushing after clearing)
Steps
Estimated time: 30-45 minutes
- 1
Shut off water and prepare workspace
Turn off under-sink water valves to prevent spills. Clear the area and lay towels to catch any drips. Have your bucket handy for catching water as you work.
Tip: Keep your flash light aimed at the trap area so you can see threads and debris clearly. - 2
Place a bucket under the P-trap
Position a bucket directly beneath the P-trap to catch standing water and debris as you remove the trap.
Tip: This minimizes splashing and makes cleanup easier. - 3
Loosen and remove the P-trap
Use the appropriate wrench or hand to loosen the slip nuts. Gently pull the trap away from the drain and inspect for clogs or cracks.
Tip: If the nuts are stubborn, apply a little dish soap as a lubricant and avoid forcing them. - 4
Clean the trap and inspect the debris
Disassemble the trap, clear out hair, grease, and food particles, and rinse the pieces with hot water before reassembly.
Tip: Look for cracks or wear; replace the trap if damaged. - 5
Insert the drain snake and clear the line
Feed the snake into the drain and rotate the handle to break up the clog. Retrieve any material in stages and push debris back toward the trap.
Tip: Work slowly to avoid bending the snake or pushing debris deeper. - 6
Reassemble the trap and tighten
Reconnect the P-trap, tighten slip nuts securely, and ensure there are no cross-threaded joints.
Tip: Hand-tighten, then give a final quarter-turn with the wrench—do not overtighten. - 7
Flush and test drainage
Run hot water through the sink for several minutes to clear residual debris. Check for leaks and test the drain by running water and stopping to observe drainage.
Tip: If water still pools, repeat the snake process or move to a longer snake length.
Common Questions
What is the quickest way to unclog a sink?
Start with a plunger and, if needed, a plumber’s snake to address the clog. Avoid jumping to chemicals. If the flow returns after clearing, flush with hot water and inspect the trap.
The fastest path is to start with a plunger, then use a drain snake if needed, and finish with hot water rinse.
Is it safe to use baking soda and vinegar to unclog a sink?
Baking soda and vinegar can help mild blockages and are safer than harsh chemicals, but they may not clear stubborn clogs. Use them as a first step before mechanical methods.
Baking soda and vinegar can help mild clogs as a gentler first step before mechanical methods.
When should I remove the P-trap?
Remove the P-trap if the clog is visible there or if water drains slowly despite snaking. Clean the trap and test drainage before reassembling.
If the clog sits in the trap or if flow is slow after snaking, remove and clean the P-trap.
Can I use chemical drain cleaners for a sink?
Chemical drain cleaners can damage pipes, seals, and the trap; they should be a last resort and used with extreme caution if at all. Prioritize mechanical methods first.
Chemical cleaners can harm pipes, so use mechanical methods first and avoid frequent use.
What safety steps should I follow when unclogging a sink?
Wear gloves and eye protection, ensure the area is well-ventilated, and avoid mixing cleaners. If you smell sewer gas or see leaks, stop and call a professional.
Wear gloves, protect your eyes, work in a ventilated area, and don’t mix cleaners.
What should I do if the clog returns after I try?
If clogs recur, it may indicate a deeper issue in the main line or vent system. Reassess and consider professional evaluation to prevent recurring damage.
If clogs keep coming back, you may have a deeper problem; consider calling a plumber.
Key Points
- Identify where the clog sits (trap vs. drain) and start with mechanical methods.
- Avoid chemical cleaners when possible to protect pipes and fittings.
- Reassemble carefully and test drainage to confirm success.
- Prevent clogs with regular maintenance and proper disposal.
- If the clog persists, consider professional help to avoid damage.