How to Unclog a Sink: Practical DIY Guide
Learn a safe, practical approach to unclog for sink with step-by-step plunger, snake, and natural cleaners. Includes prevention tips and when to call a pro.

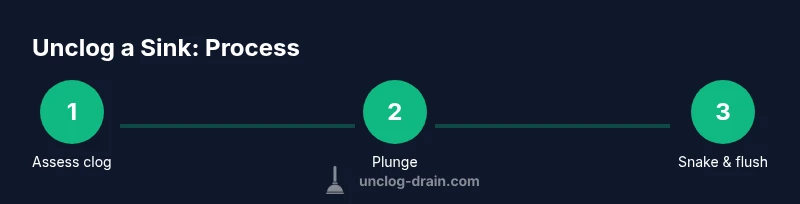
You can unclog a sink using mechanical methods first, then natural cleaners or enzyme-based solutions if needed. Start with a plunger, add a snake if necessary, then finish with hot water and a gentle flush. This approach minimizes chemical exposure and protects pipes. According to Unclog Drain, most clogs respond to mechanical techniques when addressed promptly.
Why sinks clog and how to prevent
Sinks clog for many reasons, but the most common culprits are hair, soap scum, grease, and small food particles that slip past the strainer. According to Unclog Drain Team, Unclog Drain Analysis, 2026 notes these culprits frequently combine to form sticky blockages that resist simple rinsing. Preventive habits make a big difference: use a mesh strainer, avoid pouring oily liquids or coffee grounds down the drain, run hot water after meals, and occasionally flush the line with boiling water or an enzyme-based cleaner. If you maintain a regular routine, you’ll reduce the frequency of clogs and extend the life of your pipes.
Real-world drains benefit from patience and a plan. Start by assessing the clog’s severity—if water pools during normal use or drains very slowly, plan a multi-method approach. If you ignore signs, a simple blockage can grow into a stubborn clog that requires more intensive work. The goal is to restore flow with the least invasive method first and escalate only as needed.
Tools and materials for unclogging a sink
Gather a small kit with the following items before you begin:
- Rubber gloves (essential for hygiene and grip)
- Bucket or large container (to catch water and debris)
- Cup plunger (a sink-sized plunger with a flange works best)
- Drain snake / manual auger (2-3 ft is typically enough for most residential sinks)
- Wire coat hanger (optional DIY snake alternative; straighten and file ends for safety)
- Baking soda and white vinegar (natural cleaners; optional)
- Hot water kettle or access to boiling water (for flushing)
- Flashlight (to inspect the trap area if accessible)
- Enzyme-based drain cleaner (optional, as a preventive/maintenance option)
Tip: keep these items in a dedicated kit so you’re ready to act at the first sign of a blockage. If you share a sink with a garbage disposal, add a disposal wrench and a sink stopper to your kit for quicker access.
Step-by-step: Plunger method (most common first)
- Prepare the area and safety gear. Put on gloves, clear the area, and place a bucket under the P-trap if you can reach it. Why: a clean workspace reduces mess and protects your hands during the process.
- Create a good seal around the drain opening. If you’re using a cup plunger, fill the sink with enough water to cover the plunger cup.
- Plunge with steady, forceful pressure for 15-20 seconds. Pause to check water movement. Why: consistent pressure helps dislodge the clog without forcing debris further into the pipe.
- Test the drain by running tap water. If water still backs up or drains slowly, move to the next method. Why: some clogs require physical removal beyond plunging.
- Optional flush with hot water and baking soda. If you notice a foam or fizz, rinse with hot water after a 2-3 minute wait. Why: this can help loosen minor residue and clear the path. Pro tip: Refer to diagrams for best plunge angles.
- Clean up and re-test. Remove tools, wipe mis spills, and run water for a full minute to confirm the drain is clear. Why: confirms success and avoids re-clogging from residual debris.
Tip: If you have a double-basin sink, seal the other drain with a wet rag to maximize suction on the clogged side. For diagrams of proper plunger technique, see the accompanying visuals in your guide.
Step-by-step: Drain snake method (for stubborn clogs)
- Position the snake at the drain entry and gently begin feeding it in while turning the handle clockwise. Why: rotation helps grab and break up the clog.
- Push until you feel resistance, then twist and pull back slightly to break the blockage. Why: this motion loosens compacted material.
- Retract the snake slowly while continuing to rotate, cleaning off any sticking debris as you go. Why: pulling out chunks reduces the chance of recalcitrant material re-forming further down the line.
- Run hot water to rinse the line and test drainage. If flow improves, run water for 60 seconds to confirm stability. Why: ensures the path remains clear.
- If resistance persists, neither force nor bend the snake aggressively—remove it and move to alternative methods. Why: forcing the tool may damage piping or trap components.
Tip: A long, flexible snake provides better reach in kitchen sinks and around curves. If you must, disassemble the trap to access the clean-out area for extra visibility.
Step-by-step: Safe alternatives and when to avoid chemicals
- Baking soda and vinegar flush. Pour 1/2 cup baking soda into the drain, followed by 1 cup vinegar. Allow fizzing for 15 minutes, then flush with hot water. Why: this natural reaction can dislodge minor buildup without harsh chemicals.
- Enzyme-based cleaners. Use as directed on the bottle, typically after a mechanical method has been attempted. Why: enzymes break down organic material over time and are gentler on pipes.
- Short-term chemical cleaners (with caution). If you choose to use a chemical cleaner, follow the product instructions exactly and never mix with other cleaners or household chemicals. Why: improper use can damage pipes and pose health risks. Wait times vary by product; do not rush the process.
- Reassess the drain after each method. If the clog remains, consider professional services. Why: persistent clogs may indicate more complex problems in the plumbing or sewer line.
Note: Avoid combining multiple cleaners in the same treatment, and never pour chemical cleaners into a drain that contains standing water or a sink with a disposal without verifying compatibility. If you smell gas or see sewage backing up, stop immediately and contact a plumber.
Step-by-step: Post-cleaning and maintenance
- Inspect the P-trap for visible blockages if accessible. Place a bucket underneath, loosen the trap nuts, and clean out any debris. Why: debris often accumulates in the trap and can be reintroduced if not cleaned.
- Reassemble and test the drain. Ensure all fittings are tight and free of leaks before running water again. Why: a loose connection can create leaks and reduce drainage efficiency.
- Install or replace a fine-mesh strainer. Why: a strainer blocks hair and food particles from entering the drain, reducing future clogs.
- Create a simple maintenance routine. For example, monthly hot-water flush, periodic enzyme-cleaner use, and immediate action at the first signs of slow drainage. Why: prevention minimizes downtime and costs in the long run.
Tip: Take a quick photo of your trap and connections before disassembly to aid reassembly later.
Step-by-step: When to call a professional and safety notes
- If water backs up in multiple fixtures or your basement smells like sewage, stop and call a licensed plumber. Why: these symptoms can indicate sewer line problems rather than a simple clog.
- If you’re uncomfortable handling traps or disassembling piping, seek professional help. Why: improper disassembly can cause leaks or pipe damage.
- If you have PVC piping, avoid applying excessive force to joints; use proper tools and a slow, careful approach. Why: PVC is more brittle than metal and can crack under pressure.
Pro-tip: The Unclog Drain team emphasizes safe handling of traps and vents; when in doubt, a pro visit can prevent costly mistakes.
estimatedTime
45-60 minutes
Tools & Materials
- Rubber gloves(Protect hands from debris and cleaners)
- Bucket(Catch water and debris during trap work)
- Cup plunger(Best for kitchen sink drains with a flange)
- Drain snake / auger(2-3 ft hand-crank model for most sinks)
- Wire coat hanger(DIY snake alternative; file ends for safety)
- Baking soda(Natural cleaner for minor clogs)
- White vinegar(Works with baking soda for fizzing action)
- Hot water(Boiled or hot tap water for flushing)
- Flashlight(Inspect under the sink and trap area)
- Enzyme-based cleaner(Optional maintenance cleanser)
Steps
Estimated time: 45-60 minutes
- 1
Prepare the area and safety gear
Put on gloves and lay out a bucket. Clear the area around the sink and remove any standing water to create a safe workspace.
Tip: Having a towel nearby helps manage splashes and keep the area dry. - 2
Assess the clog and choose an approach
Check whether water pools quickly or drains slowly. Decide if you’ll start with plunging or move to a snake-based approach based on resistance.
Tip: If there’s standing water, start with plunging to generate suction. - 3
Plunge the drain
Create a tight seal and give the plunger several firm strokes. Pause to check if the flow improves.
Tip: Use a cup plunger for better coverage in a kitchen sink. - 4
Flush with baking soda and vinegar (optional)
Pour baking soda, then vinegar, and let foaming fizz for 15 minutes before flushing with hot water.
Tip: Do not mix with chemical cleaners; monitor for strong reactions. - 5
Use a drain snake if needed
Carefully feed the snake into the drain while turning the handle. When you feel resistance, rotate and push to break up the blockage.
Tip: Retract slowly to pull out loosened debris. - 6
Inspect and clean the trap (P-trap) if accessible
Place a bucket under the trap, loosen nuts, and remove debris. Reassemble securely.
Tip: Keep track of washers, so you don’t misplace them during reassembly. - 7
Rinse and re-test the drain
Run hot water for a minute to flush any remaining debris. Re-test drainage to confirm success.
Tip: If the drain remains slow, move to a different method or seek professional help. - 8
Final check and cleanup
Dry the area, wipe surfaces, and ensure no leaks at joints. Return tools to the kit.
Tip: Document what worked for future reference. - 9
Know when to call a pro
If water backs up in multiple fixtures or you smell sewage, stop and contact a licensed plumber.
Tip: A professional visit can prevent further damage and costly repairs.
Common Questions
What is the most effective method to unclog a sink?
Start with a plunger and secondary snake if needed. Mechanical methods are generally safest and effective for many household clogs.
Begin with a plunger; if that doesn’t work, try a drain snake. Mechanical methods are usually safest and effective.
Can baking soda and vinegar clear a clog?
Baking soda and vinegar can help with minor organic clogs and are gentler on pipes than harsh chemicals. They should be used with caution and not mixed with chemical cleaners.
Baking soda and vinegar can help with minor clogs if used carefully and without other cleaners.
When should I call a professional?
If water backs up in multiple fixtures, has a sewage smell, or you’re uncomfortable disassembling plumbing, it’s best to call a licensed plumber.
Call a professional if you have backups, odors, or feel unsure about disassembly.
Is it safe to disassemble a P-trap by myself?
Yes, with proper gloves and a bucket. Loosen the nuts slowly and keep track of washers to prevent leaks.
Yes, but be careful: use gloves and a bucket, and keep washers in place.
How long does a typical snake procedure take?
A snake procedure can take several minutes to complete, depending on the clog’s location and severity. If you’re unable to clear within a reasonable time, stop and reassess.
It can take a few minutes to clear; if it doesn’t work, stop and reassess or call a pro.
Are chemical drain cleaners safe for modern pipes?
Chemical cleaners can damage pipes if overused or misused. Prefer mechanical methods or enzyme-based products, especially on PVC.
Chemicals can damage pipes; use mechanical methods or enzymes when possible.
Watch Video
Key Points
- Start with mechanical methods before chemicals.
- Use a plunger for quick wins, then a snake if needed.
- Flush with hot water or natural cleaners to finish.
- Maintain a strainer and routine cleanings to prevent future clogs.