Manually Unclog Garbage Disposal: A Safe Step-by-Step Guide
Learn how to manually unclog garbage disposal safely with a practical, tool-ready strategy from Unclog Drain. This guide covers causes, safety, and a complete process to restore grinding and prevent future clogs.

You’ll learn how to safely manually unclog garbage disposal using common tools, without damaging the unit. Start by cutting power, then inspect for jams, remove debris with tongs, rotate the impeller with a hex key, and flush with cold water. This hands-on method helps you restore grinding and prevent future clogs.
What it means to manually unclog garbage disposal
To manually unclog garbage disposal, you must safely cut power, inspect for jams, and remove debris. Manual clearing involves accessing the grinding chamber with proper tools while minimizing risk to hands and skin. This approach emphasizes control, avoids chemical cleaners, and relies on the right sequence—identify the jam, clear the obstruction, rotate the impeller, and test the unit. According to Unclog Drain, safety and deliberate action reduce the risk of damage and recurring clogs. The technique works best when you are prepared with a flashlight, gloves, and the correct tools. Understanding where jams form—near the splash guard, in the grinding chamber, or in the downstream piping—helps you plan each step with confidence.
Common causes and how to inspect
Clogs typically form from fibrous vegetables, coffee grounds, bones, or starches that swell with water. Inspect for buildup around the splash guard, the grinding ring, or loose seals. Look for foreign objects like utensils dropped into the disposal. Use a flashlight to peer into the grinding chamber and identify the jam location. By understanding where debris collects, you can tailor your approach and minimize future jams. If you don’t see obvious obstruction, the jam may be deeper, potentially requiring careful disassembly or professional evaluation. This stage sets the tone for a controlled, safe clearing.
Safety and preparation before you begin
Safety is the backbone of this task. Always switch off the circuit breaker or unplug the unit. Gather gloves, safety glasses, a flashlight, tongs, and a bucket. Avoid loose clothing and keep the area dry to prevent slips or contact with electricity. Running cold water while testing helps you observe whether the jam clears and pushes debris through. These precautions reduce the risk of electric shock, leaks, and injury, and align with best-practice standards from the Unclog Drain team.
A practical, safe approach: non-destructive first, then disassembly
Begin with non-destructive steps: remove visible debris from the splash guard, then attempt to rotate the impeller with a hex key. If the jam persists, you may need to loosen or remove the disposal housing to inspect the grinding chamber. In most homes, non-destructive methods clear the jam effectively, avoiding full disassembly. If disassembly is necessary, follow the manufacturer’s instructions and secure the unit before handling internal components. This balanced approach prioritizes safety and preserves disposal integrity while delivering results.
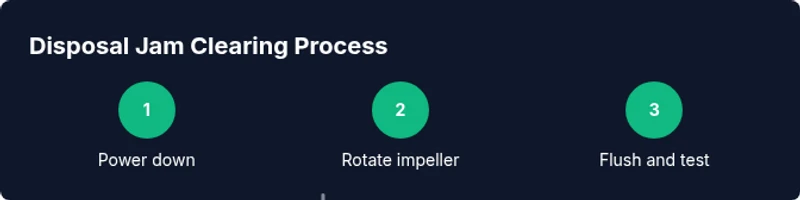
Step-by-step overview (high-level)
The overall flow is: secure power → inspect for jams → clear using tools → rotate the impeller → flush with cold water → reset and test → inspect for leaks. This high-level outline keeps you oriented as you work through the hands-on steps, while keeping you focused on safety and control. Detailed steps are provided in the dedicated STEP-BY-STEP section for clarity.
Post-cleanup checks and maintenance to prevent future clogs
After clearing a jam, run cold water for 15-30 seconds with the disposal on to clear remnants and check for leaks around the mounting assembly and hoses. Clean the splash guard and keep food waste in check. Consider periodic citrus peels to keep the grind smooth and odors under control. To prevent future clogs, avoid dumping large amounts of fibrous vegetables or starch-heavy foods at once and always run water while the unit operates. Regular maintenance reduces clog frequency and extends the life of the disposal.
Troubleshooting stubborn jams and when to call a pro
If the jam persists after careful clearance, or you hear grinding but the disposal won’t run, it may indicate a deeper issue such as a damaged impeller or motor. Stop and reassess, and consider a professional evaluation if the unit is older or leaks appear. Choosing professional help early can prevent damage to plumbing and electrical components.
Quick-reference checklist for quick fixes
- Cut power to the disposal before any work
- Remove visible debris with tongs, not fingers
- Rotate the impeller with a hex key to free jams
- Flush with cold water and test operation
- Inspect for leaks after testing
- When in doubt, consult a professional
Tools & Materials
- Gloves, nitrile(Durable and cut-resistant)
- Safety glasses(Eye protection)
- Flashlight(Illumination for inside chamber)
- 1/4-inch hex key (Allen wrench)(To rotate impeller)
- Long-handled tongs or needle-nose pliers(Grip and remove debris)
- Bucket or towel(Contain water and debris)
- Dish soap (optional)(Lubrication and cleaning)
- Screwdriver (flathead or Phillips) (optional)(Remove splash guard if needed)
Steps
Estimated time: 60-90 minutes
- 1
Power down and secure area
Turn off the circuit breaker or unplug the disposal. Move containers and items away; prepare towels and a bucket. This prevents accidental starts during the jam-clearing process.
Tip: Use a non-contact tester to confirm no live voltage at the disposal. - 2
Inspect for a visible jam
Shine a flashlight into the chamber and identify obvious blockages near the splash guard or grinding ring. Do not put your hands in the disposal; use tongs to remove debris.
Tip: Look for objects like utensils or metal pieces that could impede the impeller. - 3
Rotate the impeller with a hex key
Insert a 1/4-inch hex key into the bottom access hole and gently rotate the impeller back and forth to loosen the jam. Stop if you feel resistance to avoid motor damage.
Tip: Turn slowly in small increments to feel when the jam frees. - 4
Remove the obstruction with pliers
Grasp the debris with long-handled pliers and pull it clear. Keep it away from the sink and body. Wipe the chamber to remove loose particles.
Tip: After removing, re-check the area for any remaining fragments. - 5
Flush and test
Run cold water into the sink and briefly power the disposal to flush small particles through. If it runs smoothly, proceed to the reset phase. If it stalls, repeat the jam-clearing steps.
Tip: Do not use hot water during this stage; it can contribute to future clogs. - 6
Reset the motor and verify
If the motor tripped, press the reset button on the bottom and run a longer water-affected test. Listen for grinding; inspect for leaks around the mounting and hoses.
Tip: If no improvement, stop and evaluate other issues. - 7
Final checks and cleanup
Clear the workspace, dry surfaces, and reassemble any components removed. Restore power and run a final test with cold water to confirm full operation.
Tip: Monitor for leaks over the next 24 hours.
Common Questions
Can I use chemical drain cleaners to fix a disposal jam?
No. Chemical cleaners can damage the disposal and pipes, and may worsen clogs. Mechanical clearing with proper tools is safer and more effective.
No. Chemical cleaners can damage your disposal and pipes; use mechanical clearing with the right tools instead.
Is it safe to reach into a garbage disposal?
Only if the power is off and you are using tongs or pliers. Never put your hand inside a running disposal.
Only with power off and tools; never reach in while it's running.
What if the jam won’t come free with a hex key?
If rotating the impeller doesn’t release the jam after several attempts, stop and inspect for deeper obstructions or damaged components. Consider professional help.
If it won’t loosen after several tries, stop and get a pro to inspect.
How long should I test the disposal after clearing a jam?
Run cold water and the disposal for 15-20 seconds to confirm smooth operation and check for leaks.
Test it with a short run of cold water to confirm it’s grinding smoothly.
What are signs I need a professional?
Persistent leaks, burning smell, unusual noises after clearing, or inability to reset may require a licensed plumber.
Call a professional if leaks persist or you hear odd noises after clearing, or you can't reset.
Can I disassemble the disposal myself?
Disassembly is possible but can void warranties and create safety risks. Use caution and consult the manual or a pro if unsure.
Disassembly is possible but risky; consult the manual or a pro if unsure.
Watch Video
Key Points
- Power off before inspection
- Use tools, not hands, to clear jams
- Rotate impeller with hex key
- Flush with cold water and test
- Prevent future clogs with smart habits