How to Unclog Yart: A Practical DIY Guide
Learn a practical, step-by-step method to unclog yart safely using common tools. Unclog Drain walks homeowners through diagnosis, tools, steps, and prevention for durable results in 2026.

To unclog yart, identify the blockage, assemble basic tools, and follow a safe, step-by-step process that prioritizes mechanical methods over harsh chemicals. Start with plunging, then use a drain auger if needed, flush with hot water, and re-test. If the clog persists, avoid risky chemical cleaners and consider professional help.
What unclog yart means in practical terms
Unclog yart is more than a single trick; it’s a practical approach to restoring normal flow in a drain that has backed up or slowed down. For homeowners, the goal is to eliminate the obstruction with safe methods that protect pipes, seals, and septic systems. When you hear the phrase unclog yart, imagine returning your plumbing to its original performance, without resorting to guesswork or harsh chemical cleaners. According to Unclog Drain, the most reliable results come from a structured plan that uses mechanical actions first, then checks the outcome before trying more aggressive measures. The term yart here stands in for any problematic drain line—bathroom sink, shower, or kitchen—where partial clogging reduces draining speed. With patience and the right approach, you can regain normal drainage and reduce the likelihood of future backups.|
Common causes of clogs in yart lines
Many clogs in yart lines arise from everyday use and neglect. Hair accumulate in bathroom drains, soap scum builds up along the pipe walls, and mineral scale forms where water sits in traps. In kitchen drains, grease and food particles combine to form dense masses that resist simple flushing. A secondary culprit is a misaligned or old P-trap that traps debris, causing recurring backups. Debris can also travel from the main sewer line during heavy rain or tree root intrusion. Understanding these typical causes helps you choose the right method to unclog yart without overhauling your plumbing. When a clog stubbornly clings to the pipe, you’ll need a combination of mechanical methods—plunging and snaking—followed by a thorough flush. Unclog Drain notes that early intervention is key to keeping this drain path clear and reducing the chance of water damage, foul odors, or mold growth.
Safety first: before you start any intervention
Safety should come before any attempt to unclog yart. Always wear gloves and eye protection, and ensure the area is well-lit and dry to prevent slips. If your plumbing involves a septic system or older pipes, avoid aggressive chemical cleaners that can corrode pipes or upset septic balance. Turn off water supply to the affected line when necessary to minimize splash-back. Keep kids and pets away from the workspace. If you must use a chemical drain cleaner, read the label carefully, choose a product suitable for your pipe material, and never mix cleaners with other chemicals. For more sensitive systems, it’s wise to test a small amount in a discreet area first. Following these precautions reduces risk and keeps your unclog yart task on a safe track.
Tooling up: what you need to unclog yart
Gathering the right tools before you begin makes the process smoother and safer. Essential items include a cup-style plunger or flange plunger, a Drain snake or auger, a bucket, towels, and protective gloves. A flashlight helps you inspect slow-flow areas or the P-trap to spot the obstruction. Optional but helpful items are a bottle of hot water, white vinegar for gentle rinsing, and baking soda to maintain fresh drains after cleaning. Keep a trash bag handy for disposable gloves and used rags. Having the right tools reduces frustration and improves your odds of successfully unclogging yart without professional help.
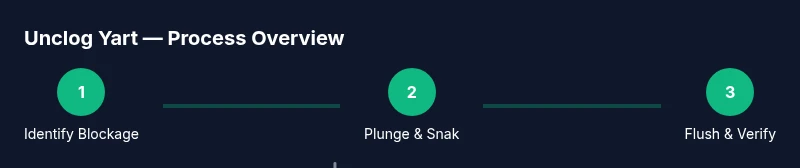
Step-by-step overview: the general approach to unclog yart
Most home unclog yart projects follow a three-phase approach: locate and diagnose, apply a mechanical remedy, then verify results with a thorough flush. Start with plunging to create suction and dislodge surface debris. If that fails, switch to a drain auger to reach deeper blockages. Finally, flush with hot water to clear remaining material and wipe away residue from the pipe walls. This sequence minimizes the need for harsh chemicals and preserves pipe integrity. Always test the drain after each method to determine if you have achieved a clear flow.
When to avoid home fixes and call a pro
Some clogs are best handled by a professional, especially if you notice repeated backups after attempting standard remedies. If you hear gurgling, notice sewage odors, or see water backing up into another drain, the issue could involve venting, stack problems, or a major blockage. If you have old or corroded pipes, if the clog is in a hard-to-reach location, or if you lack the right tools, it’s safer to contact a licensed plumber. For septic systems, aggressive cleaners can disrupt beneficial bacteria, so professional inspection is wise. The goal is to unclog yart safely without causing accidental damage or venting issues.
Preventive maintenance to keep yart clear
Prevention is easier than repeated clogs. Establish a routine to keep drains flowing: use a mesh screen to catch hair and food particles, avoid pouring grease down the sink, and flush drains with hot water weekly if your household uses hard water. Periodic maintenance, like checking P-traps for standing water and leaks, helps identify problems before they escalate. For bathroom drains, instruct household members to remove hair from the drain cover after showers. A proactive approach reduces the frequency of unclog yart projects and preserves your plumbing system’s lifespan.
Troubleshooting tips and common mistakes
One common mistake is over-reliance on chemical cleaners, which can damage pipes and fail to address the root cause. Another pitfall is using excessive force with a plunger, which can push the blockage deeper or crack the pipe. If plunging doesn’t help, stop and reassess before using an auger. Always maintain the correct orientation of the auger bit to avoid kinking the snake. If you hear running water or the drain remains slow after a flush, there may be a venting issue or a larger blockage beyond the trap. These insights help you fine-tune your approach when you unclog yart.
What to do next and long-term care for yart drains
After a successful unclog yart, run hot water for several minutes to rinse away residual debris. Reassemble any parts you may have disassembled and inspect accessible pipes for signs of leaks. Consider a quarterly drain check that includes removing the trap cover to inspect for buildup. If you notice recurring clogs, you might need to adjust your cleaning routine, screen inserts, and disposal habits. The long-term care plan includes mindful disposal, routine maintenance, and prompt attention to early warning signs.
Tools & Materials
- Plunger (cup or flange type)(Flange plunger is better for sinks/toilets; ensure rubber is pliable and intact.)
- Drain snake / auger(Cable-type auger with a bent tip works well for deeper clogs.)
- Bucket(To catch water and debris during steps.)
- Protective gloves(Rubber or latex; keep hands clean and dry.)
- Flashlight(Inspect the P-trap and pipe interior.)
- Towels or rags(Clean up spills and keep area dry.)
- White vinegar and baking soda(For gentle post-clean rinse and odor control.)
- Old towels or rags(For safe cleanup of any splashback.)
Steps
Estimated time: 45-90 minutes
- 1
Prepare the area and safety checks
Clear the area around the drain and place towels to catch spills. Put on gloves and safety glasses. If you are dealing with a toilet, ensure the bowl is dry before starting. Preparing properly minimizes mess and protects you from splashes during unclog yart attempts.
Tip: Cover the drain quickly with a cloth if water starts to back up to prevent splashes. - 2
Seal and set up the plunger
If you’re working on a sink or tub, seal overflow openings with a damp cloth to improve suction. Position your plungers so the rubber cup fully covers the drain. The goal is to create a tight seal and generate controlled pressure.
Tip: Avoid excessive force; start with gentle, repeated plunges to test the blockage’s looseness. - 3
Plunge with steady pressure
Pump the plunger up and down in a controlled rhythm for 15-30 seconds, then pull away sharply to break the suction. If water begins to drain, continue until flow returns to normal. This is often enough to clear light clogs in yart.
Tip: If no movement after several attempts, switch to an auger. - 4
Insert the drain auger and rotate
Insert the snake into the drain and tighten the handle to feed the cable. Rotate slowly while pushing forward to break up the clog. Retract and reinsert as needed to reach and dislodge the obstruction.
Tip: Be patient; deep blockages require gradual, consistent advancement. - 5
Flush with hot water and test
Boil water and slowly pour a steady stream down the drain to wash debris away. Let the water run for a minute or two to confirm that the drain is clear. If the flow remains sluggish, repeat the auger step or consider a second approach.
Tip: Do not pour boiling water into PVC pipes if you’re unsure of equipment ratings. - 6
Cleanup and verify
Remove tools, wipe up spills, and recheck the drain by running normal usage water. If the drain remains slow or back up recurs, document the issue and consider professional inspection.
Tip: Keep the area dry for the rest of the day to prevent slips.
Common Questions
What is the most effective method to unclog yart for most homeowners?
For most home clogs, start with a plunger to create suction, then use a drain snake if necessary. Hot water flush helps move debris. If the clog persists, avoid chemical cleaners and call a pro.
Start with plunging; if that doesn’t work, try a drain snake and a hot water flush. If it’s still blocked, get professional help.
Can I use chemical drain cleaners for unclog yart?
Chemical cleaners can damage pipes or septic systems and may not reach deep blockages. Use them only as a last resort and follow all safety guidelines.
Chemicals can hurt pipes and septic systems—use them only if you’ve exhausted mechanical options and read the label.
How long should I wait after plunging before testing again?
Wait 1-2 minutes between plunging attempts to allow the obstruction to settle and the pipe to relax, then test the drain.
Give it a minute or two between attempts to see if the clog loosens.
What if the clog recurs after I fix it?
If clogs keep returning, you likely have a deeper blockage, venting issue, or root intrusion. Schedule a professional assessment to prevent recurring damage.
If it keeps coming back, you probably have a deeper problem needing a pro.
Is it safe to unclog a toilet myself?
Yes, with the right plunger and careful technique. If the clog is stubborn or you see backflow, stop and call a plumber.
You can, but don’t push past resistance; backflow means you should call a pro.
How can I prevent clogs in the future?
Use screens, avoid pouring grease down drains, run hot water regularly, and clean traps to reduce buildup. Regular maintenance saves time and money.
Screen your drains, avoid grease, and run hot water to keep clogs away.
Watch Video
Key Points
- Unclog yart requires a structured, mechanical-first approach.
- Prepare, seal, and test before closing up.
- Use a drain snake if plunging fails; patience pays off.
- Avoid harsh chemicals on old or unknown pipe materials.
- Prevent future clogs with routine maintenance.